Items Management
You can create product category and specific product in the backoffice. The product data can be synchronized and accessed on the POS machine.
Adding Categories
Open the Taptouch backend using the Chrome browser, On the left navigation bar, go to > Items > Items > Categories page, Click on New in the top right corner to add a new product category.
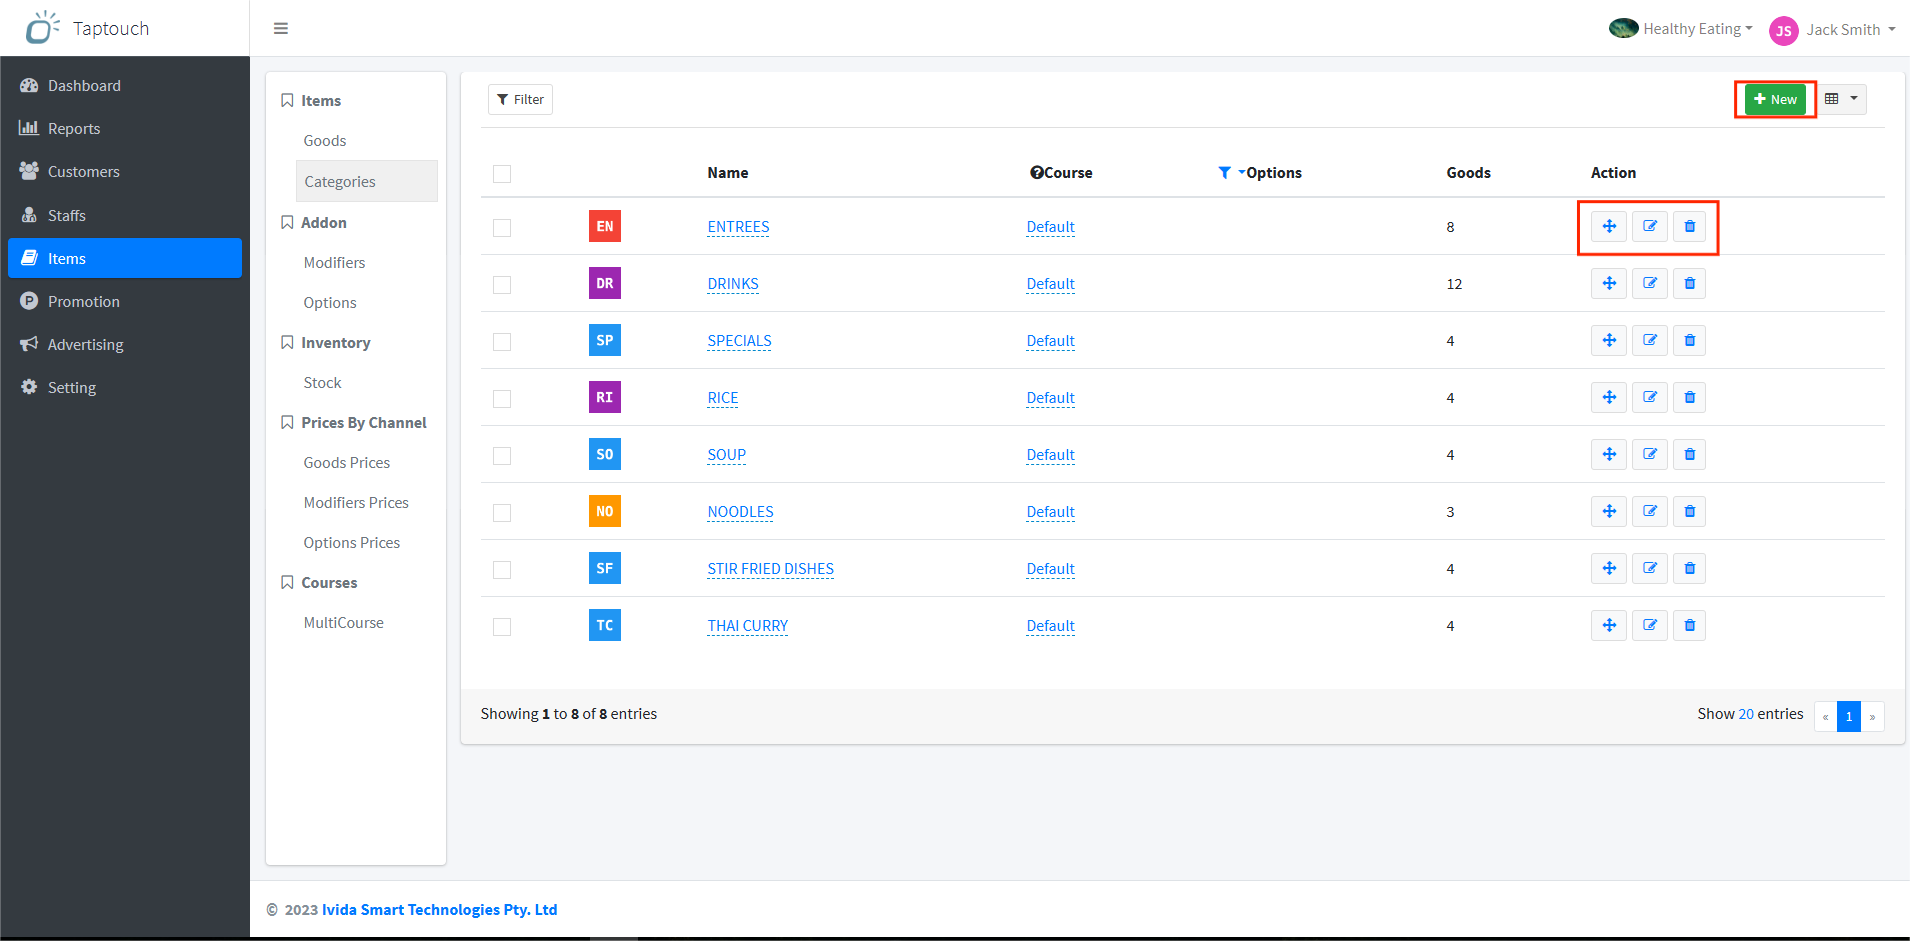
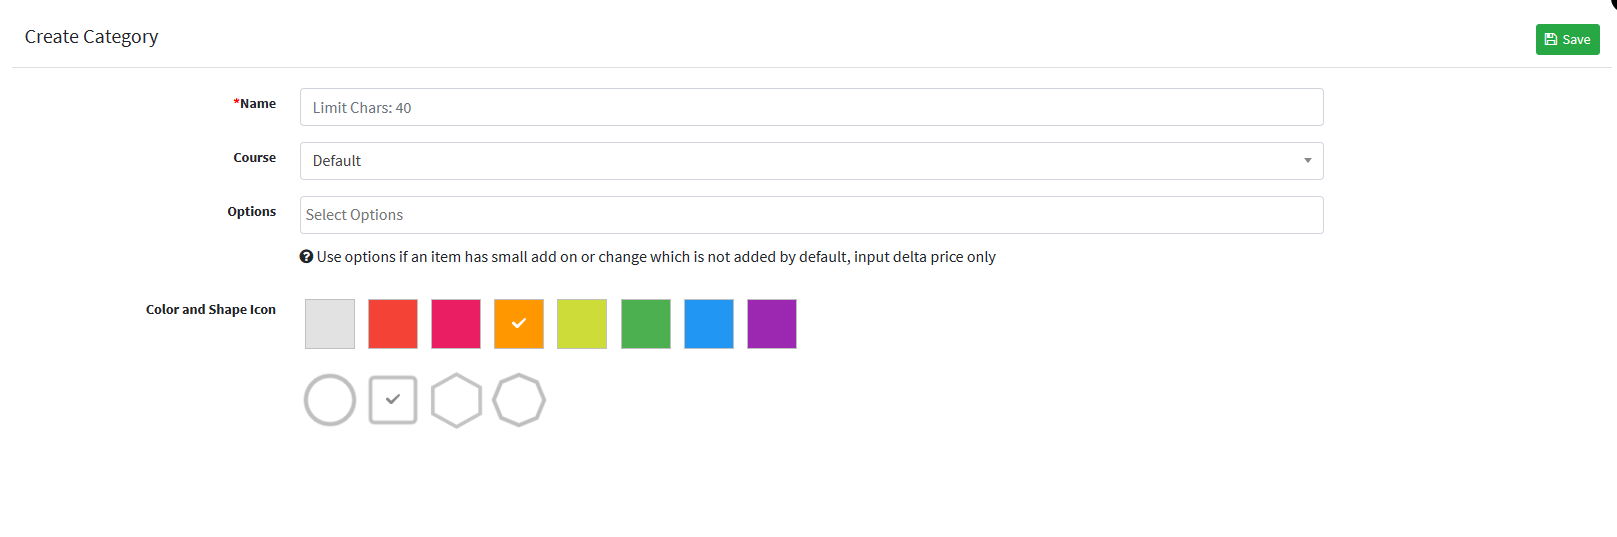
On the Create Category page, fill in the name of the product category and edit the shape and colour of the icon. Then, click Save to save the changes.
Adding Goods
There are two ways to add goods: manual creation or importing from an external template. If you have a large number of goods to add, it is recommended to import them in bulk with an Excel template.
Manually Create a Good
Click on New in the top right corner to create a single good.
On the Create Good page, complete the information for the product. The fields Name, Price, and Category are required. It is recommended to provide a Description to help online store users understand the product. After filling in the details, click Save to save the information.
Tips
When creating a good, you can also add variants and modifiers to provide more choices when ordering the good.
Variant
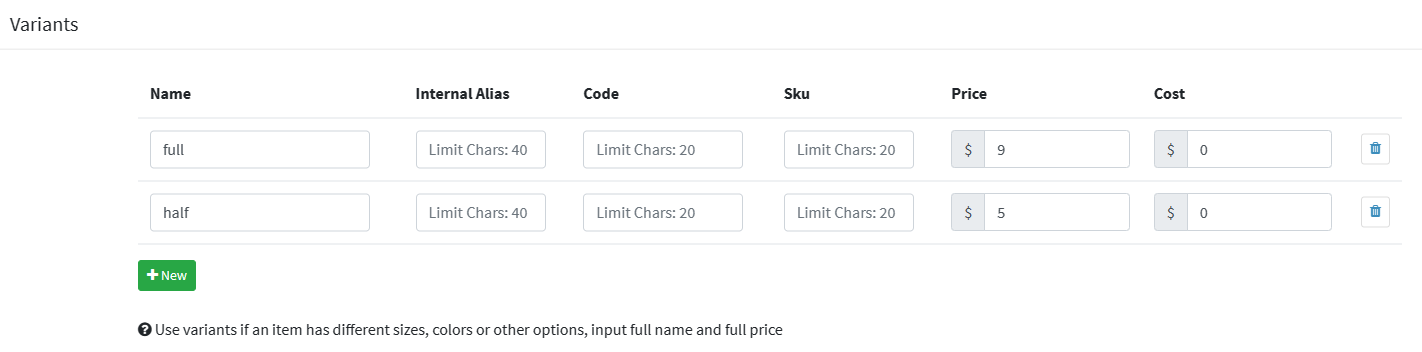
Variants are commonly used for goods that have multiple options for size, colour, etc. For example, a dish available in both a full portion and a half portion, where "Full Portion" and "Half Portion" are the variants.
The steps to add variants to a product when creating it are as follows:
- On the Create Good page, scroll down until you find the Variants section.
- Click on New to add multiple variants to the good, and set the name and price for each variant.
Note
After creating Variants, the original product price will become invalid, and the price of each Variant will be considered.
Modifier
If you need to customize the product or provide additional options, you can add Modifiers to the product. Modifiers are mainly used for making changes to the product, such as adding or removing ingredients or specifying taste preferences for dishes.
Next, let me guide you on how to configure modifiers in the Taptouch system backoffice and add modifiers to the goods.
On the left navigation bar, go to > Items > Addon > Modifiers page. Click on New on the right side to create a new modifier.

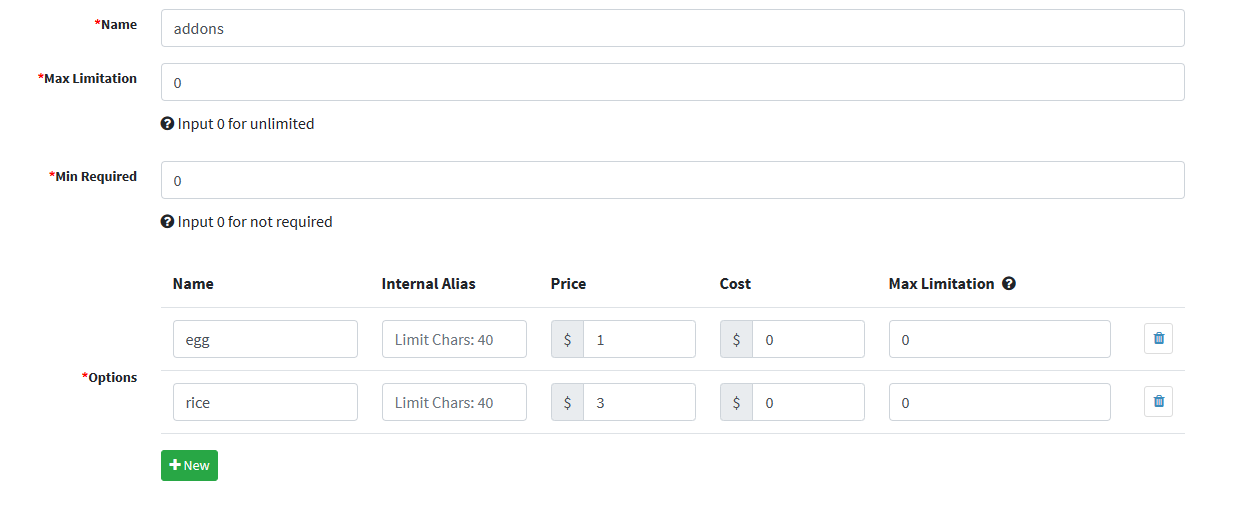
Enter the Create Modifier page and complete the information for the modifier using the following steps:
- In the Name field, enter the name of the modifier.
- Find the Max Limitation and set the maximum number of modifier options a customer can choose when ordering the goods. If customers can choose any number of modifier options, enter 0.
- Find the Min Required and set the minimum number of modifier options a customer must choose when ordering the goods. If customers are not required to choose any modifier options, enter 0.
- Find the Options section and click on the New button to add multiple modifier options to the modifier.
- Click Save to save the modifier.
After configuring the modifier, you can add it to a good when creating the good. Go to the Create Good page. Scroll down until you find the Modifiers section. In the dropdown menu, select the modifiers you want to add to the product.
Tips
A product can have multiple Modifiers, and they will be displayed according to the order in the Modifier list. You can drag and adjust the order of Modifiers in the list.

Batch Import Multiple Goods
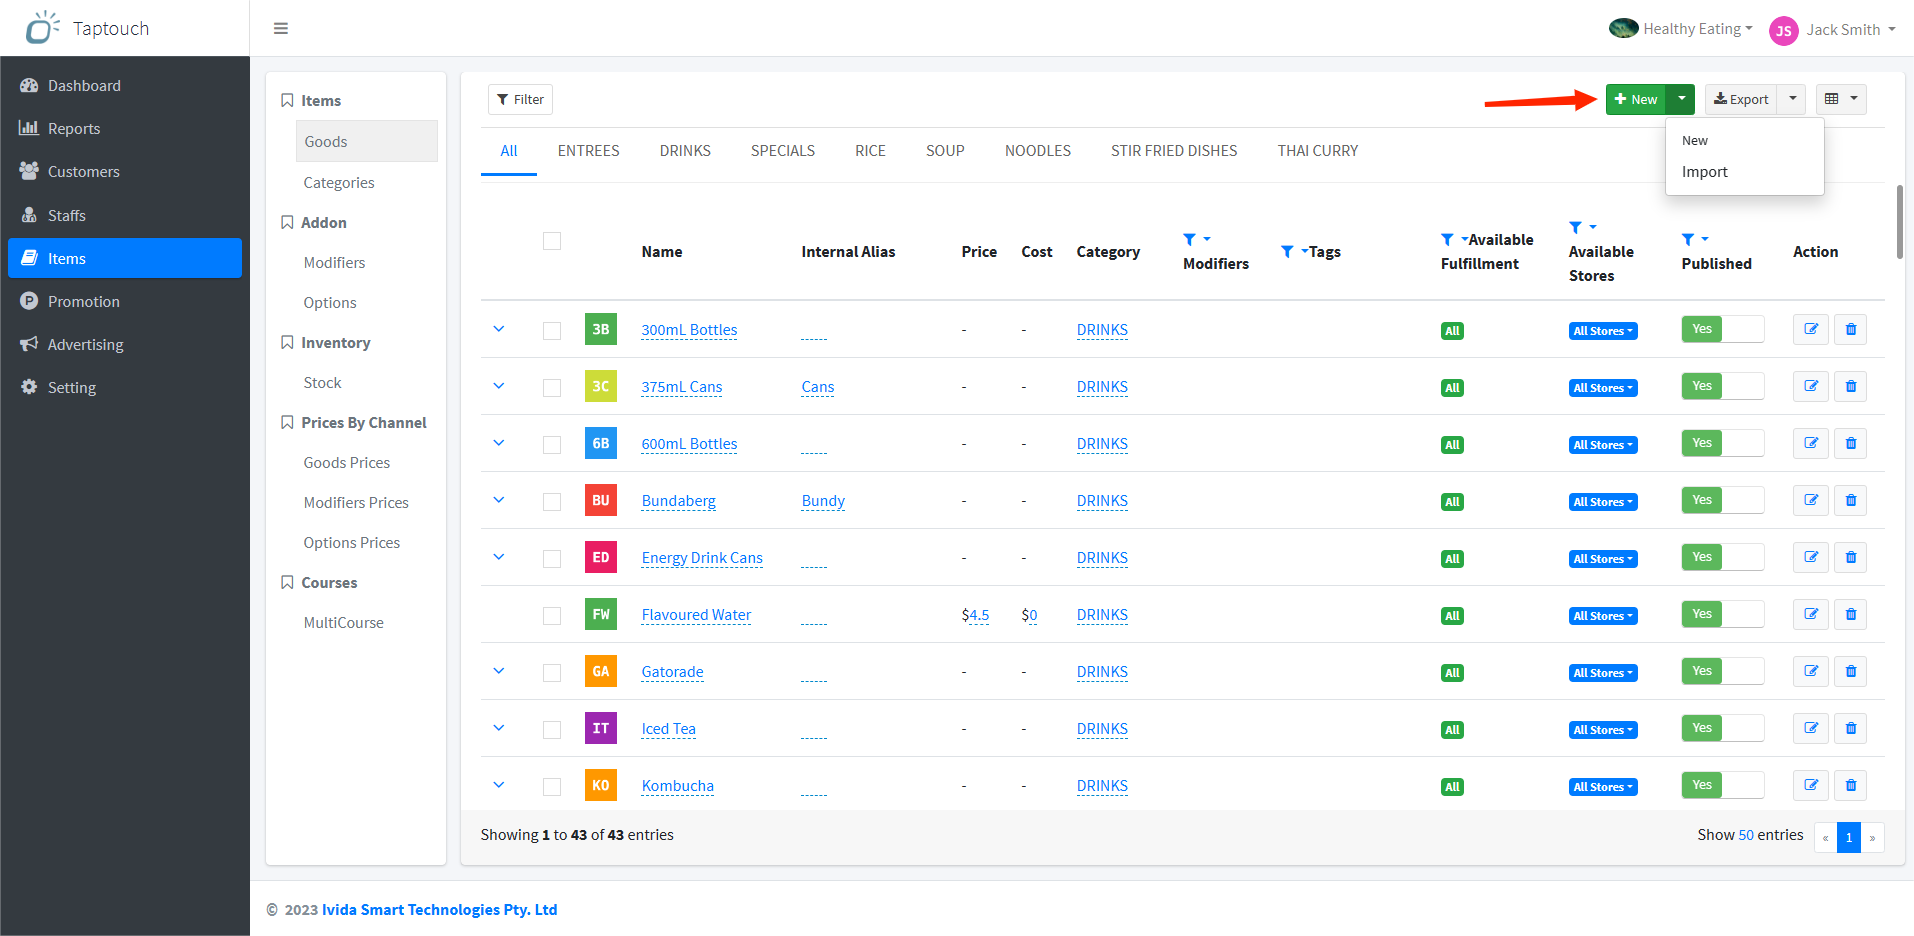
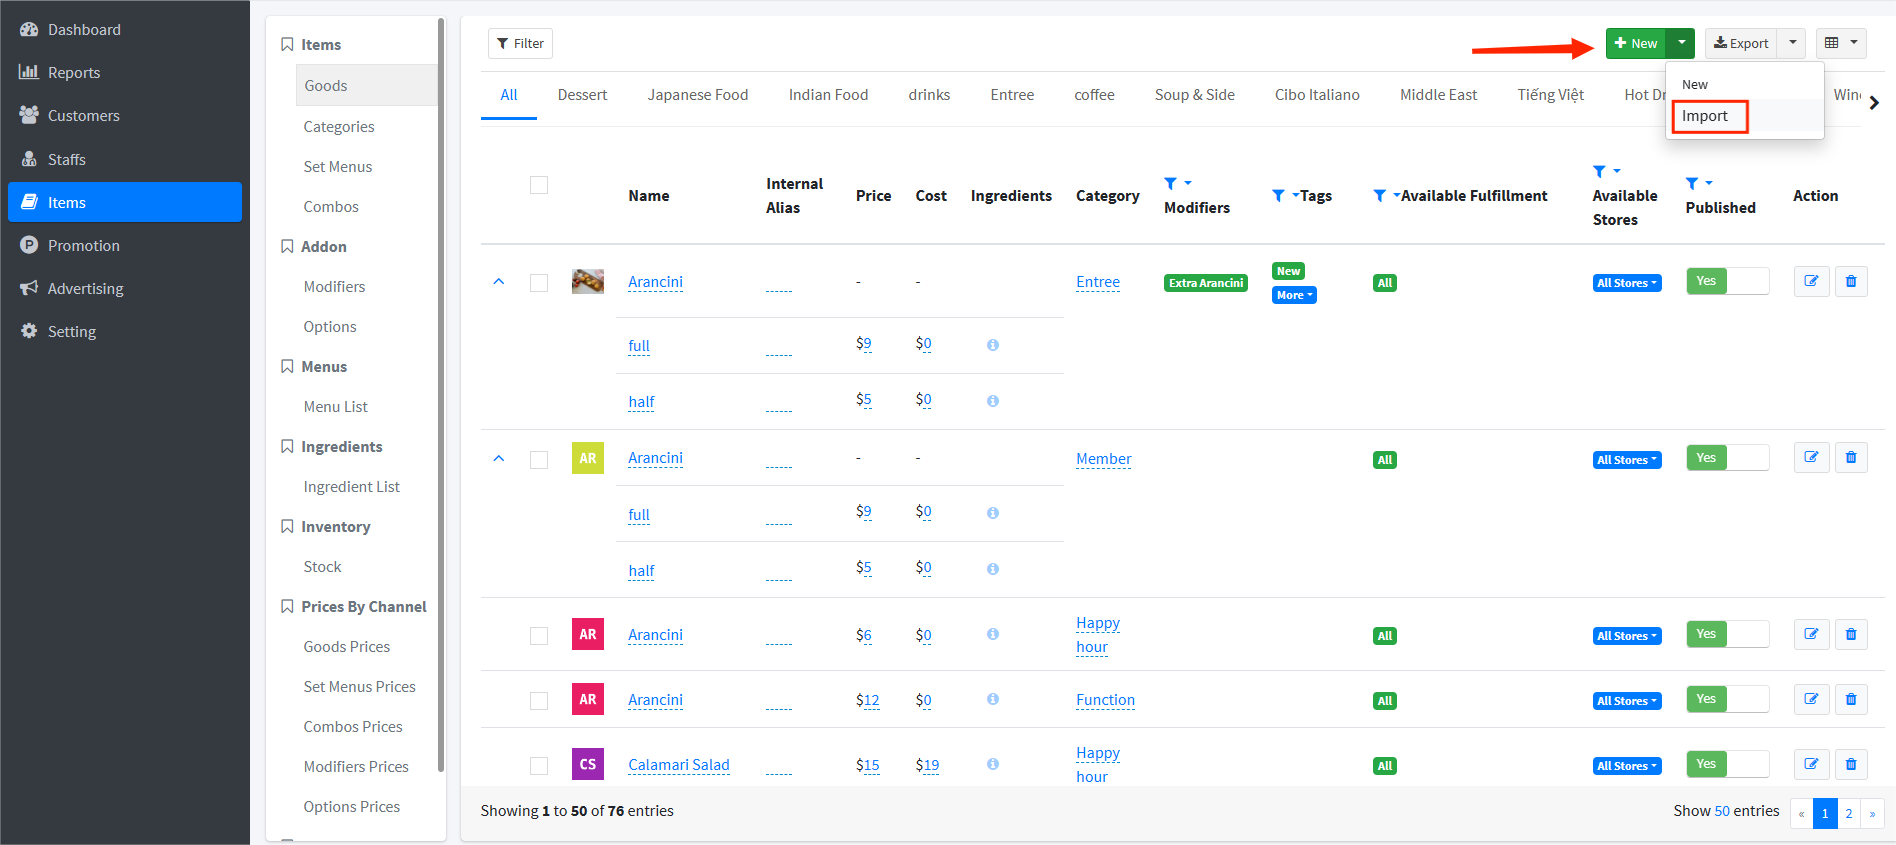
On the left navigation bar, go to > Items > Items > Goods page. Click on the New button in the top right corner, and in the dropdown menu, click on Import.
On the Import From File page, import the goods information file.
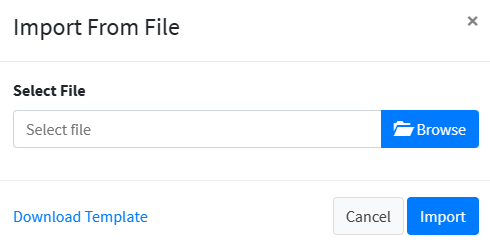
Click on Download Template to download the template Excel file. Fill in the product information following the format requirements specified in the template file. The fields Name, Price, and Category are required. It is recommended to provide a Description to help online store users understand the product.
- Variant import is supported. Variants are commonly used for goods that have multiple options for size, colour, etc. For example, a dish available in both a full portion and a half portion, where "Full Portion" and "Half Portion" are the variants.
- Batch uploading of product image icons is not supported. You can manually add image icon to the products by going to the >Items > Items > Goods product details page.


Click on Browse to select your goods information file, and then click on Import to complete the goods import.
Configuring Printing Groups
After adding items, you need to place them into Printing Groups to facilitate customer ordering and print item information.
Tips
Once Printing Groups are configured in the backend, you'll need to synchronize them on the POS machine and set up the printing content for the printer. Please refer to: Hardware Connection
Adding to an Existing Printing Group
Navigate to the > Setting > Printing page.
Select the desired Printing Group and click on the pencil icon on the right side.
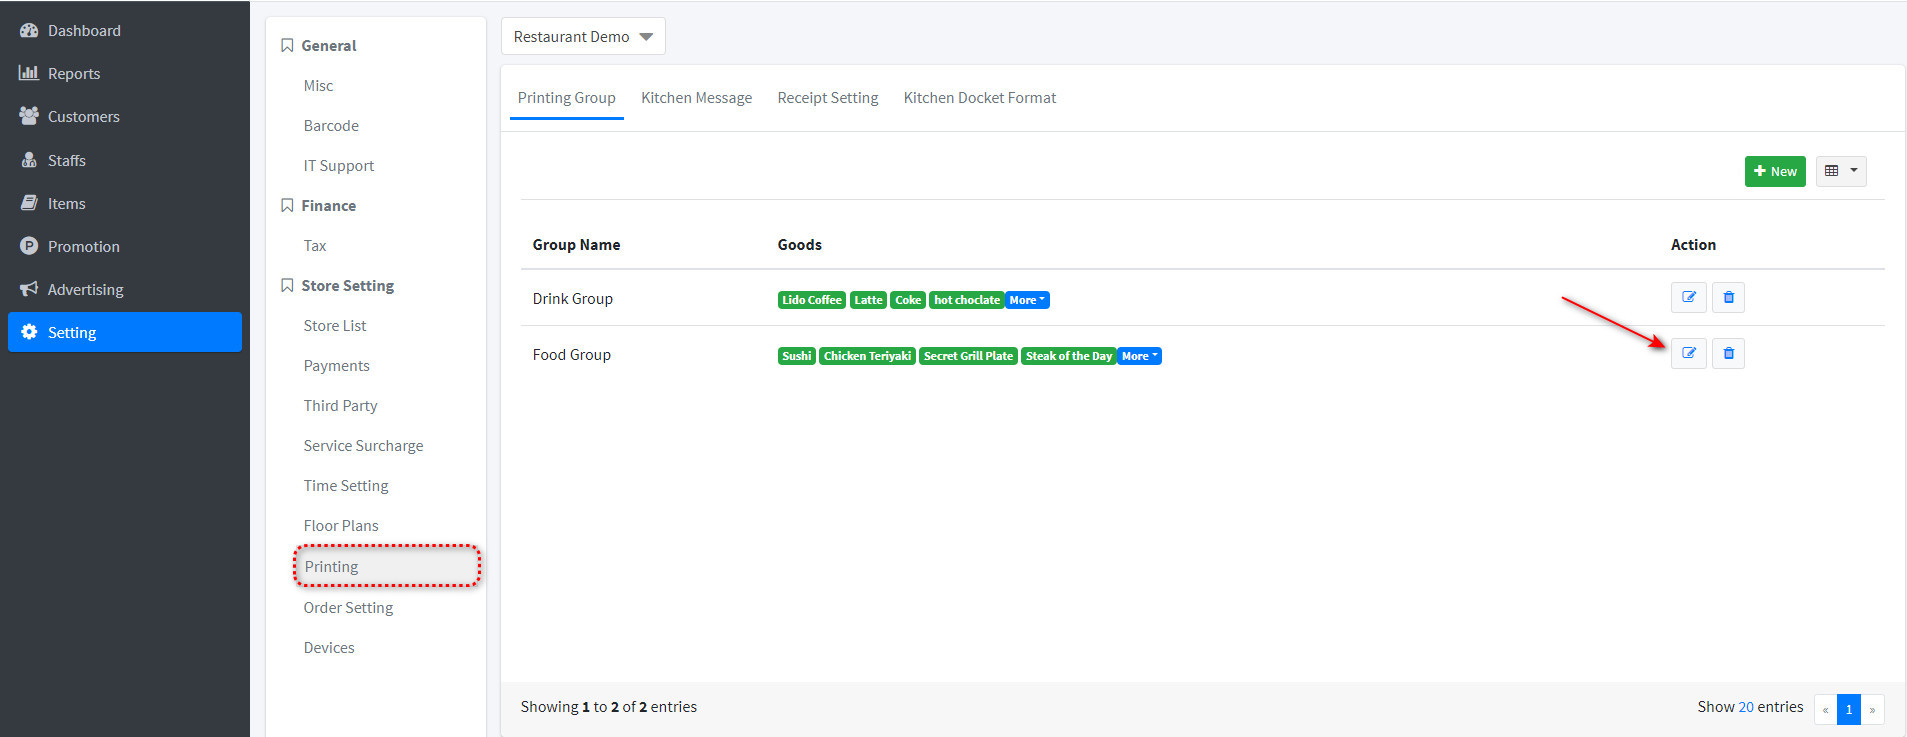
In the pop-up page, check the newly added items.
Click Save.
Adding to a New Printing Group
Navigate to the > Setting > Printing page.
Click New to create a new Printing Group.
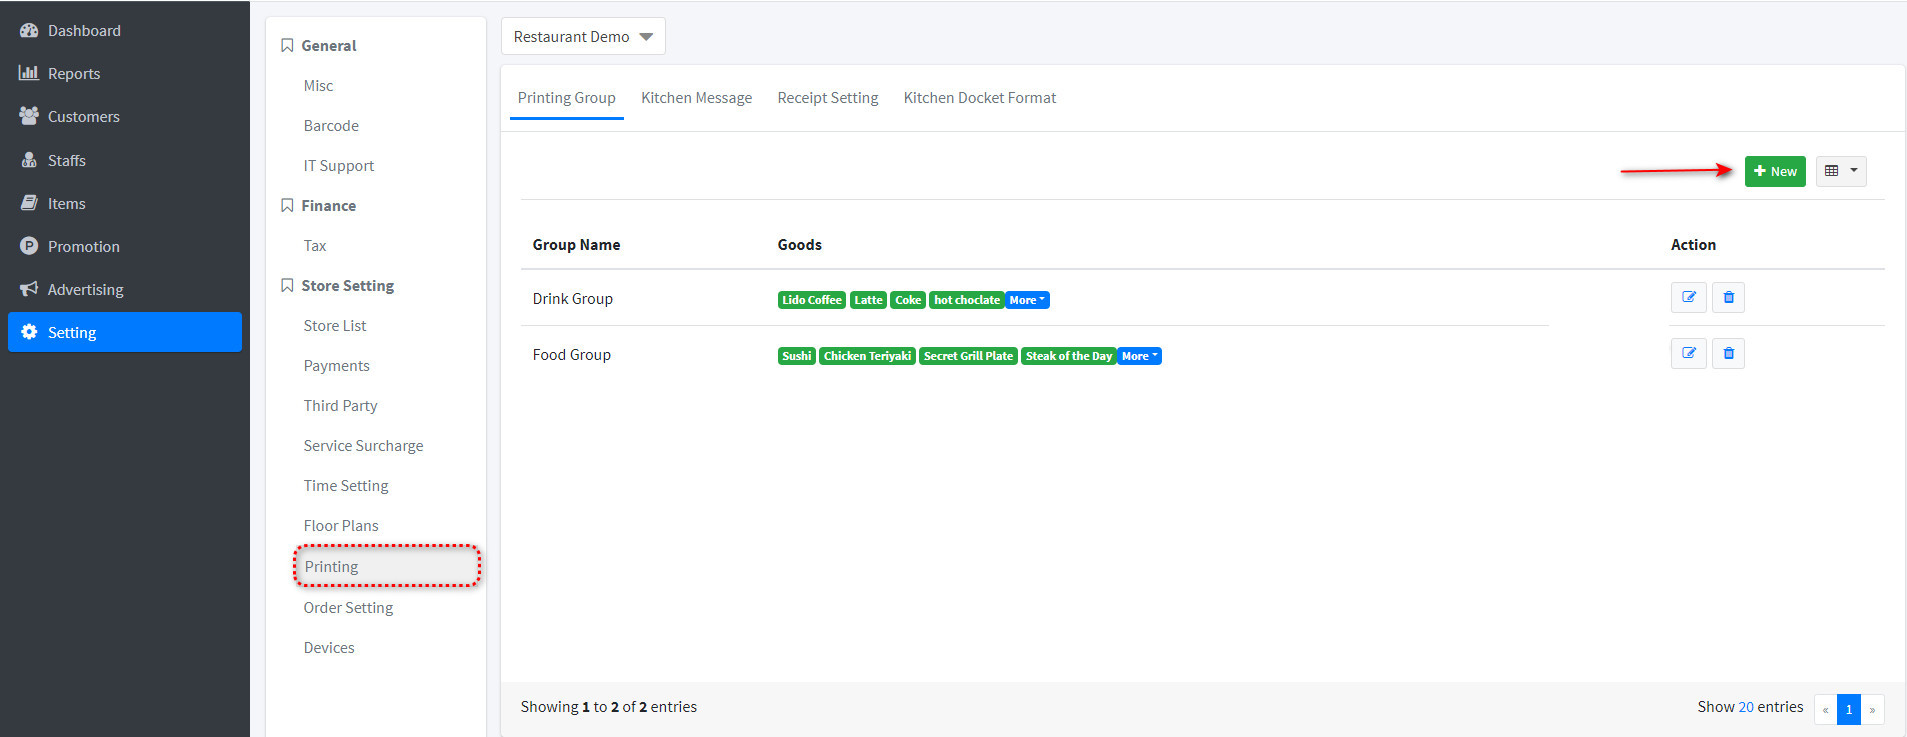
In the pop-up page, set the Printing Group name and check the newly added items.
Click Save.
Setting up Taxes
You can set up taxes for your products by following these steps:
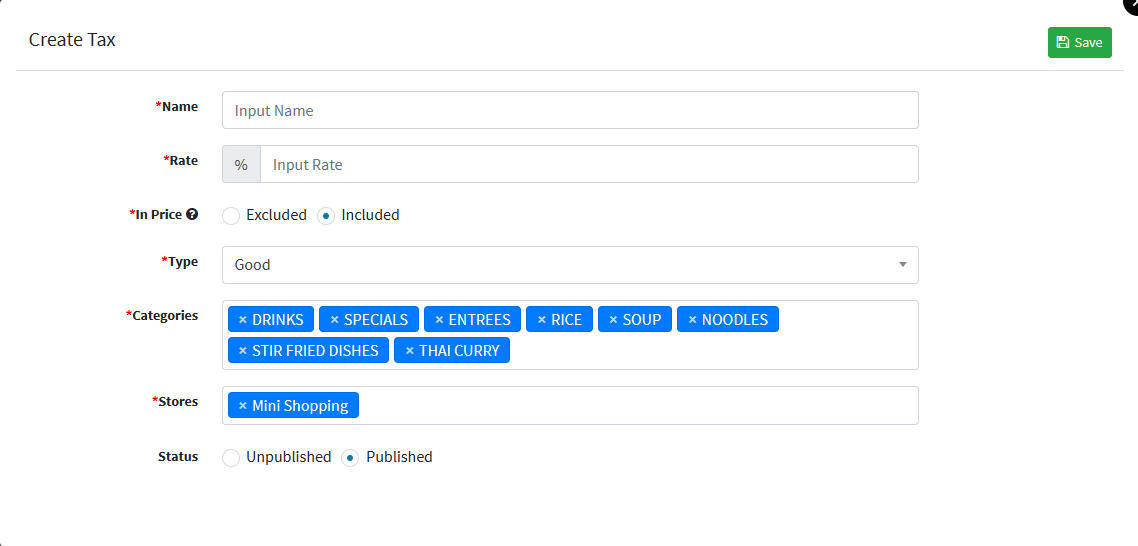
On the left navigation bar, go to > Setting > Finance > Tax page, Click on New to add a tax for your store.
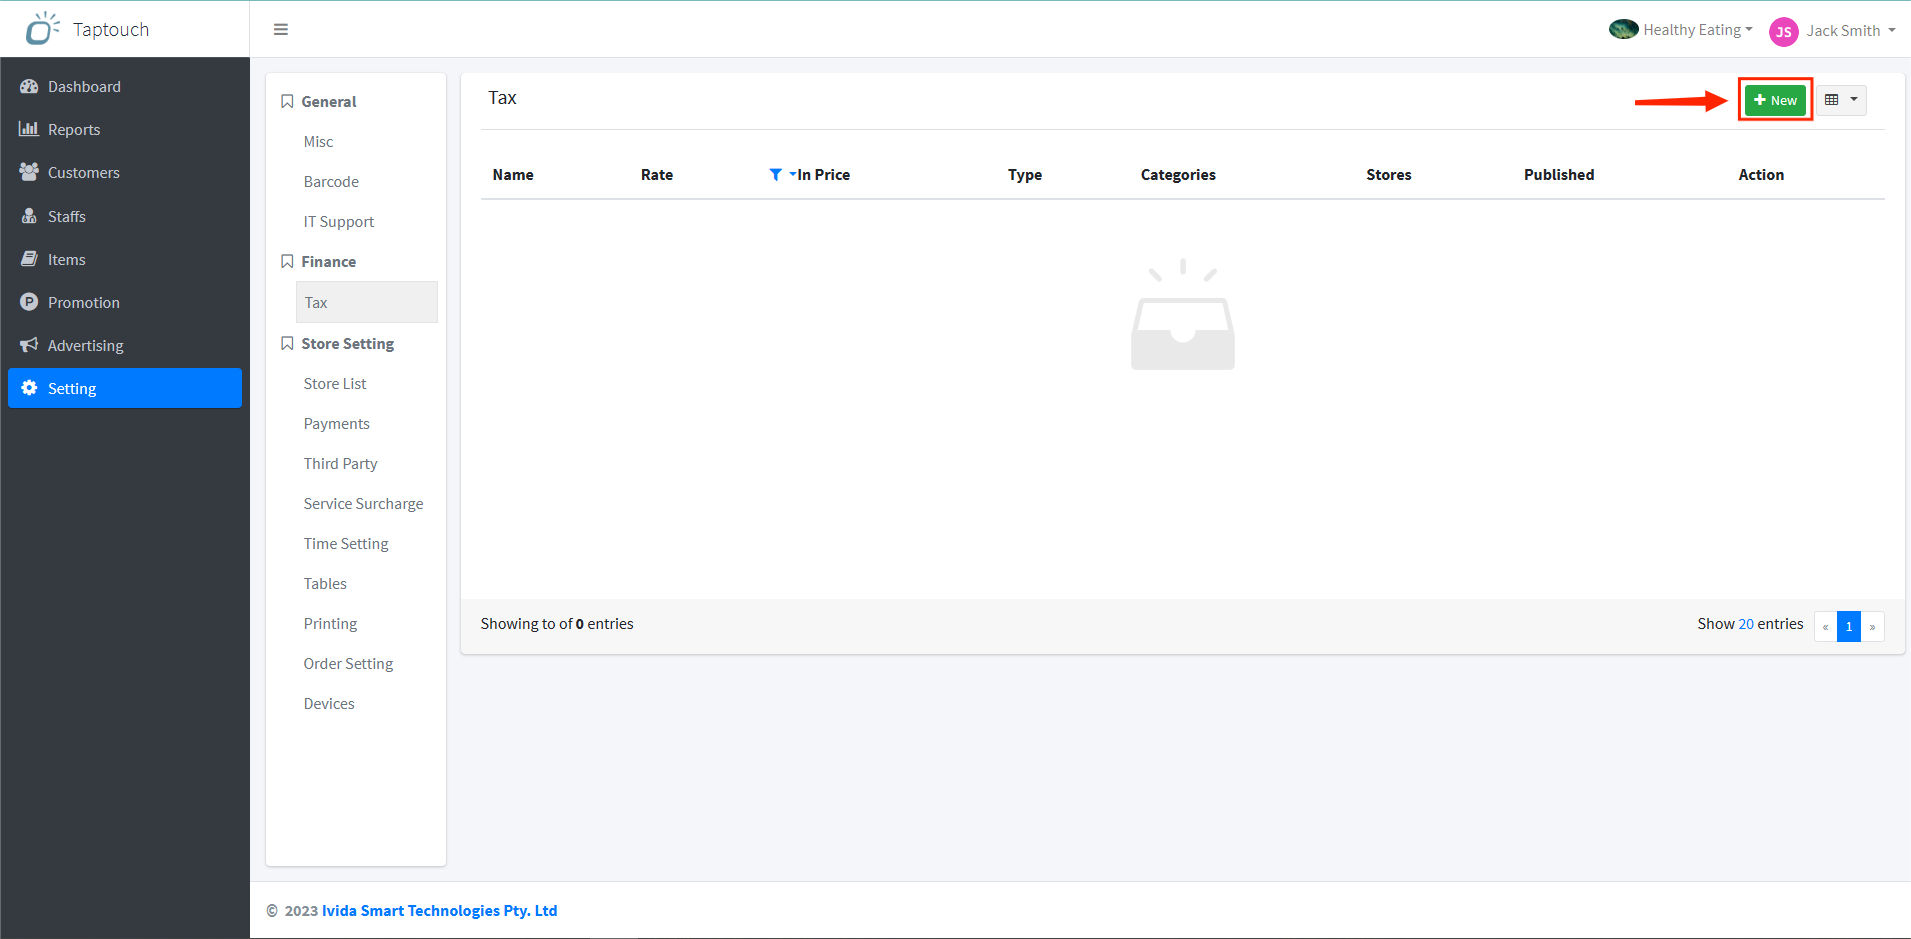
In the pop-up Create Tax page, fill in the tax name, tax rate percentage, select whether the tax is inclusive or exclusive of the price, tax type, associated product categories, and select the store(s) where the tax applies. Then, click on Save to save the tax settings.
Tips
If you choose to include taxes in the price, the tax calculation formula is as follows: Tax = ( List Price * Tax Rate ) / ( 1 + Tax Rate ). If you choose to exclude taxes from the price, the tax calculation formula is as follows: Tax = List Price * Tax Rate.