Hardware Connection
Connecting Cash Drawer to POS Machine
Before connecting the cash drawer, please refer to the interface image of the POS machine and check if the interface type of the cash drawer matches.

Connect the interface cable of the cash drawer to the corresponding interface port on the POS machine.
Connect the power supply for the POS machine, and ensure that the cash drawer is connected.
Connecting Printer to POS Machine
The Taptouch POS system supports connecting printers through USB, Bluetooth, and network interfaces. If you have only one printer, it is usually connected via USB.
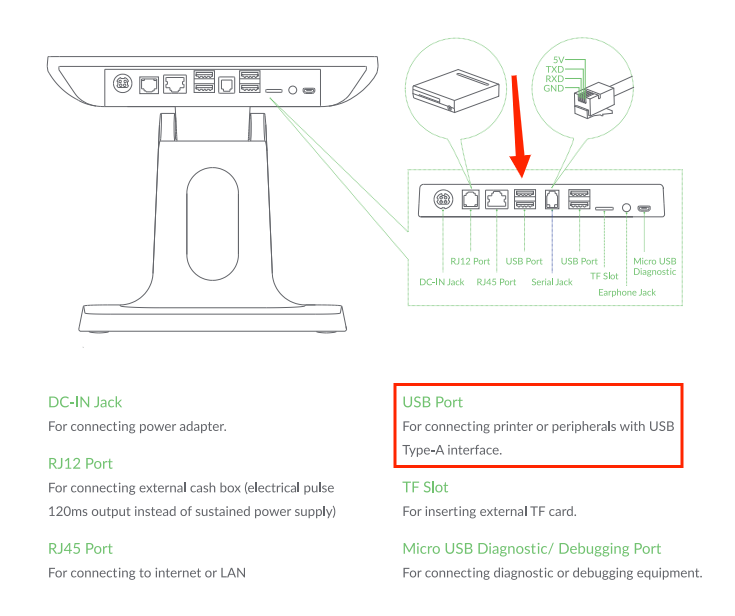
Connect the interface cable of the printer to the corresponding interface port on the POS machine.
Power on the printer and turn on the power switch.
Connect the power supply for the POS machine, and ensure that the printer is connected.
Adding a Printer
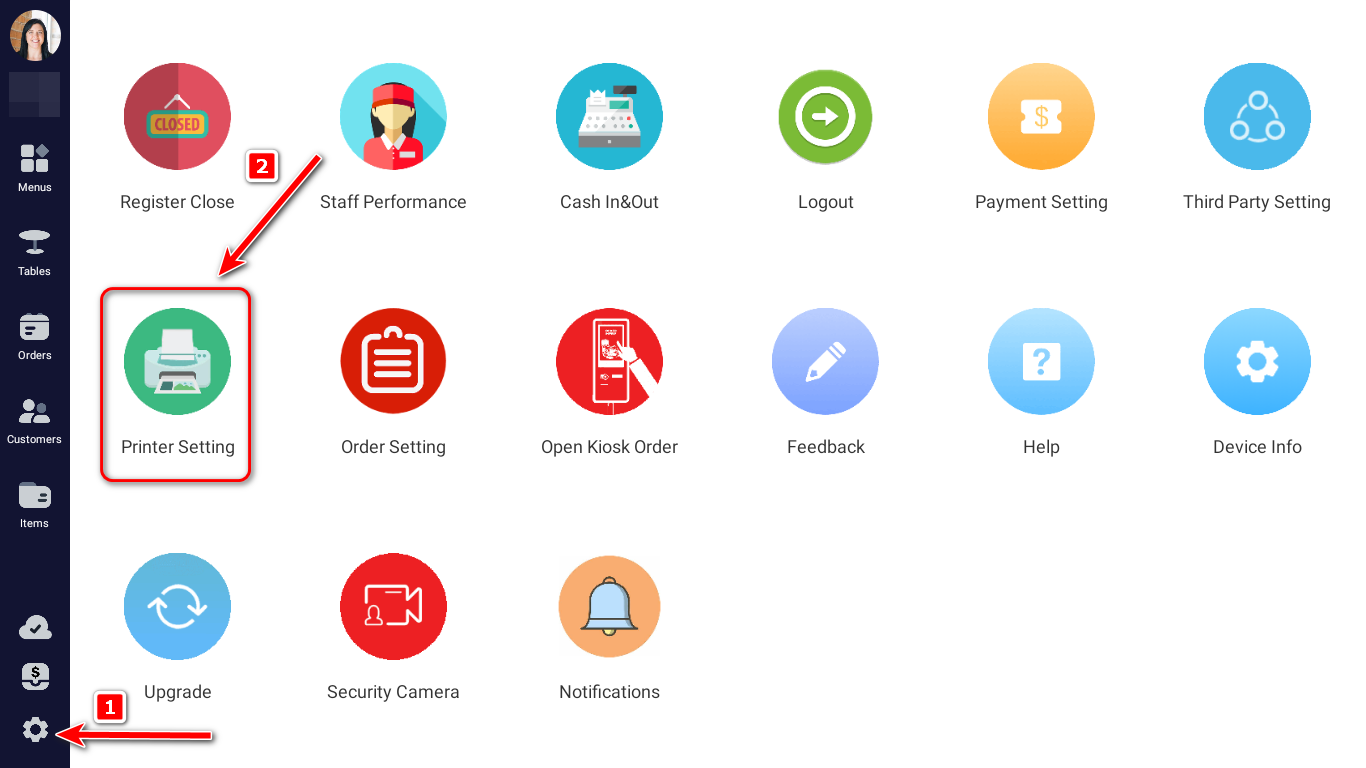
Click on the gear icon at the bottom of the left navigation bar, then click Printer Setting.
Click "+" to add a printer.
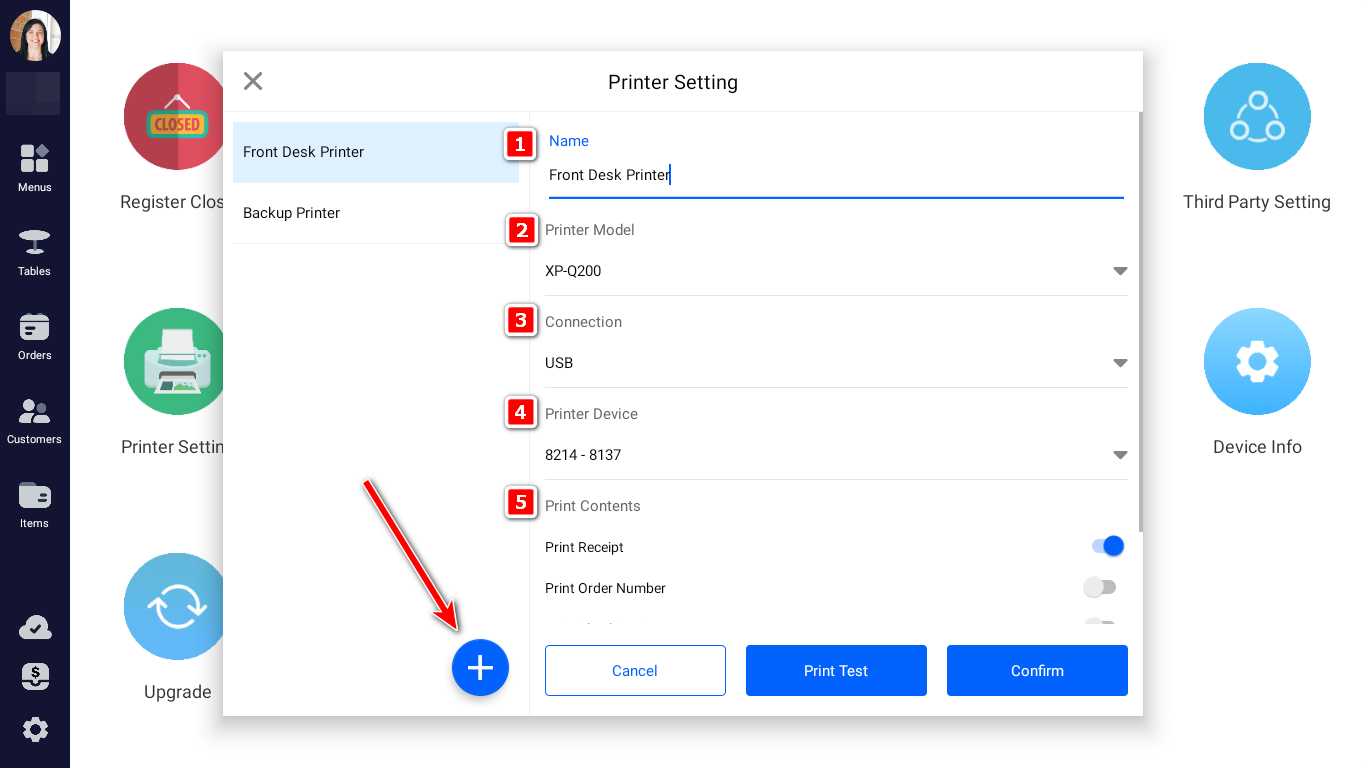
Enter the name of the printer.
Select the model of the connected printer. If there's no suitable model option, choose Other Model.
Choose the connection type as USB and select the Device Code of the printer device.
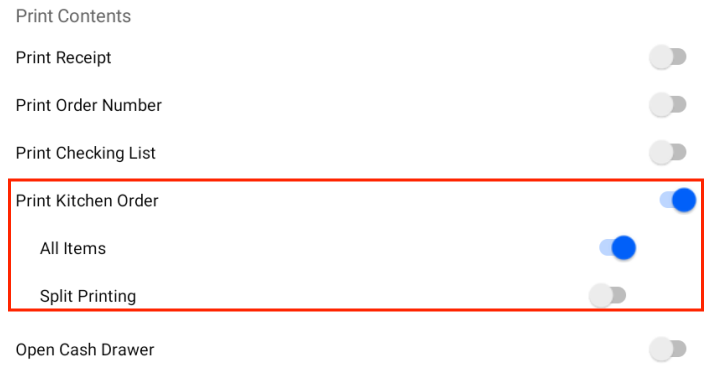
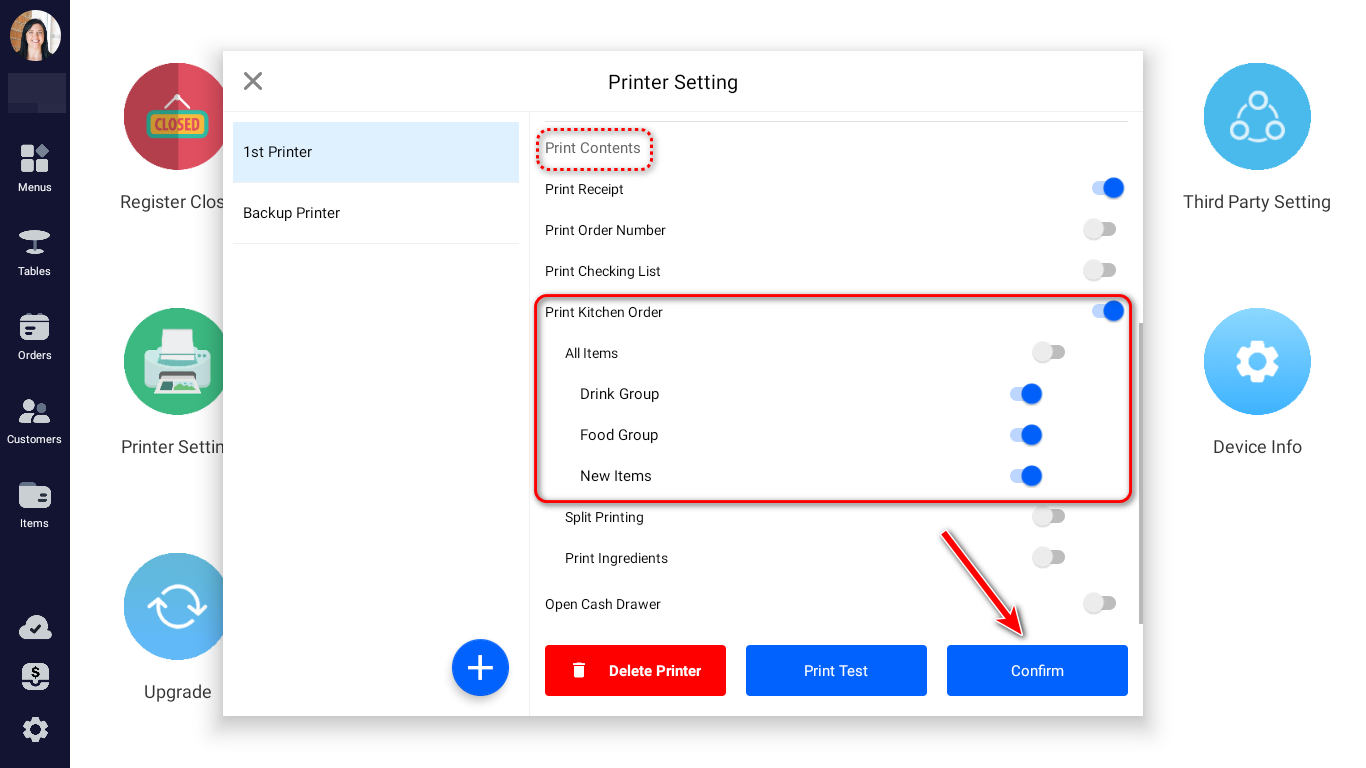
Configure the content to be printed by the printer, including receipts and kitchen orders.
Click Print Test to test if the printer is connected successfully. If there's an issue with the printout, check the configuration settings or consider repairing the printer. If the test printout is correct, click Confirm to complete the setup.
Configuring Printing Groups
Choose the Printing Group for printing. The items within these Printing Groups can all be printed.
Tips
For information on how to add items in the backend and add them to Printing Groups, please refer to: Items Management
Check Print Kitchen Order in Print Contents, and then select the Printing Group where the items are located.
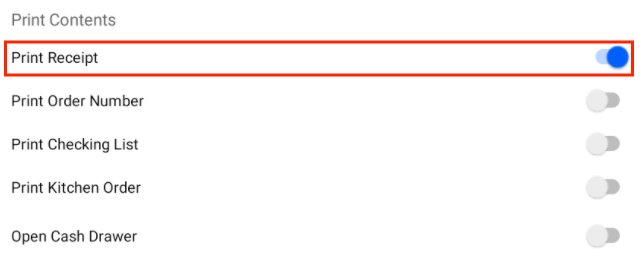
Print Receipt
Check the box for Print Receipt in the Print Contents section.
Print Kitchen Order
Check the box for Print Kitchen Order in the Print Contents section. By default, all items will be selected for printing. It also supports split printing.