How to Add New Items?
How to Add New Items?
You can quickly add new products on the POS machine and assign suitable print groups to them for easy printing of kitchen orders. Depending on your business needs, you can also add multiple variants to products or enable inventory tracking to facilitate timely restocking.
If you have many products to add or need to edit modifiers or supported ordering methods for products, you can do so in the backoffice.
Adding Products on the POS Machine
Adding new products on the POS machine involves completing the basic information of the product such as its name, price, category, icon, etc. and assigning print groups to facilitate printing of kitchen orders.
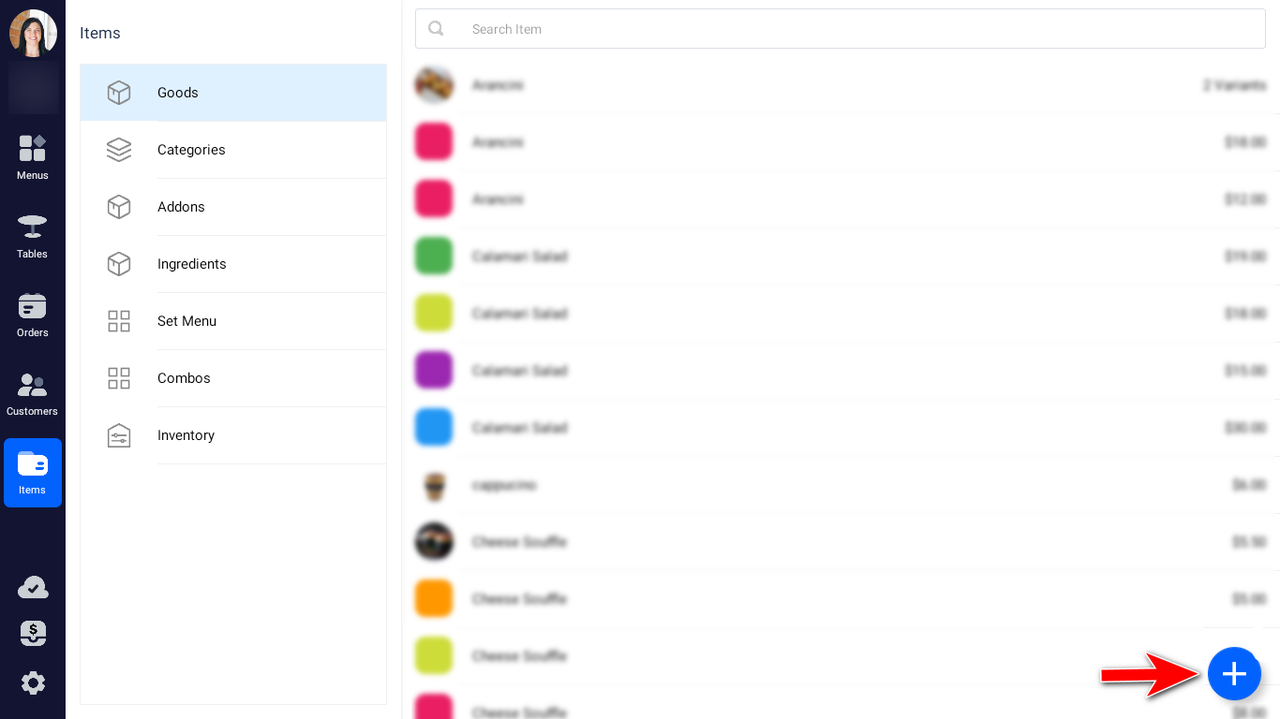
Navigate to the products page from the left-hand side navigation bar.
Click on the + icon at the bottom right of the page to add a new product.
On the product creation page, edit the detailed information of the product:
Basic Information Complete the basic information of the product, including its name, prices for in-house dining and takeout/packaging, category, SKU, etc.
Note
Please don't forget to select the category to which the product belongs from the dropdown option box under "Category". Otherwise, the product will not be displayed on the menu.

Variants
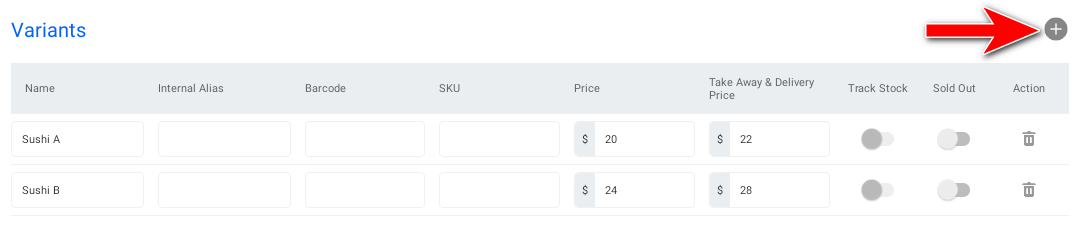
A variant is a variation of a product due to certain characteristics, each with its own SKU, making them distinct products. For example, based on the size of a coffee cup, you can have variants like large, medium, and small cups of coffee.
Each variant of a product typically has a different price. When settling the order amount, the price of the variant actually purchased by the customer at the time of ordering is considered.
Scroll down the page to find the Variants section, click on the + icon on the right to add multiple variants, and set their respective names, prices, SKUs, and other information.
Tips
Newly added products do not support adding or editing product content Modifiers on the POS. You will need to manually add modifiers to the product in the backoffice.
Assigning Print Groups
A print group is an organizational method used to manage product printing. Products in a store can typically be assigned to multiple print groups, with each printer printing products from different print groups.
Note
When adding a new product, it's important to add the product to the appropriate print group. Otherwise, when printing kitchen orders, the product will not be printed by the printer.
Scroll down the page to find the Printing Group section, check the suitable print groups for the new product. If there are no suitable print groups available, you can create a new print group in the backoffice and then synchronize it on the POS machine.
Enabling Inventory Tracking
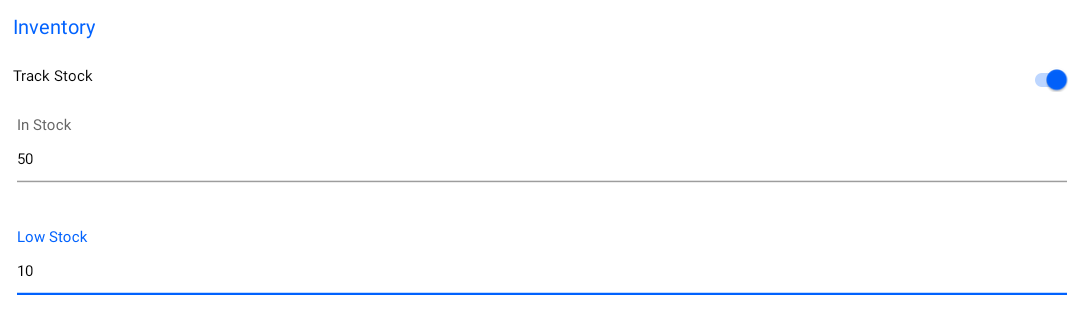
To enable inventory tracking, you can toggle the "Track Stock" switch in the Inventory section and take note of the current product inventory quantity and the inventory alert quantity.
When the product's inventory quantity falls below the alert quantity, the system will prompt you to restock in a timely manner.
Product Icons
Scroll down the page to find the Icon section, where you can choose the color and shape of the product icon to facilitate customer identification during ordering.
Adding Products in the Backoffice
When there are many products to add, or when you need to edit modifiers or supported ordering methods for products, you can add products in the backoffice.
The backoffice supports manually adding individual products or bulk importing multiple products using template files. Once added, they will take effect upon synchronization on the POS machine.