When the printer encounters an error, how to handle it?
When the printer encounters an error, how to handle it?
Main Content:
Identify printer anomalies and troubleshoot them.
Configure a backup printer to replace the malfunctioning printer and continue printing tasks.
Review error messages.
Troubleshooting
Examine the reasons for printer anomalies and resolve faults.
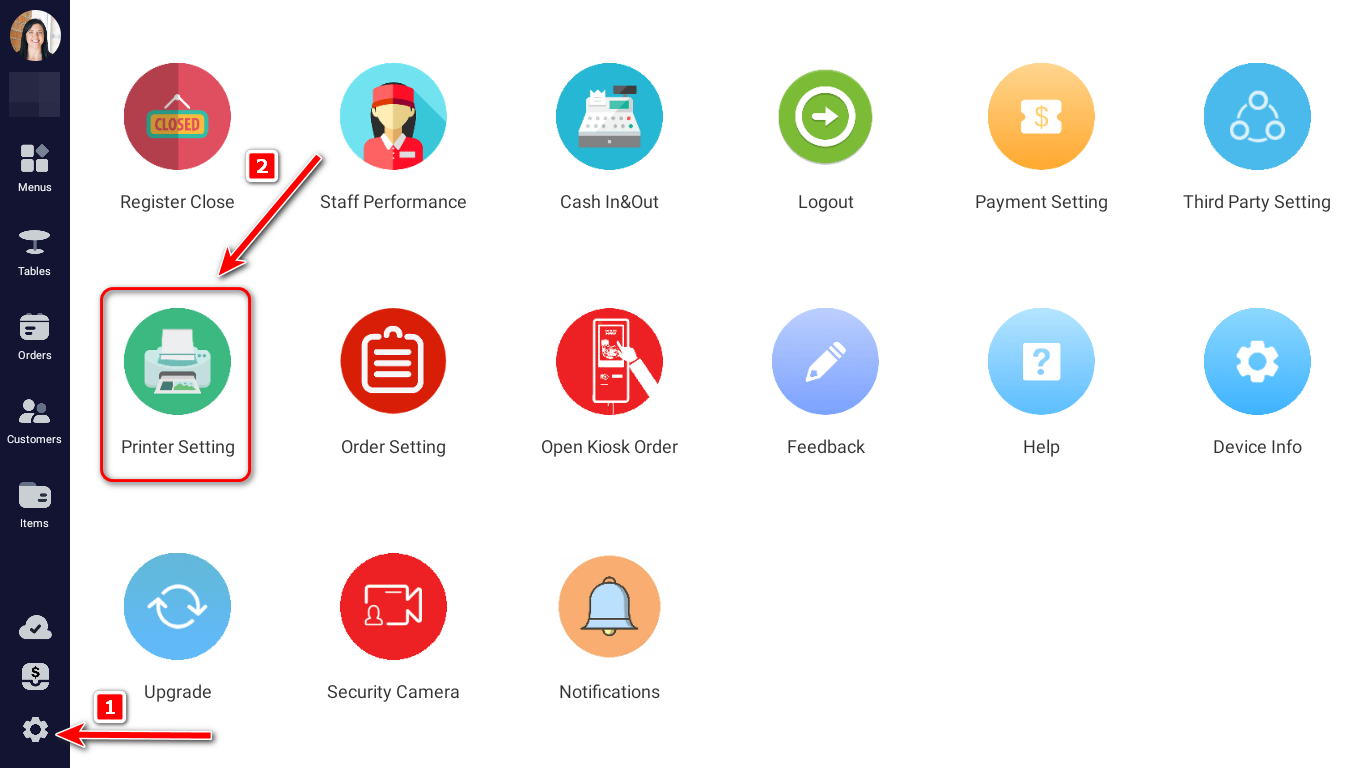
In the settings page, click on "Printer Setting".
Select the printer experiencing issues, then click "Print Test" to check if the printer is malfunctioning.
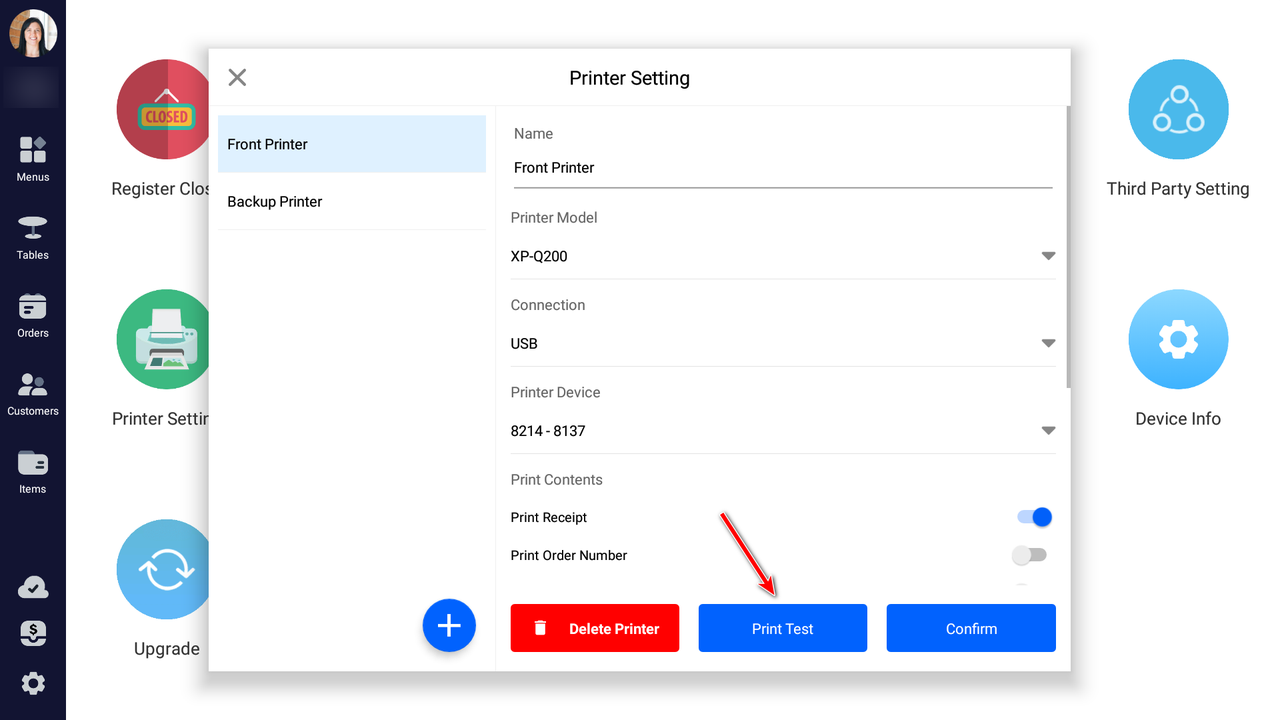
If the printer is faulty and unable to print the test page, please inspect the printer's connection and perform necessary troubleshooting.
Troubleshooting: USB Connection
If the printer is connected via USB, follow these troubleshooting steps:
Check if the USB cable is securely connected to the POS machine interface. You can try connecting it to a different interface on the POS machine (there are 4 interfaces available).
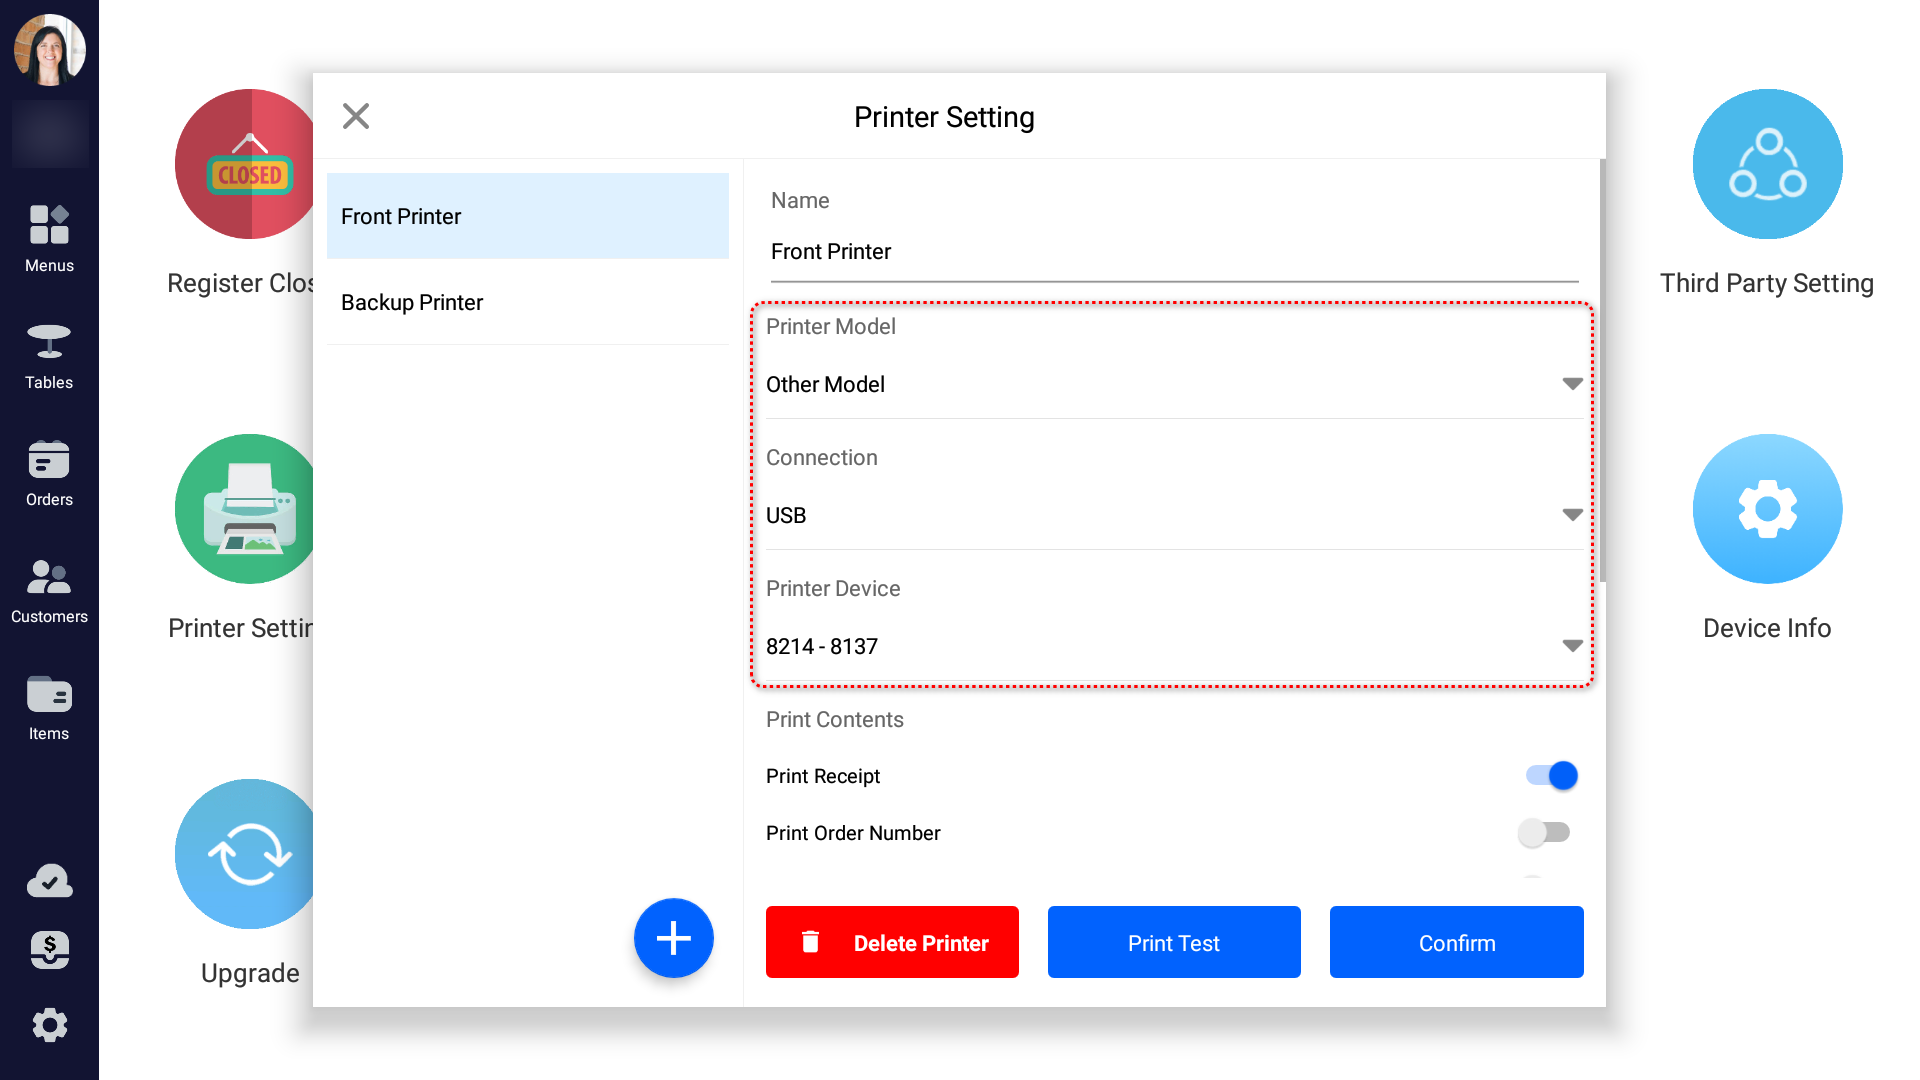
Confirm the "Printer Model", and it is recommended to select "Other Model".
Verify the "Printer Device", and the default selection is "8214-8137".
Click "Print Test" to check if the printer can successfully print.
Printer self-test:
With the power on, press the power button to turn off the printer.
Simultaneously press the FEED button and power button to turn on the printer.
After 2 seconds, release the FEED button. A complete self-test report displaying the printer's settings will be printed.
Troubleshooting: Internet Connection
If the printer is connected via the Internet, follow these troubleshooting steps:
Verify the store's network is functioning correctly.
Check whether the printer's Ethernet interface is lit, ensuring stable and normal network cable connections.
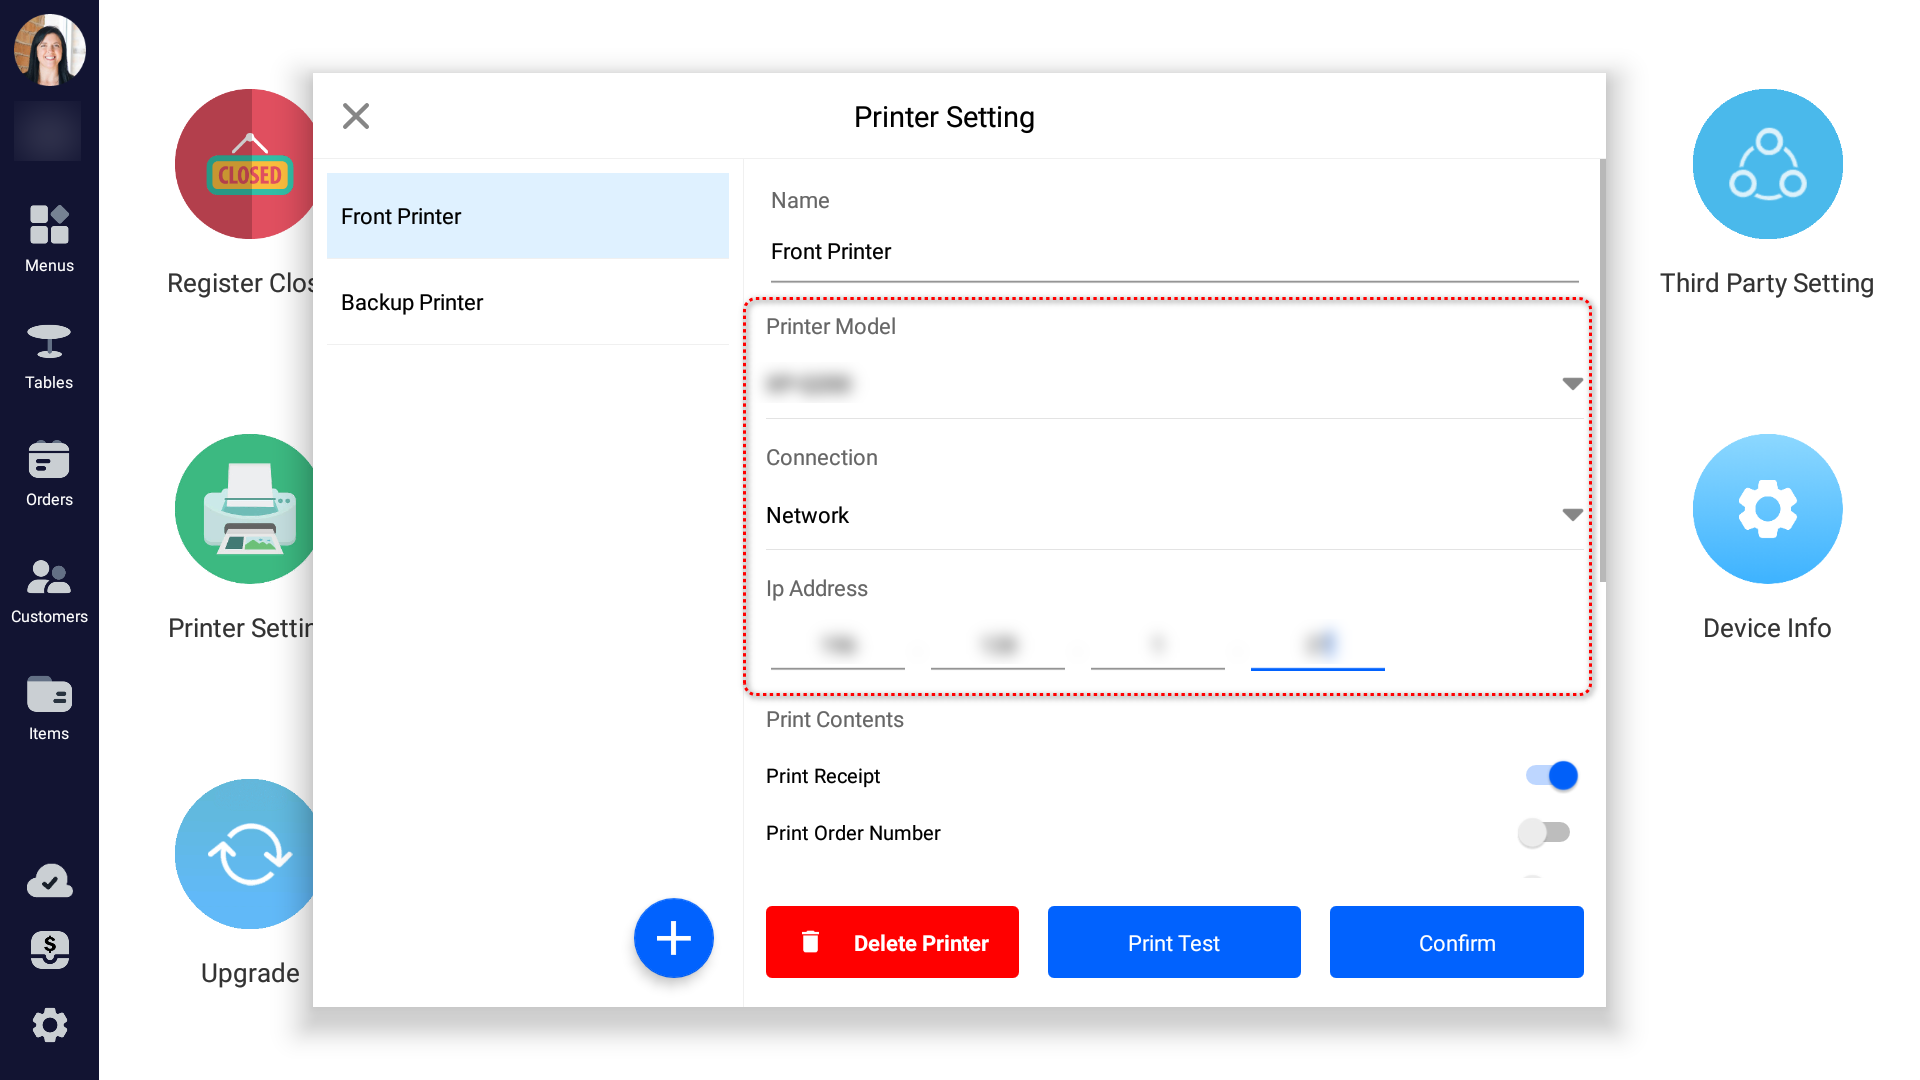
Confirm the "Printer Model" and recommend selecting the appropriate printer model.
Verify the accuracy of the "IP Address" entry.
Click "Print Test" to check if the printer can successfully print.
Printer self-test:
With the power on, press the power button to turn off the printer.
Simultaneously press the FEED button and power button to turn on the printer.
After 2 seconds, release the FEED button. A complete self-test report displaying the printer's settings will be printed.
Configuring Backup Printer
Configure a backup printer on the POS host. When any device (master or slave) connected to the printer encounters an issue, the backup printer will take over and continue printing.
In the settings page, click on "Printer Setting".
Select the printer model, connection method (USB connection is recommended), and printer device.
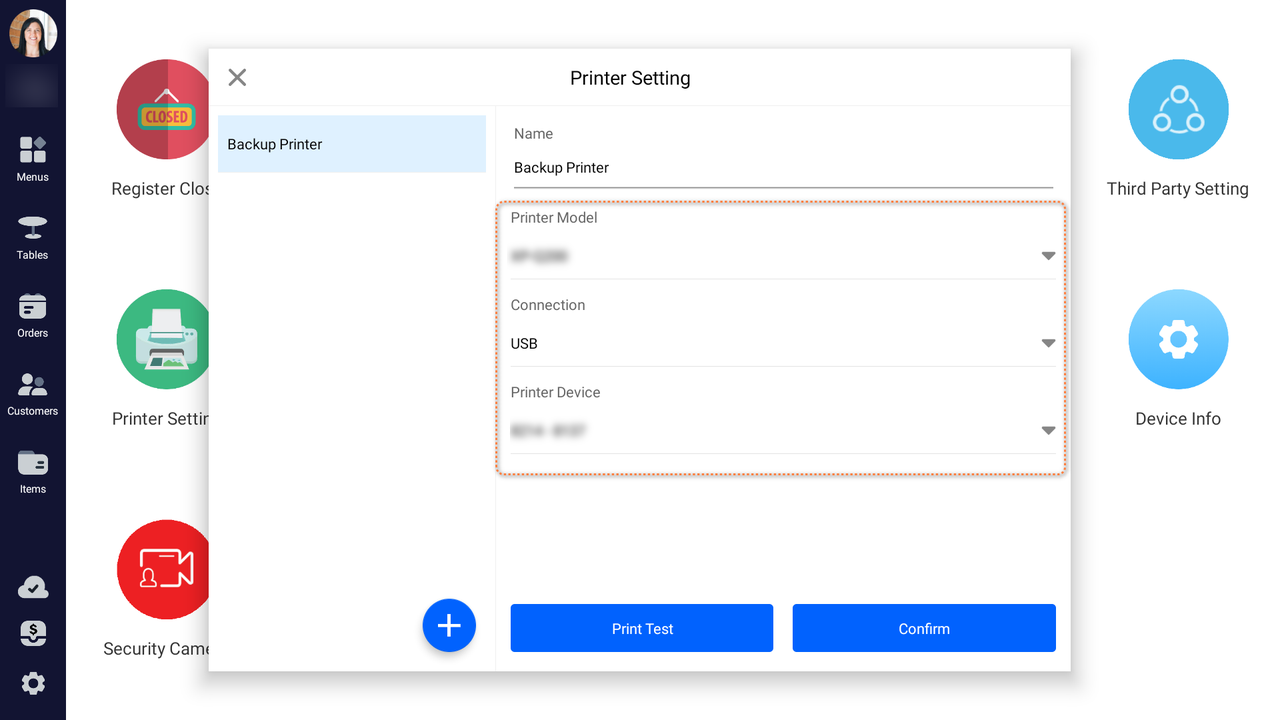
After successful printing with "Print Test", click "Confirm" to complete the configuration.
Viewing Error Messages
To view error messages on the POS host, follow these steps:
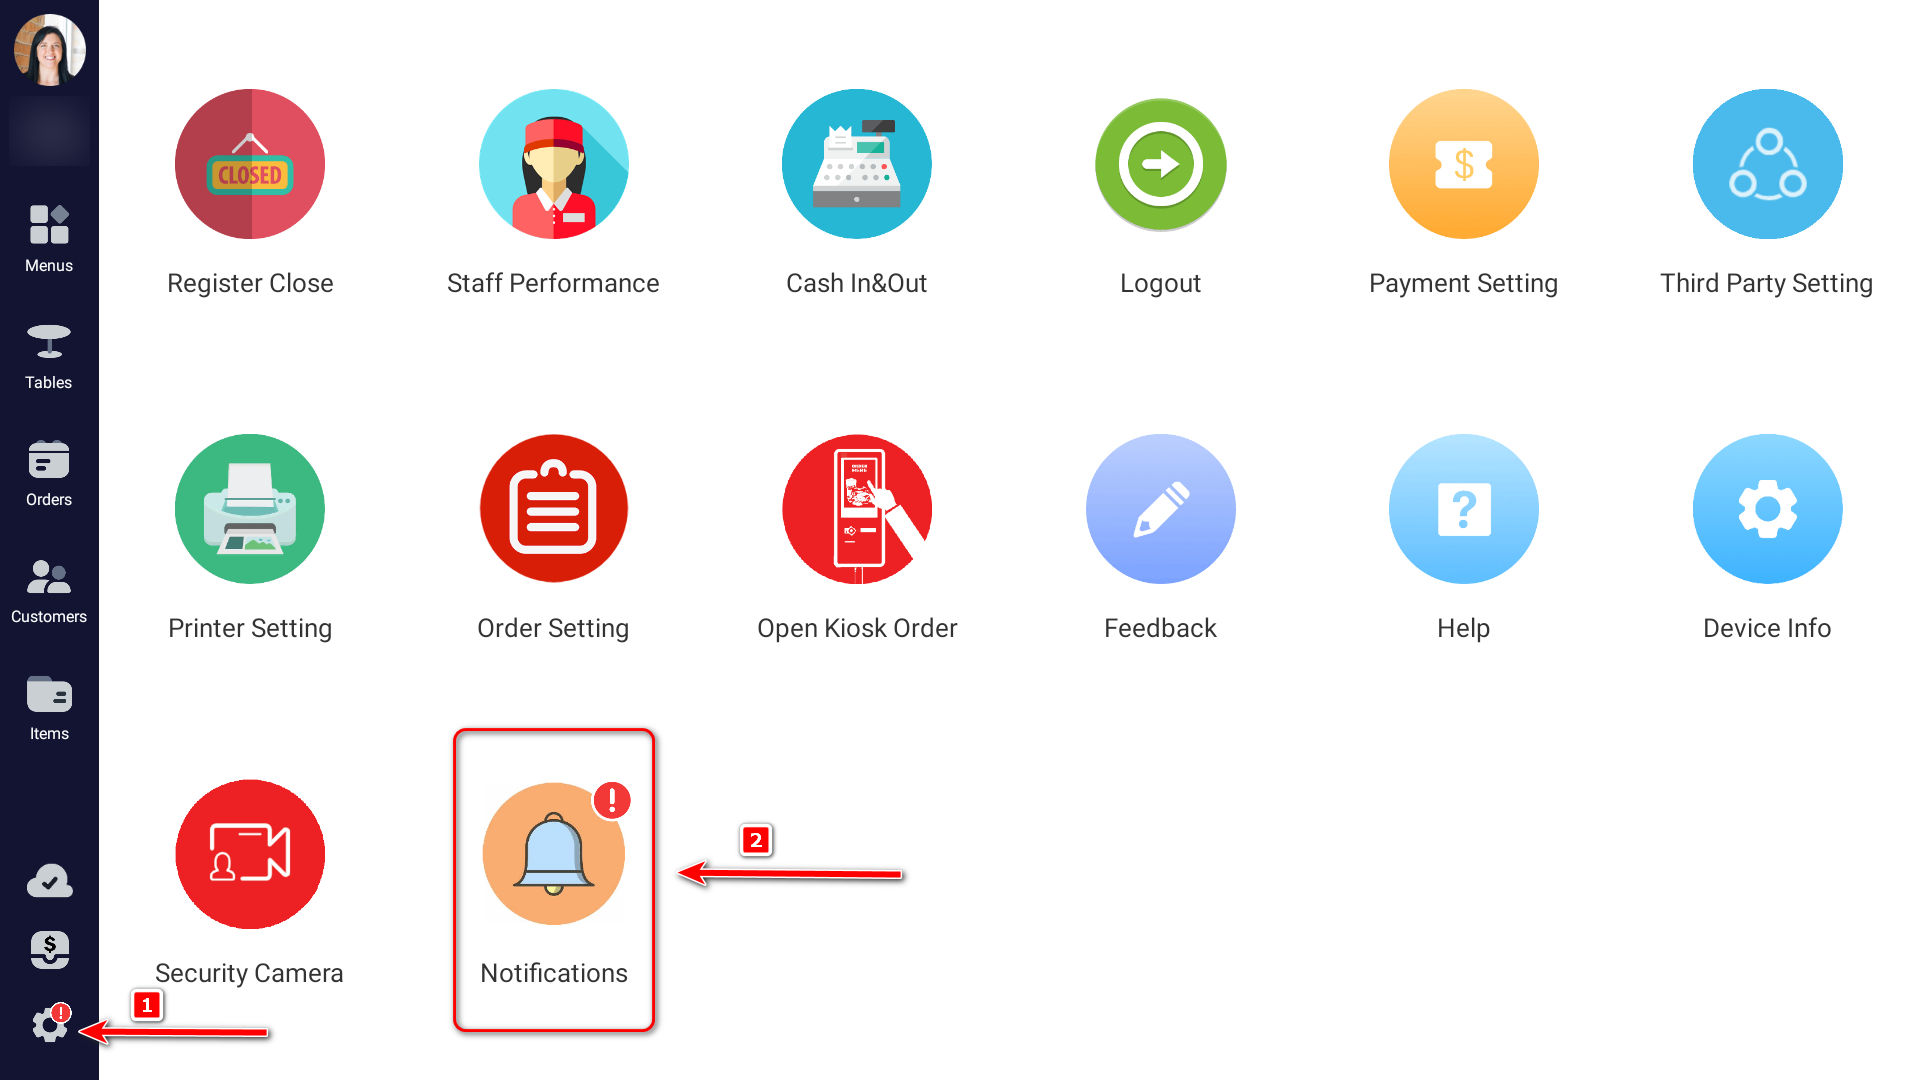
In the settings page, click "Notifications".
Check the devices, printers, and specific error messages related to printer anomalies.
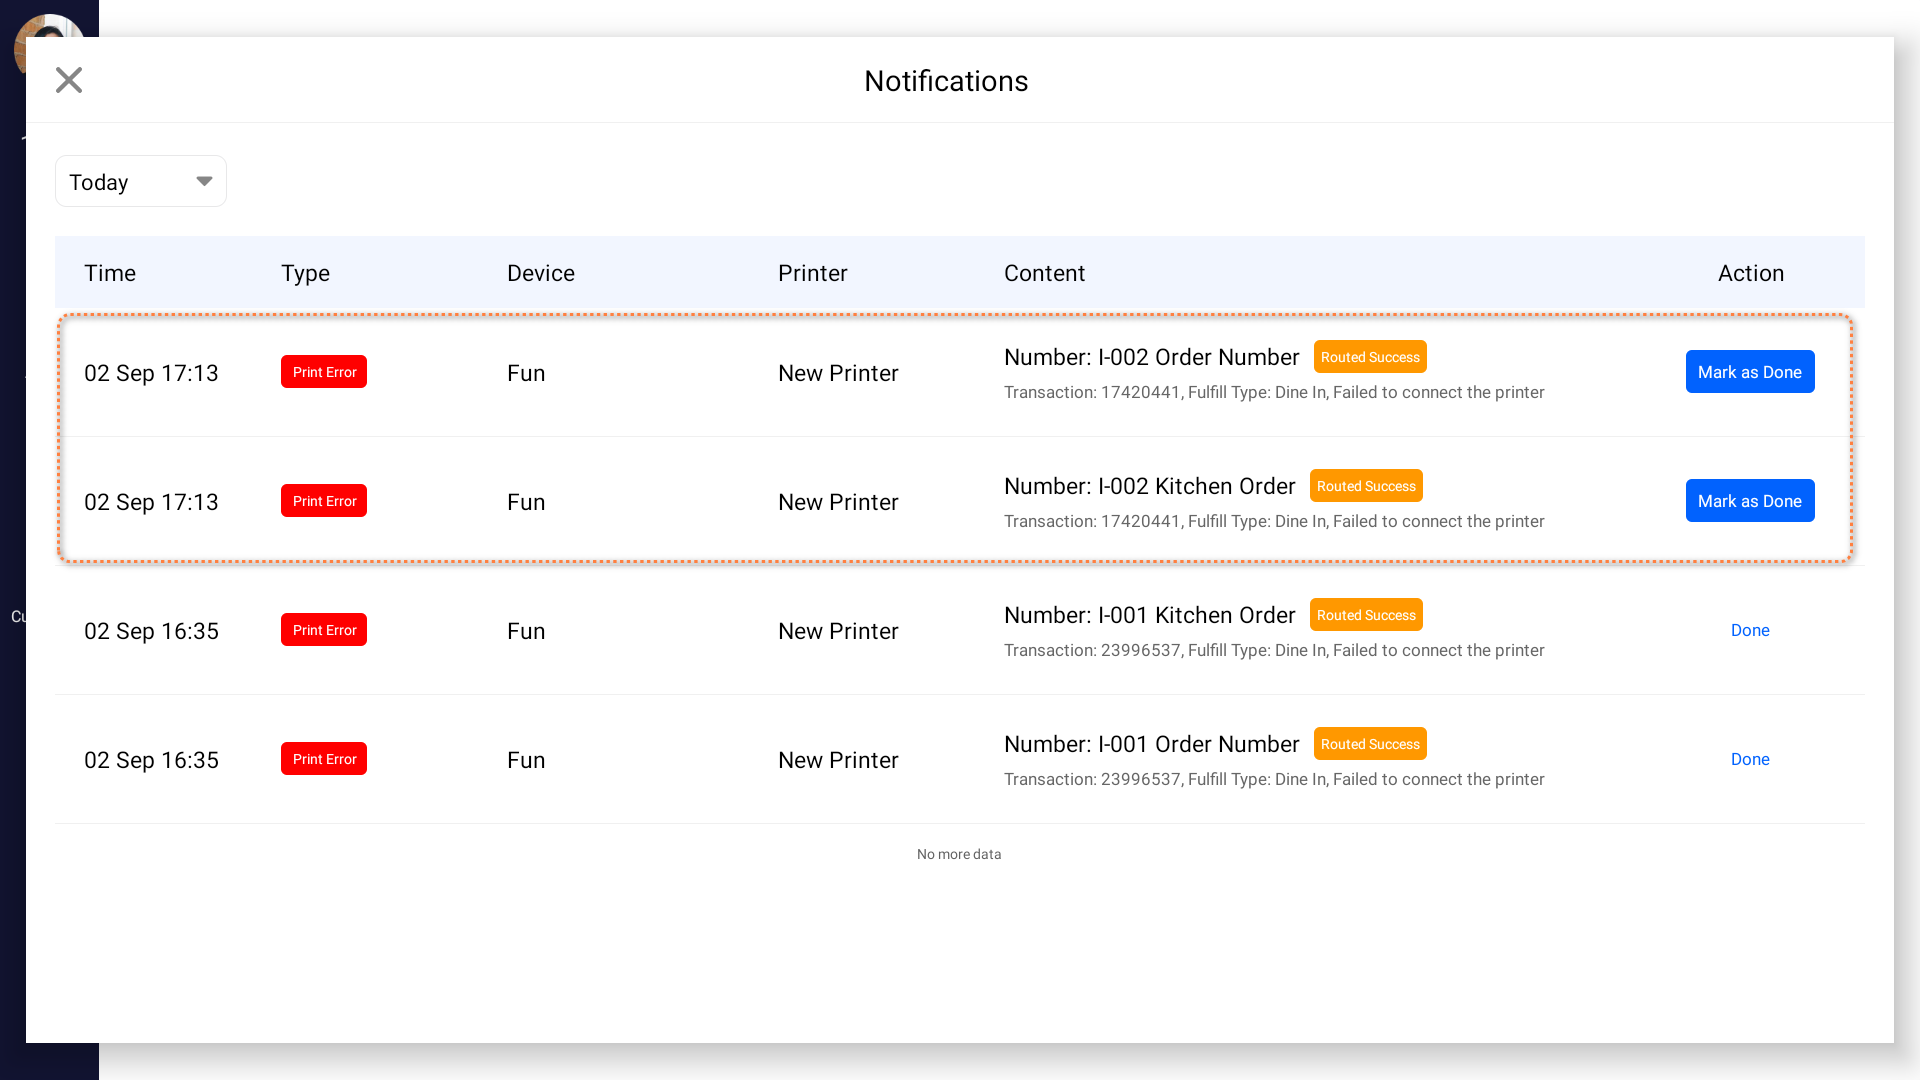
Once the backup printer has printed the content, it will display "Routed Success".
Click "Mark as Done" to remove the red warning indicator on the POS.