Taptouch Pos Simple Usage Guide
POS Simple Usage Guide
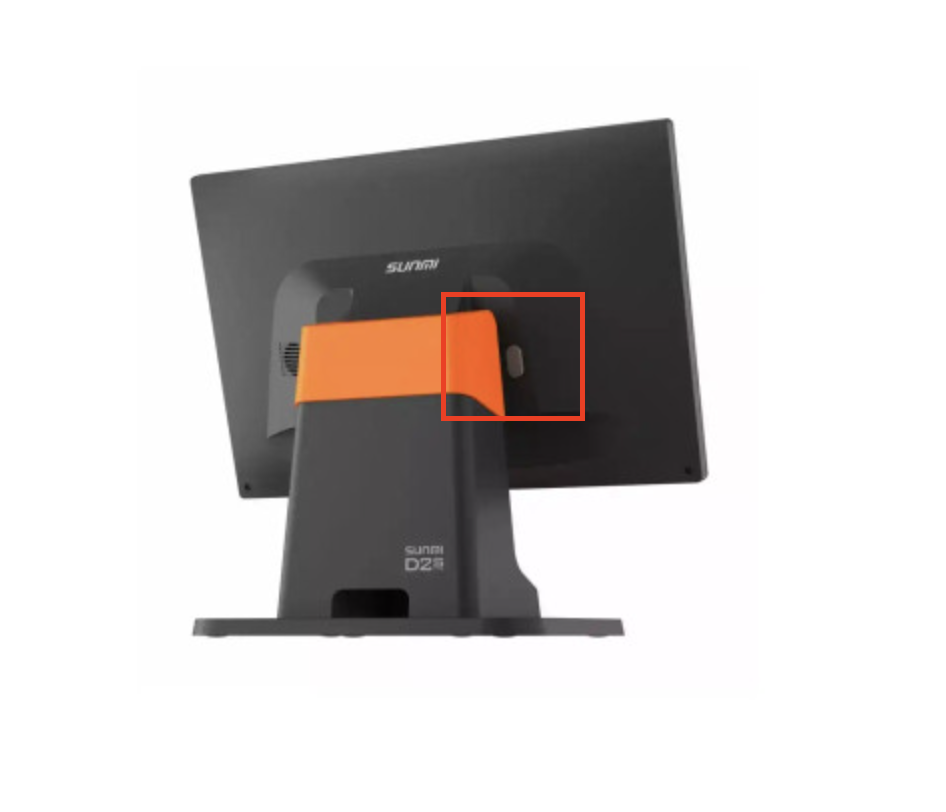
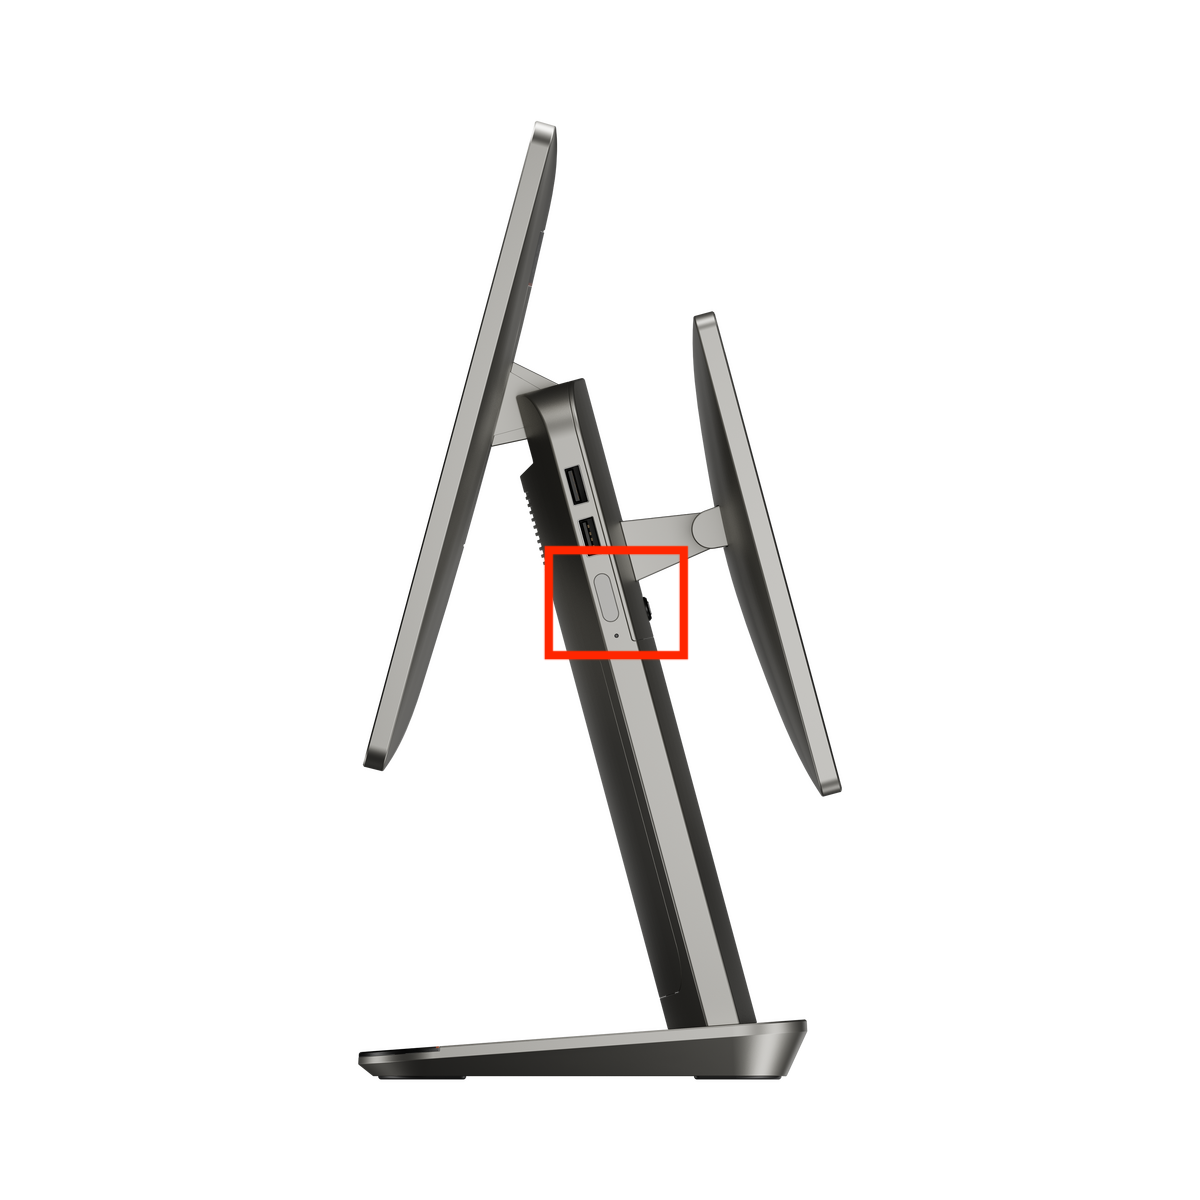
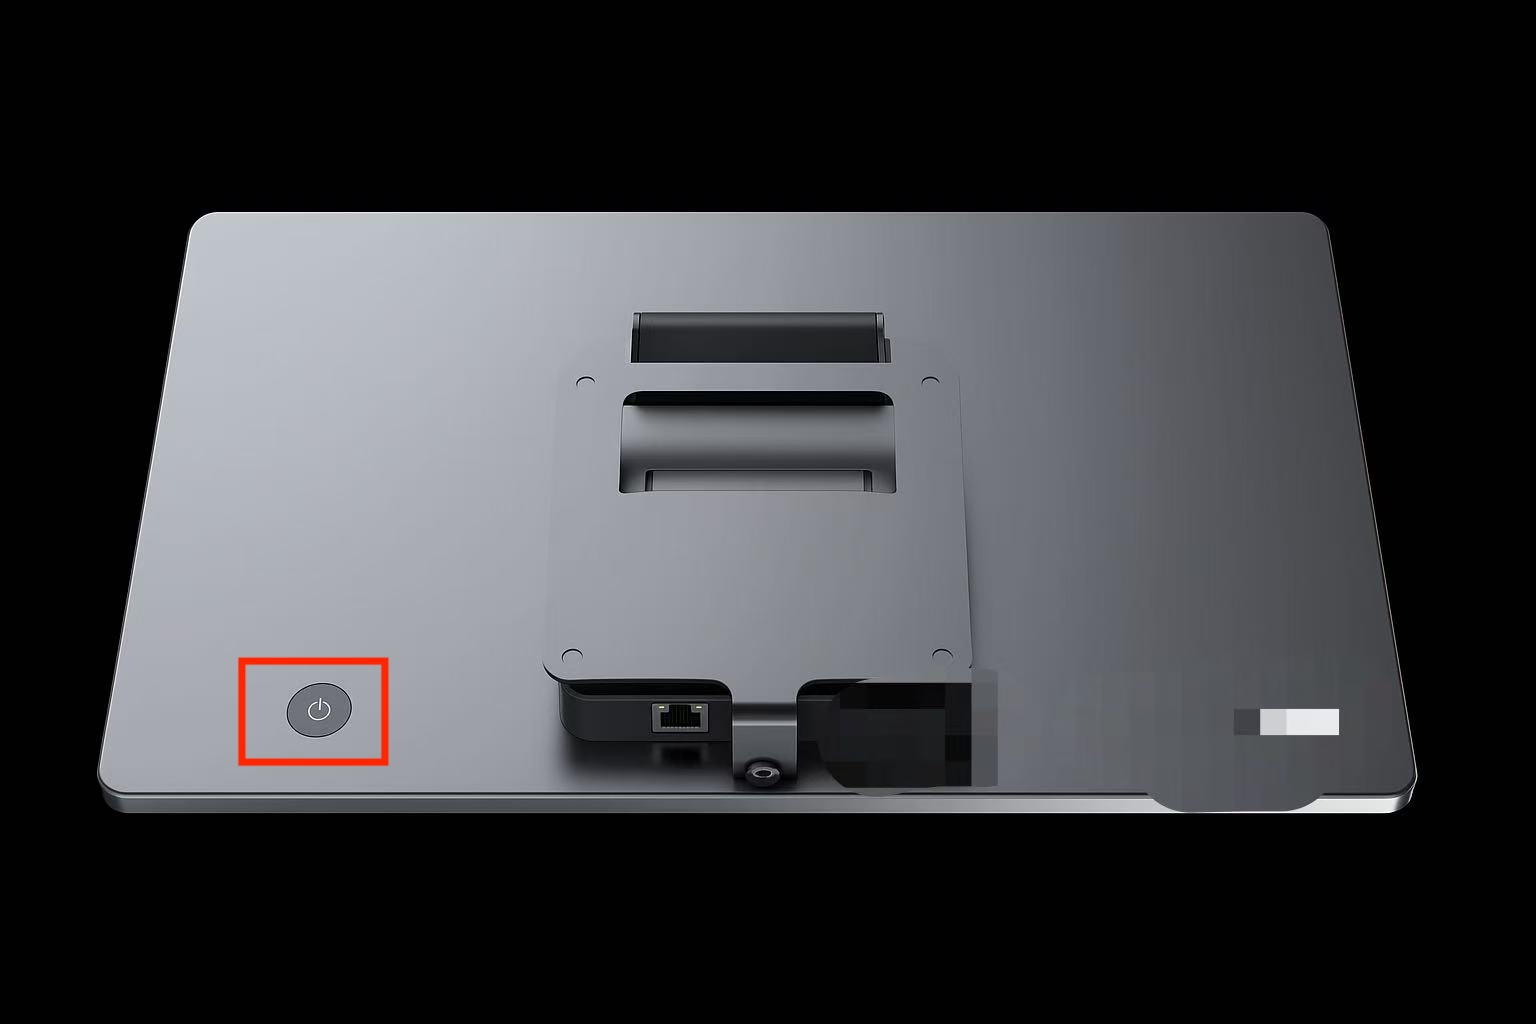
🔌 Power On / Off
The power button on the Taptouch POS terminal is usually located at the bottom right or left on the back of the screen.
Power On: Press and hold the power button for 3–5 seconds.
Shut Down / Restart: Press and hold the power button for 3–5 seconds. The screen will display shutdown and restart options—tap to proceed.
Force Shutdown: Press and hold the power button for more than 10 seconds to force the device to shut down.
Turn Screen On/Off: Short press the power button to turn the screen on or off.
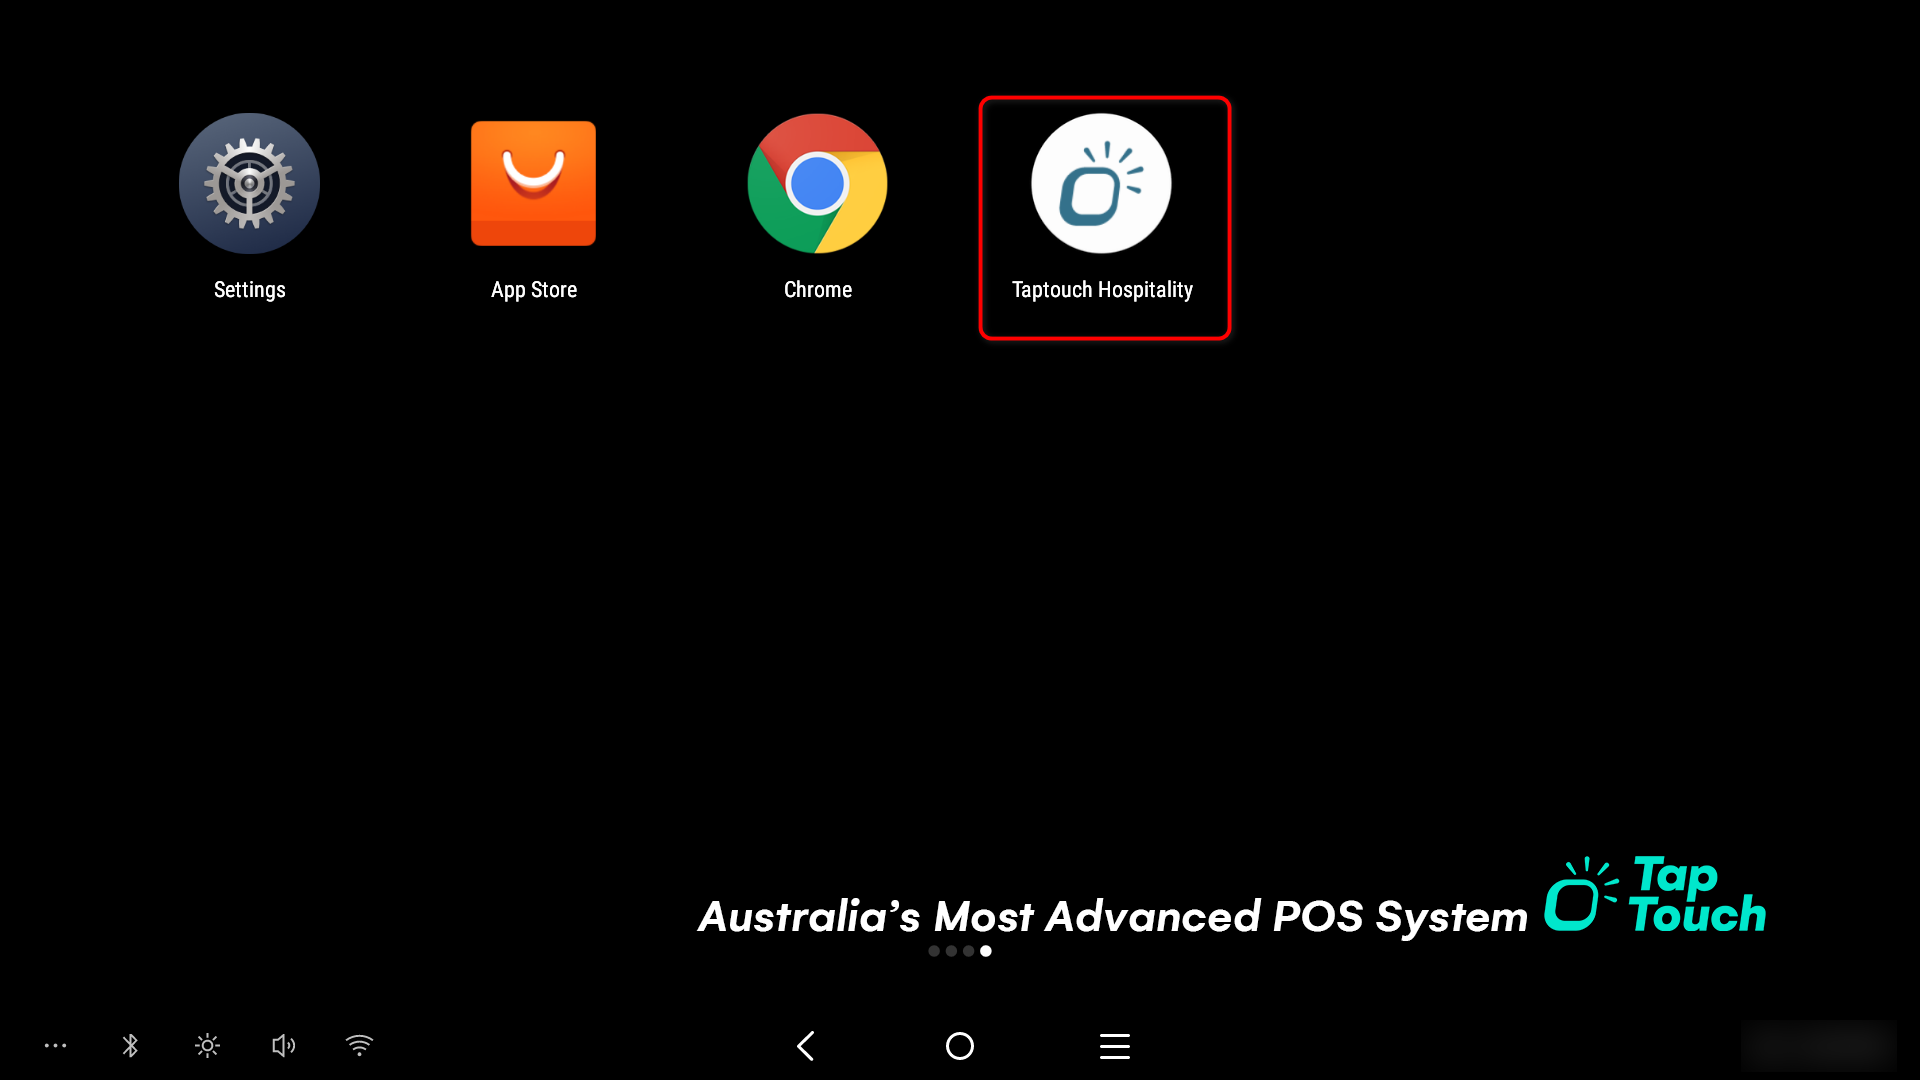
Launch Taptouch App: Tap the Taptouch icon on the home screen to open the Taptouch Hospitality app.
Opening and Closing the Store
⏰ Open Store
Launch the Taptouch app and enter the screen lock PIN (default:
1234).Upon first login each day, a petty cash window will appear:
Petty Cash: Enter the starting cash float amount.
Open Drawer: Tap to open the cash drawer.
Tap Register Open to access the ordering screen.
🌙 Close store
At the end of each day, you can review and print sales reports, and perform register close.
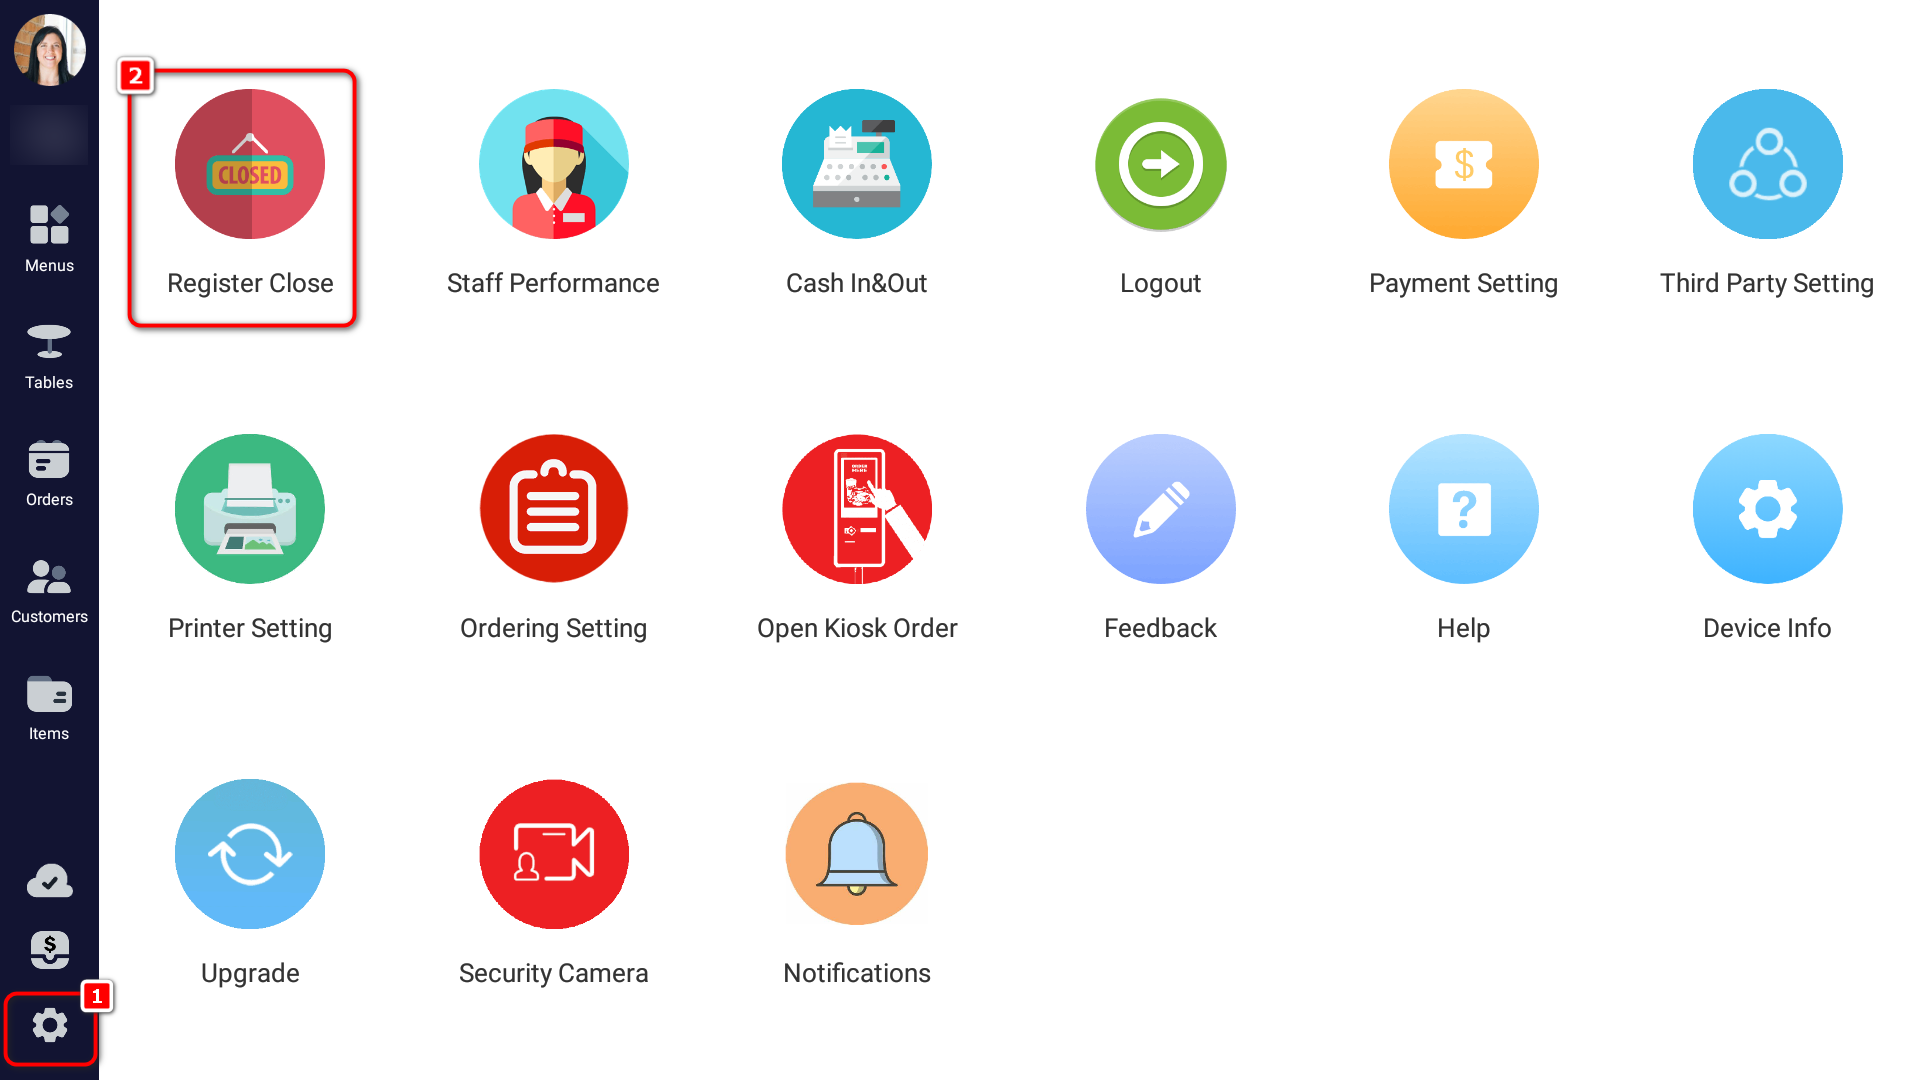
Tap the gear icon at the bottom of the left navigation bar to open Settings.
Tap Register Close.
Review daily sales and revenue data for reconciliation.
Tap Daily Close to close the register. This will automatically open the cash drawer.
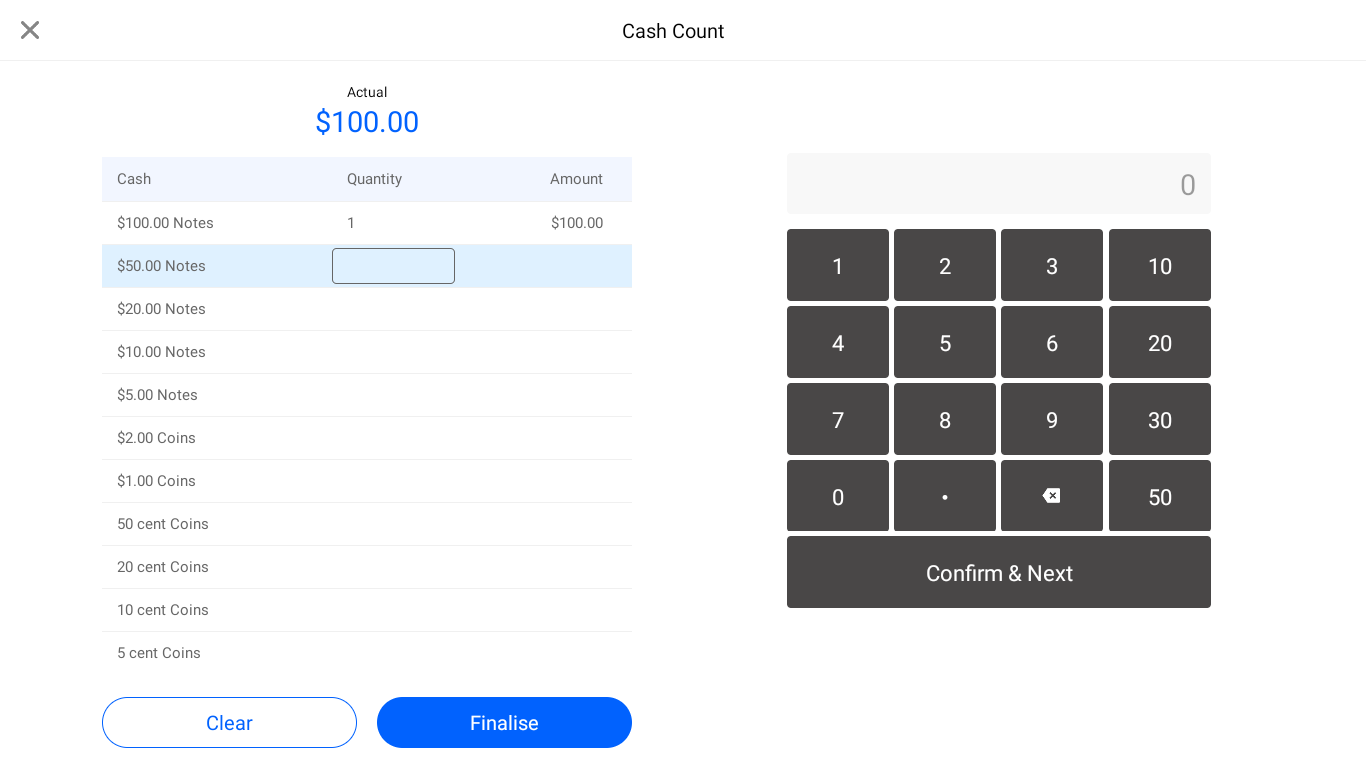
Count your cash by entering the number of each denomination, then tap Confirm & Next. When confirmed, tap Finalise.
Tap Register Close to complete the closing process.
A print window will appear. Select the reports you want to print, then tap Print.

🍽️ Placing Orders & Sending to Kitchen
Taking Orders
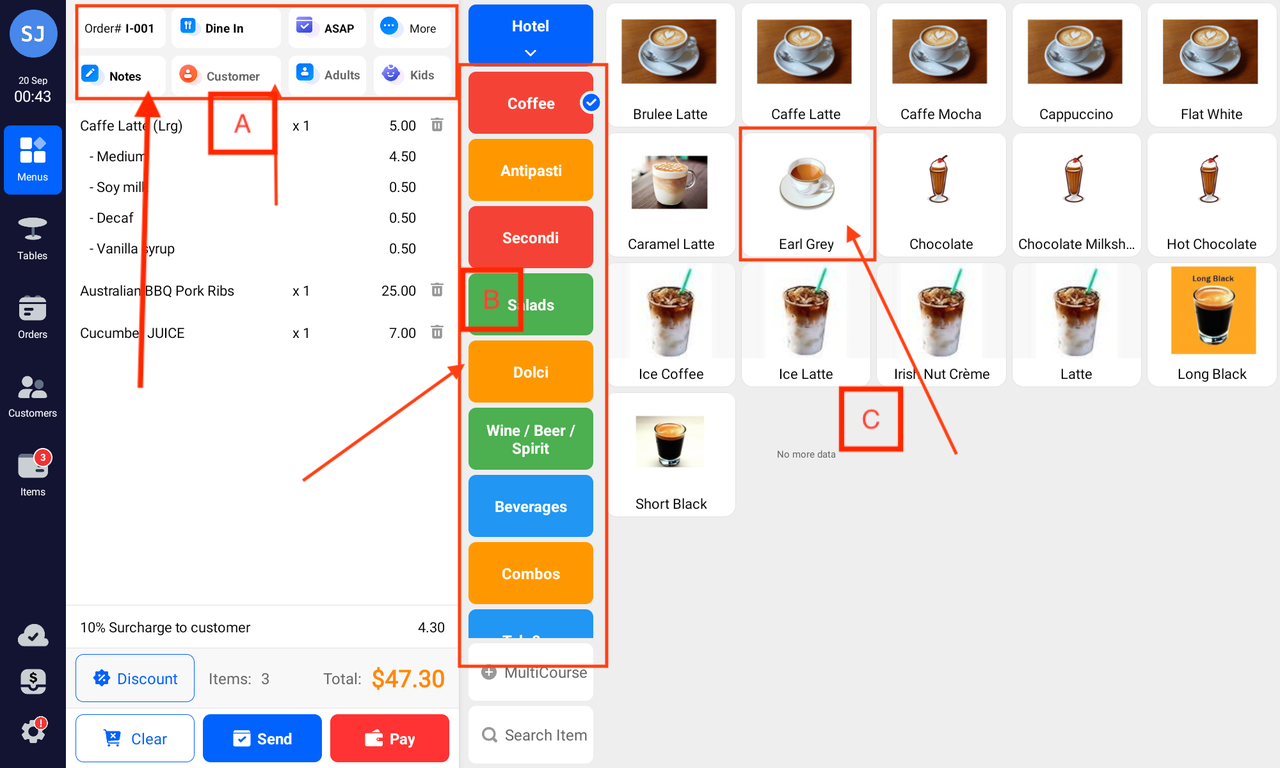
Use Section A (top-left) to select fulfillment type (e.g. dine-in, takeaway), and add notes.
Use Section B (middle) to filter products by category.
Use Section C (right) to tap and add items to the cart.
Sending to Kitchen
📌 Method 1: Pay before dining
- After selecting items, tap Pay at the bottom to proceed to the payment page.
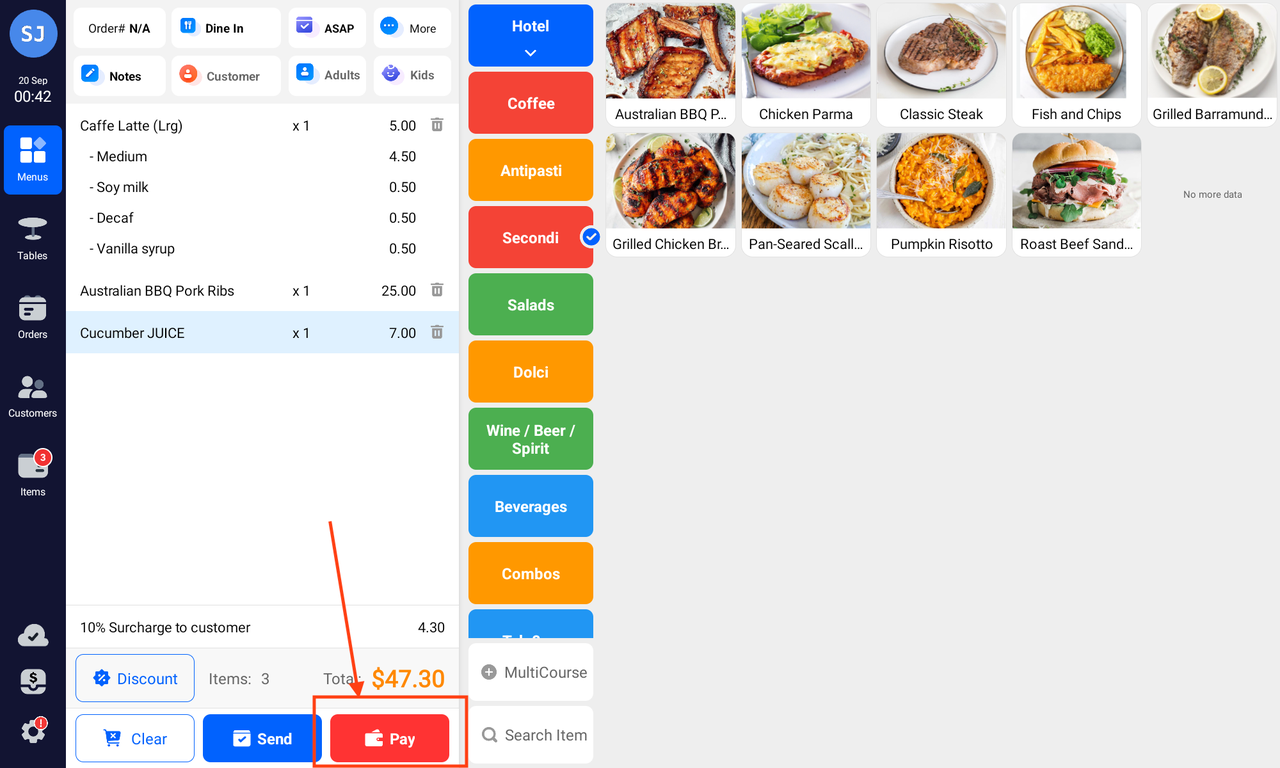
- Choose the desired payment method to complete checkout.
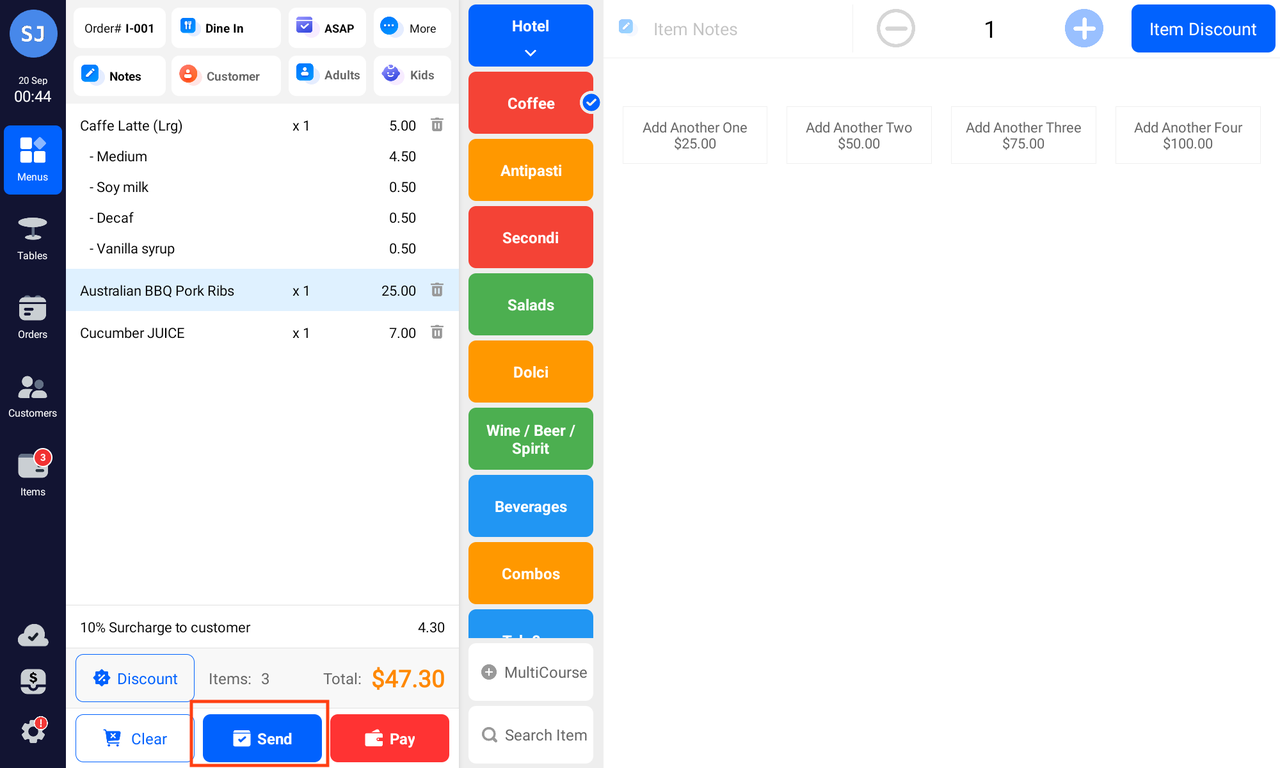
📌 Method 2: Pay after dining
- After selecting items, tap Send in the cart area to immediately send the order to the kitchen printer.
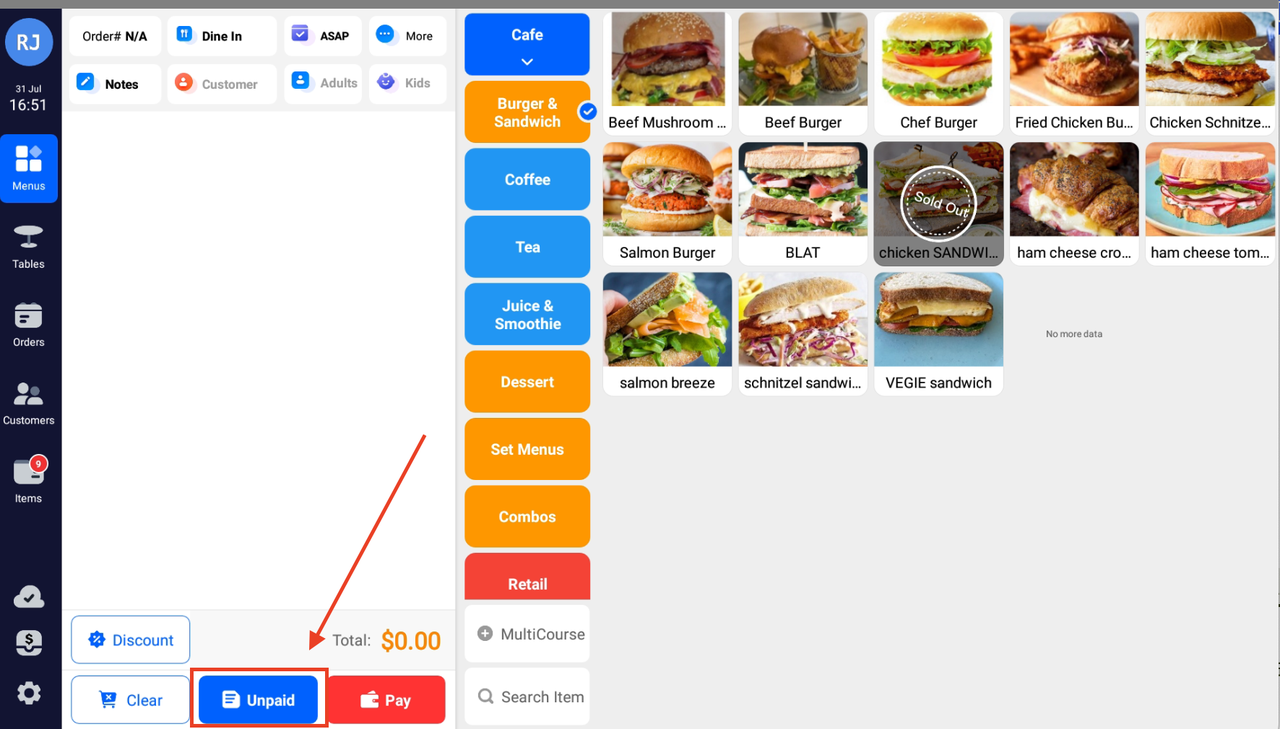
- When the cart is empty, use the Unpaid button at the bottom to quickly access unpaid orders for adding more items or checking out.
💰 Payment
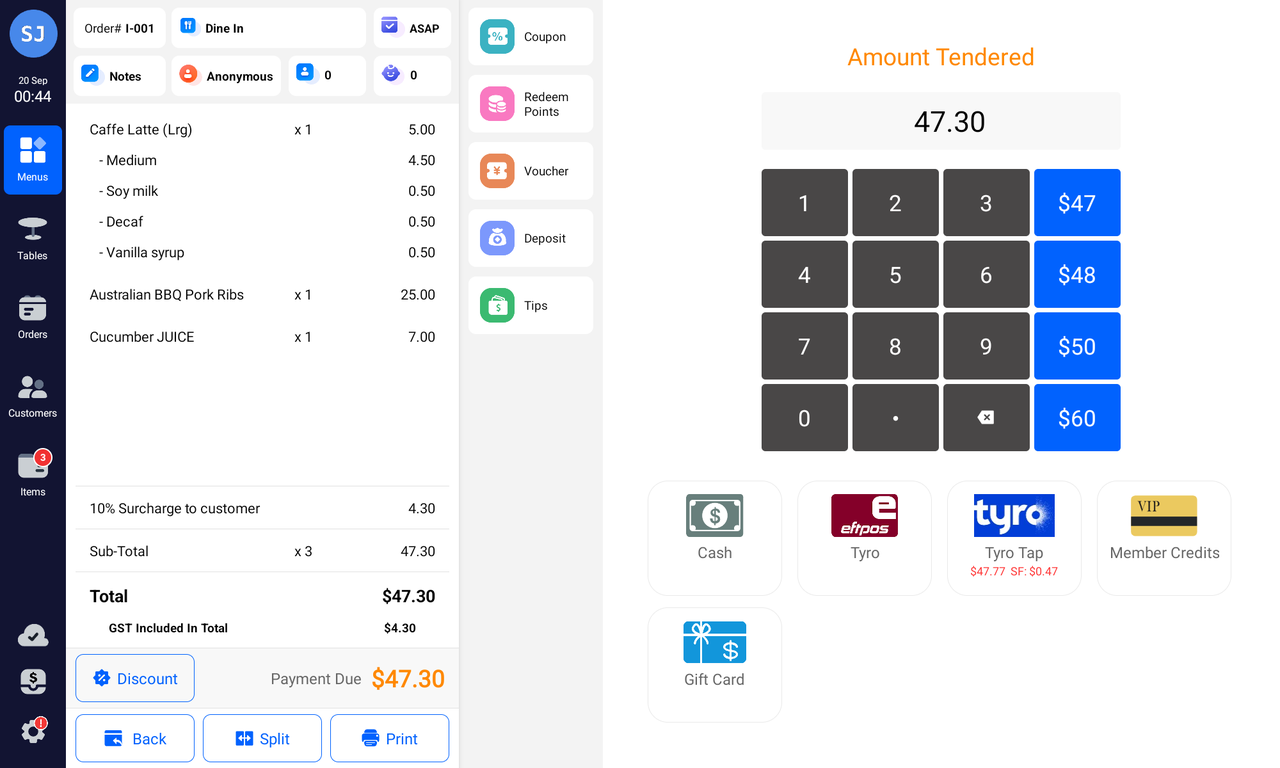
Completing a Payment
On the payment screen (right side), choose the customer's payment method:
Cash: Tap the blue quick cash button or enter the amount and tap the Cash icon. The cash drawer will pop open automatically for change.
Card: Tap the relevant card icon to complete payment. If the customer pays with a credit card, a surcharge will apply according to your backend settings.

🧾 Order receipt
After payment, the POS will show a confirmation page. You can print or email the receipt: 
Print Receipt: Tap Print Receipt. If Auto Print Receipt is enabled, the receipt will print automatically.
Email Receipt: Enter the customer’s email address in the Email field and tap Send Receipt.
Item Management
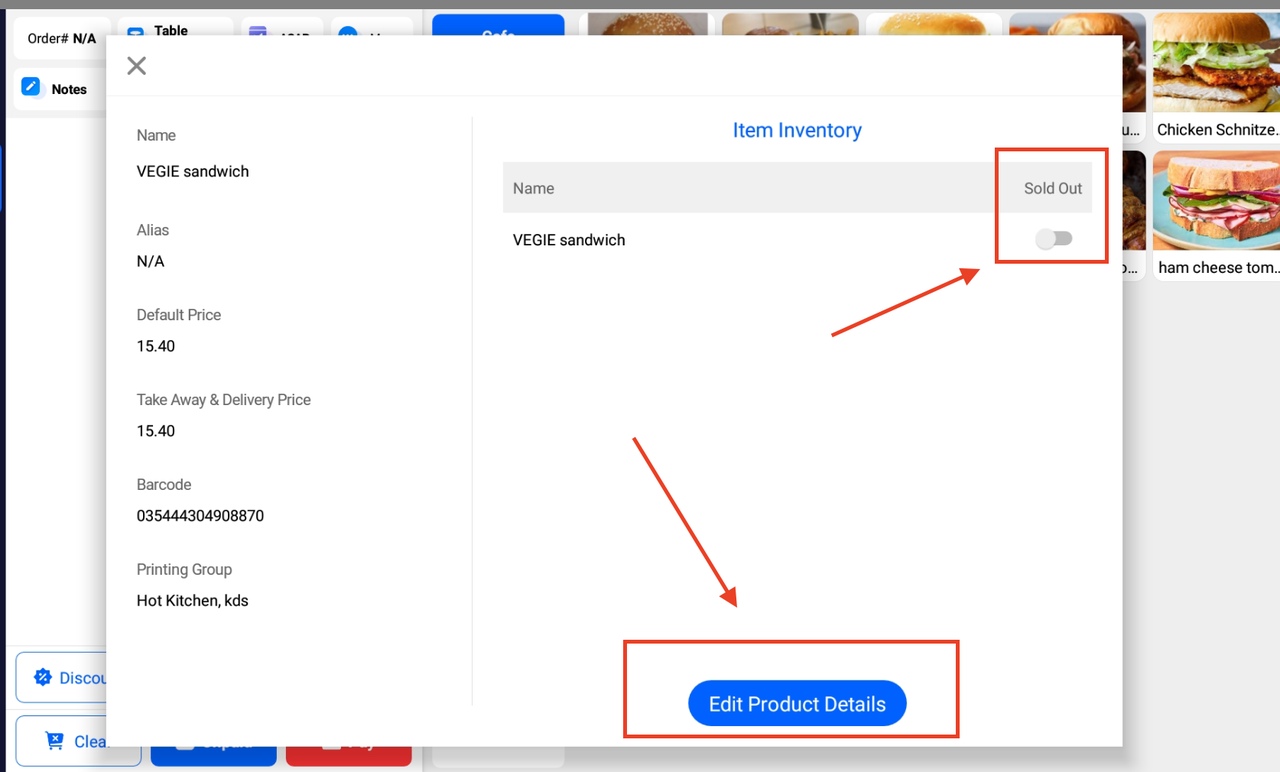
- Long-press any item on the ordering screen to quickly edit its details, such as name or price.
- Items can also be marked as Sold Out.
Discounts
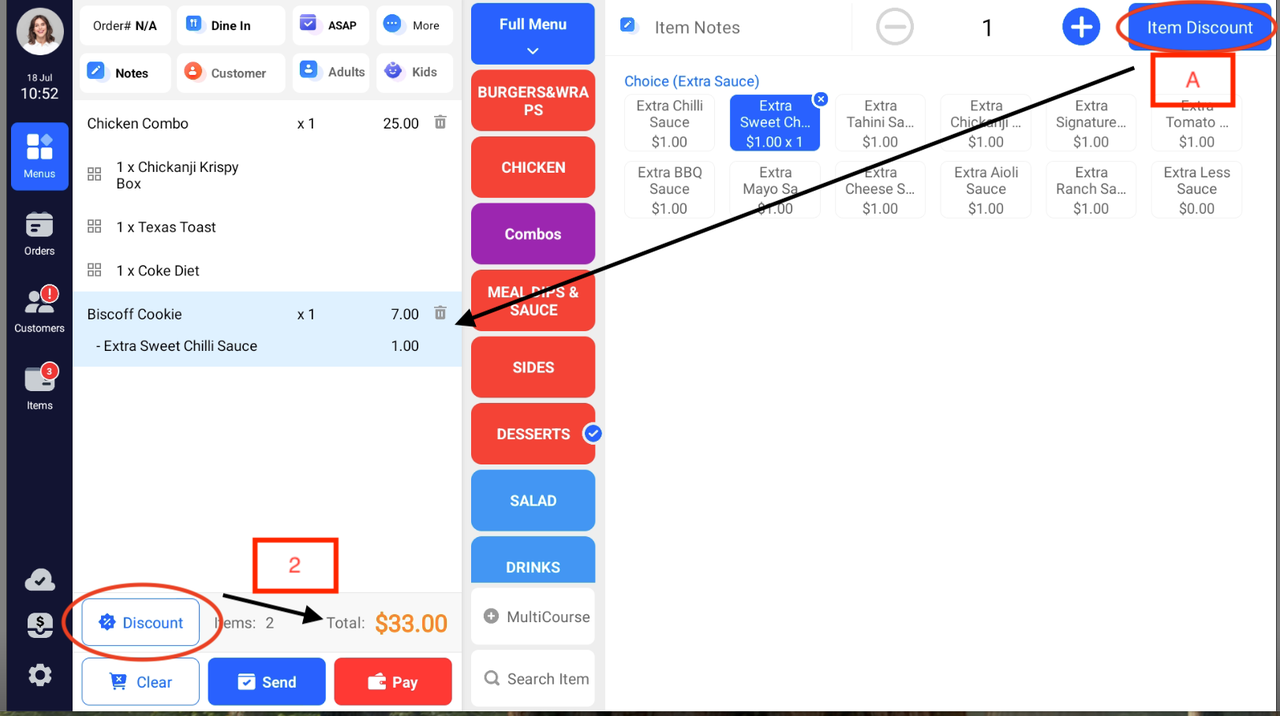
Item-Level Discount
- Select the item ➜ Tap the discount icon in the top-right corner.
Order-Level Discount
In the cart area (bottom-left), tap the discount icon to apply a discount to the entire order.
You can enter a percentage or a discounted total amount.
Refunds
Full or partial refunds can be issued for customer orders.
- From the left navigation bar, go to the Orders page. On the right, you can filter by time, order type, or payment method, or search by customer name, order number, or transaction ID.
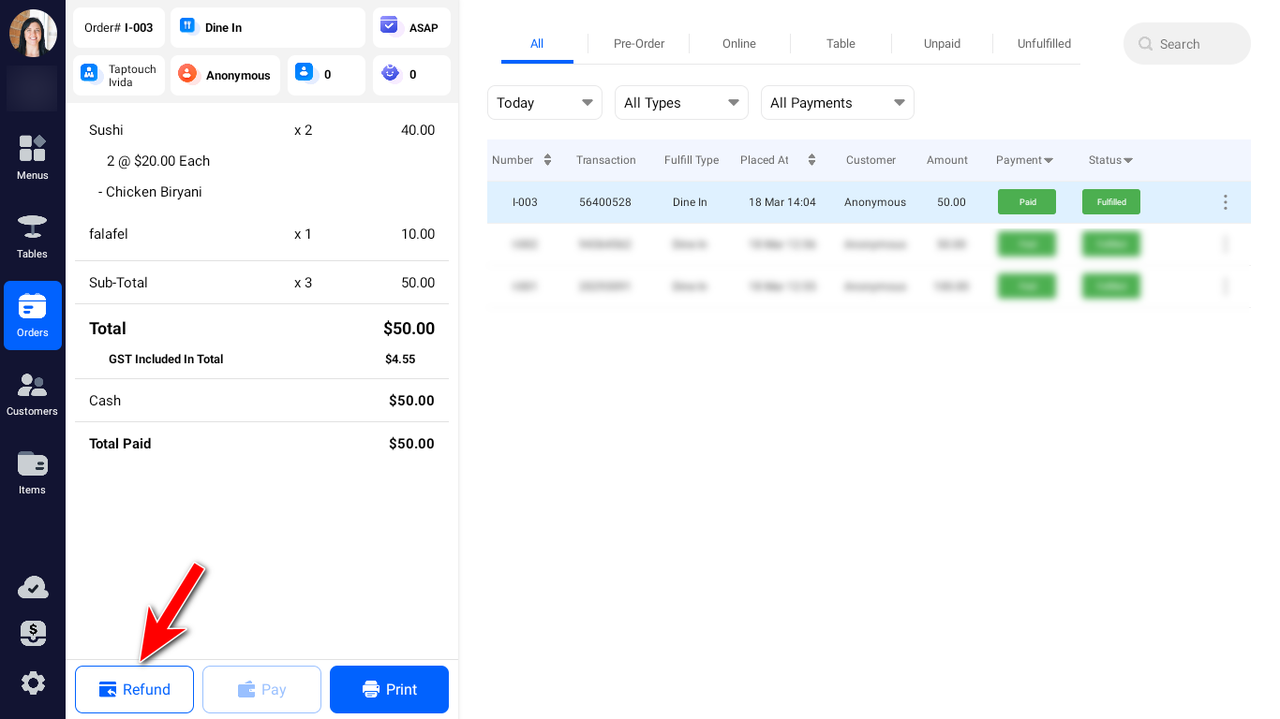
Tap Refund in the bottom-left corner.
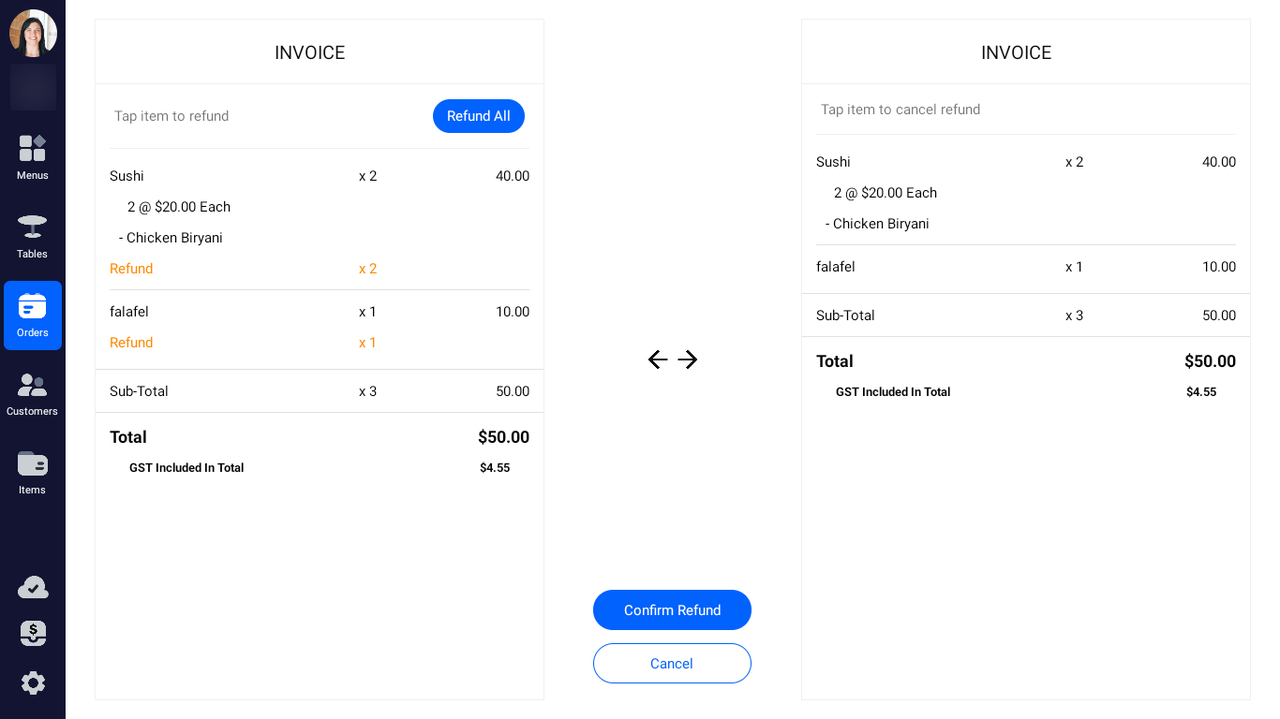
On the popup window, you can enter a reason for the refund. Then tap Refund Confirm.
On the INVOICE page:
a. Full Refund: Tap Refund All.
b. Partial Refund: Tap the specific items to refund.
Tap the Confirm Refund button.
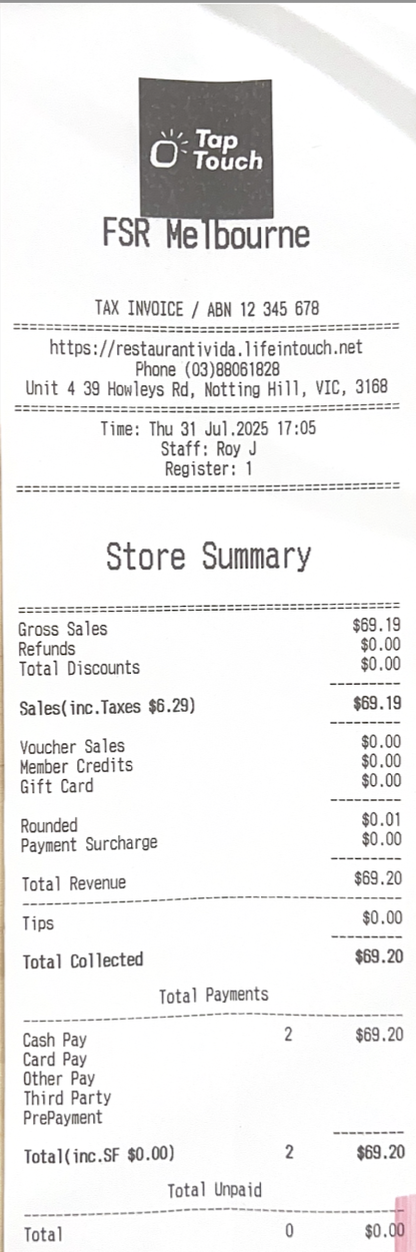
Reconciliation & Reports
You can review and print store reports at the end of day for reconciliation purposes. Reports include Store Summary and Store Details.
Tap the gear icon in the bottom-left to open Settings.
Tap Register Close.
Tap Store Daily to review totals. Confirm:
Total Collected = Total PaymentsThen tap Print to print detailed sales data.
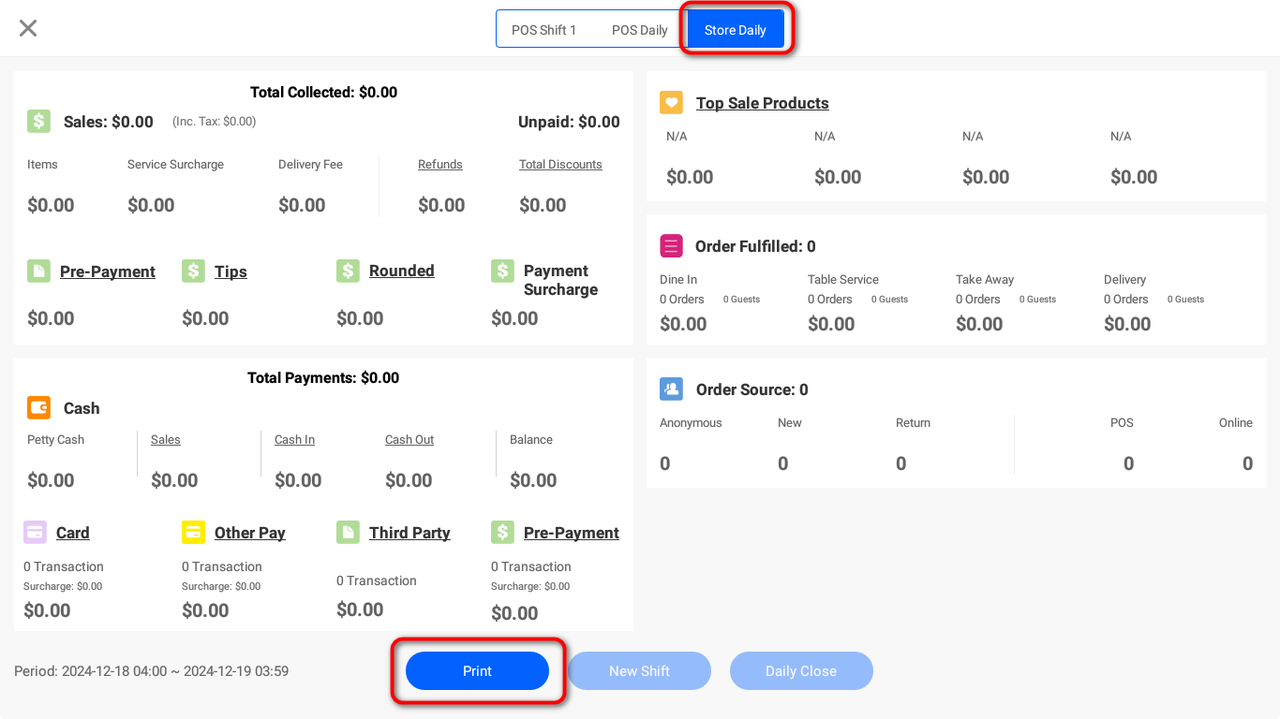
Reports include:
Store information
Store revenue
Breakdown of discounts / cash / order types