Hardware Installation Settings
Hardware Quick Setup Guide
Your POS system includes:
POS terminal
Receipt printer
Cash drawer
Pre-installation Checklist
Before installation, please ensure:
- ✅ A stable internet connection is available on site (wired connection recommended; Wi-Fi is also supported)
Hardware Setup
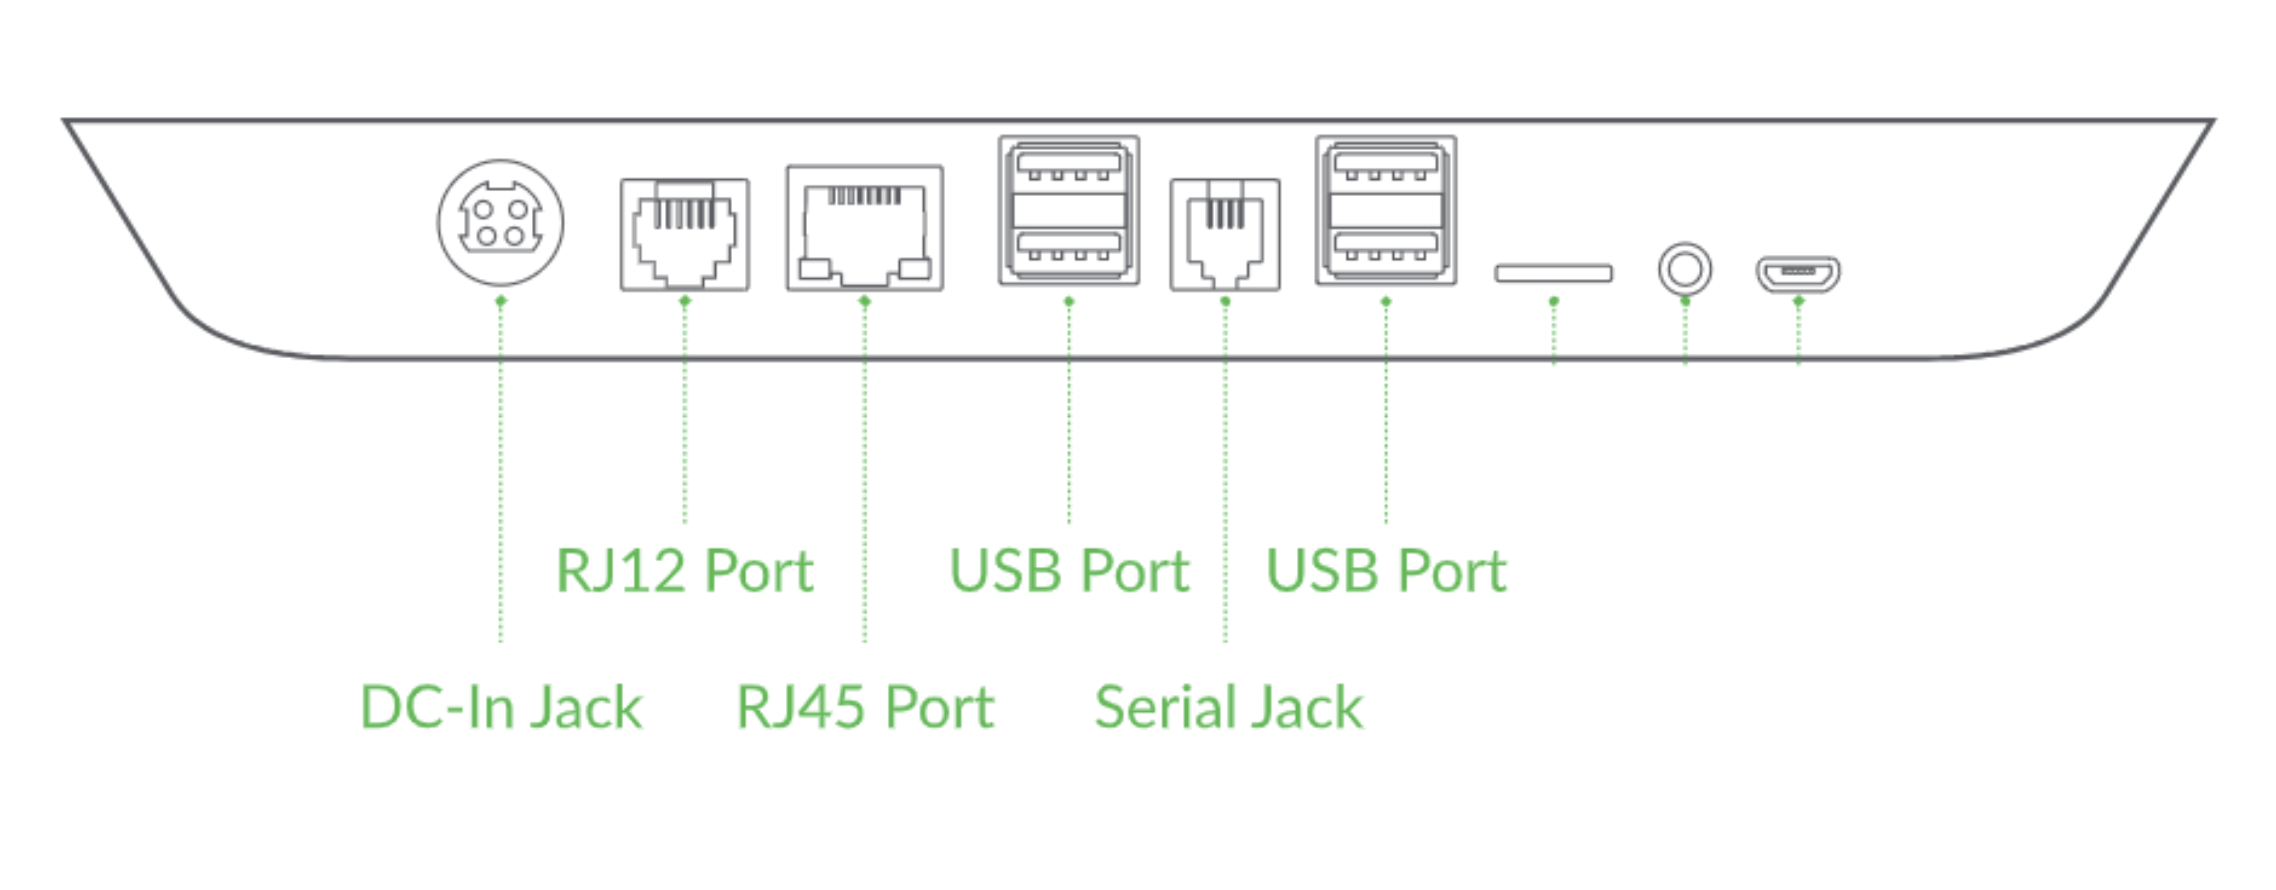
POS Terminal
Connect the network cable, cash drawer cable, and power adapter to the corresponding ports on the back of the POS terminal.
If the POS terminal has an Ethernet port, always use a wired connection for maximum stability.
Port locations may vary depending on the POS model. Please refer to your device manual.
For Tablet-based POS Devices
Connect to the network via Wi-Fi
If using a USB printer, please:
Plug the printer's USB cable into the USB port on the tablet dock
Ensure the dock is powered on and charging, otherwise the printer will not function
Connecting POS to Printer
USB Connection: Connect the printer to the POS terminal via USB
Network Connection: For setups with multiple POS terminals
Load Paper & Connect Printer Power
Plug in the printer’s power adapter – ensure the flat side faces upward
Load thermal paper roll as shown below
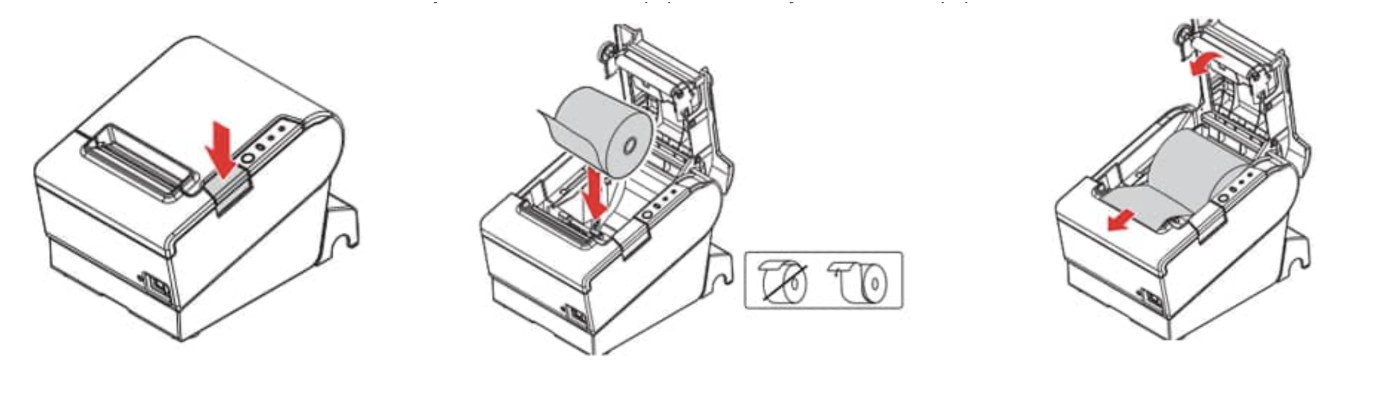
Note: The location of the cover release button may vary depending on your printer model – refer to your printer manual.
⚠️ Important for S300H or A300L Thermal Printers
If using these models, you must install the paper roll spindle:
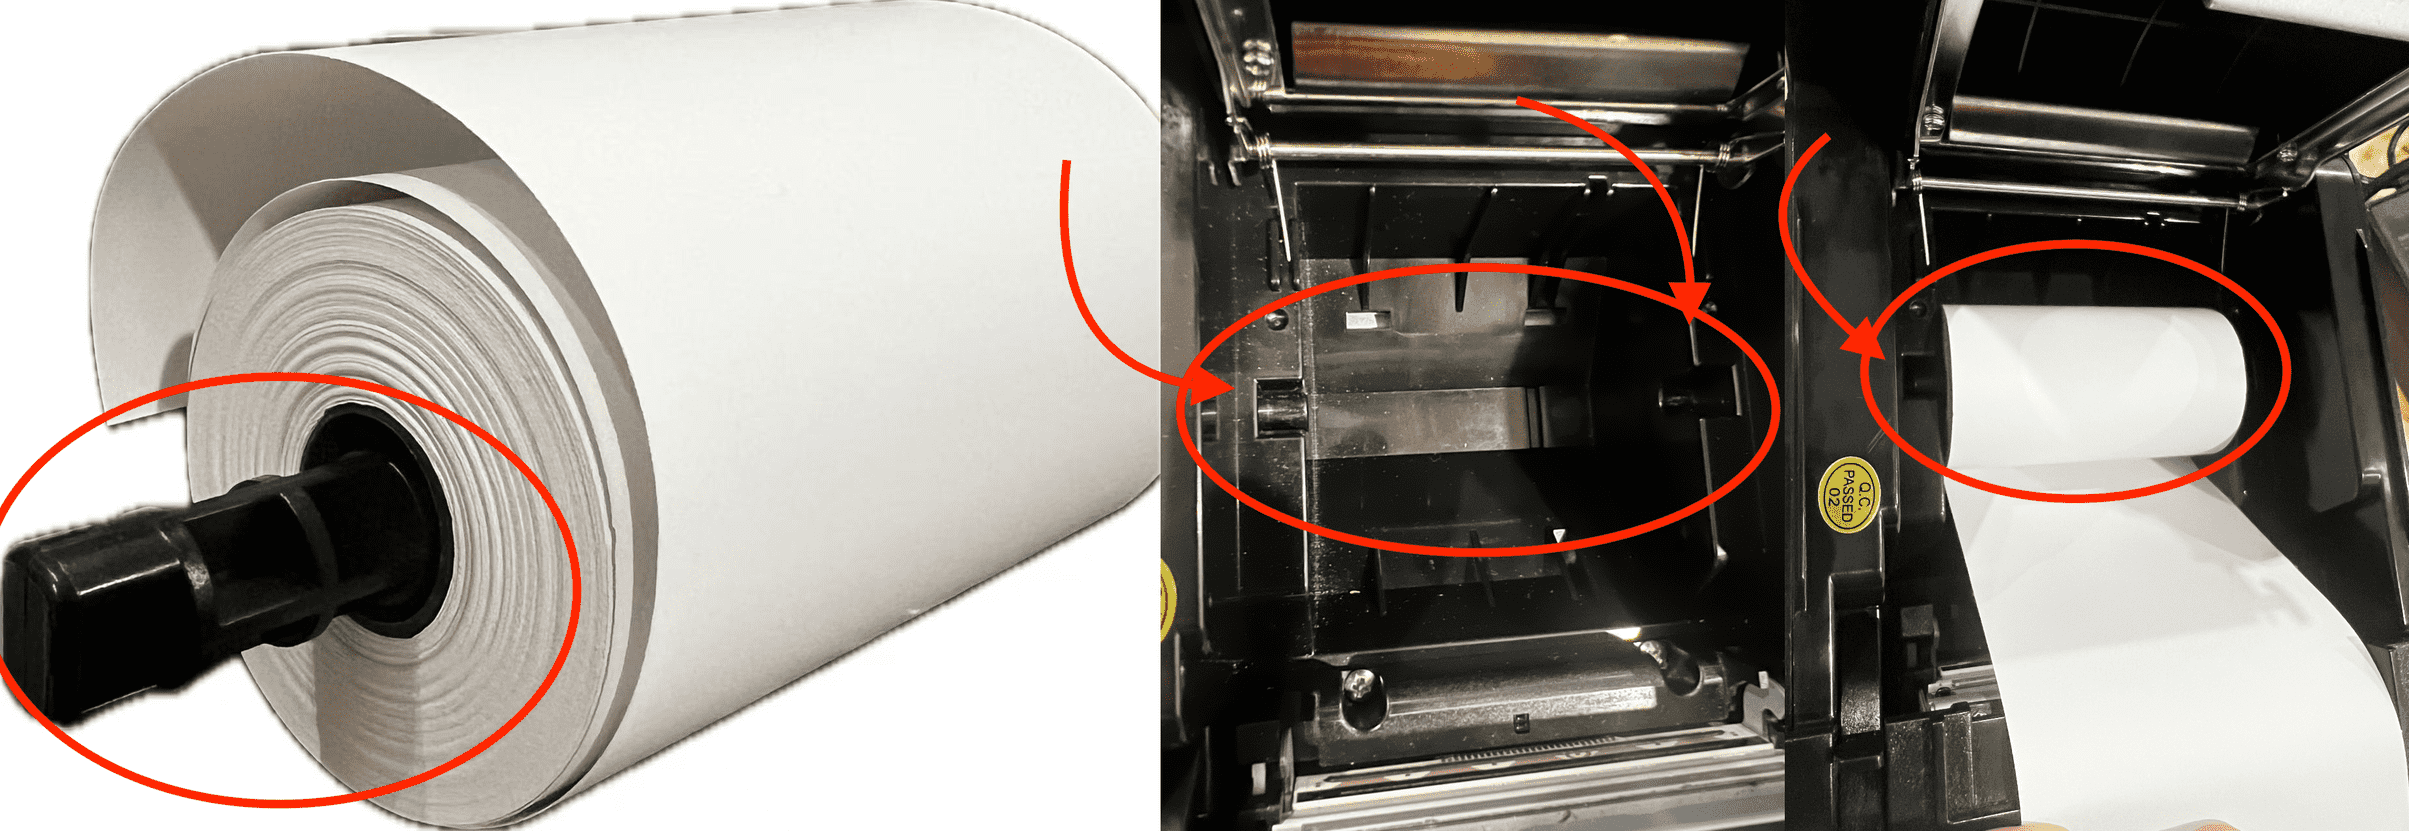
Always install the spindle when changing paper rolls to prevent misalignment
Proper installation extends the printer’s life significantly
Initial System Setup
Power on the printer and POS terminal
Follow on-screen prompts to complete initial configuration (Language, Region, Time zone, Network settings):
Note:
📌 If using a wired connection, Please disable Wi-Fi for stability.
📎 For multi-device setups → [Jump to Guide]
Initial Software Setup
Open the App Store and check if the Taptouch app is installed/updated
During installation, grant all necessary permissions when prompted
Once installed, launch the Taptouch app
Log in with your Taptouch back office account
(Make sure your store and device are configured in the back office → [Jump to Guide])Enter the initial PIN code:
1234(can be changed in the back office)
On first login each day, a petty cash window will appear. Tap Register Open to start.
Connecting & Configuring the Printer
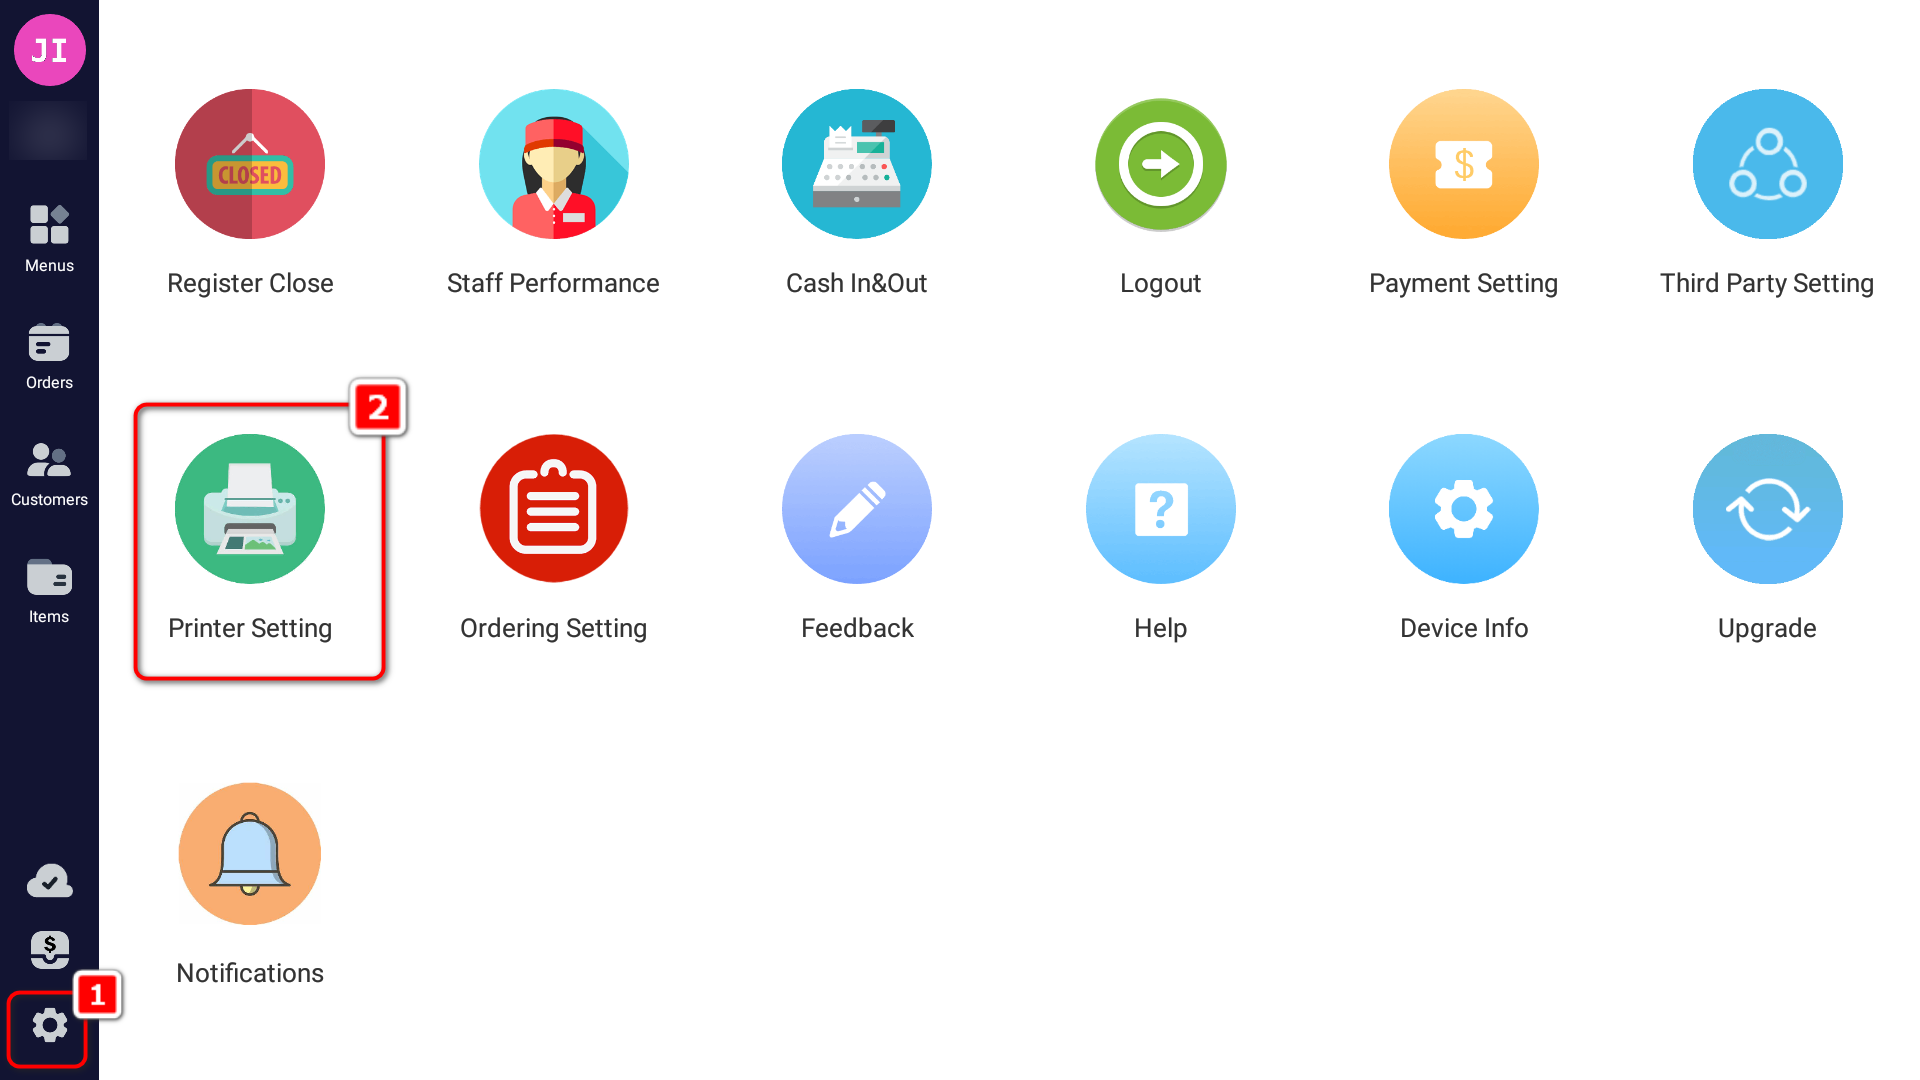
Tap the gear icon in the bottom-left of the sidebar to enter the Settings page
Tap Printer Setting

Tap the + icon to add a new printer and configure the following
a. Printer Name: It is recommended to name the printer based on its location.
For example, a front counter printer can be named Counter Printerb. Printer Model: Select the corresponding printer model from the list.
If your model is not listed, try selecting Other Model to connect.
If the printer does not work properly, we recommend purchasing a supported model from the Taptouch POS Online Shop .
c. Connection Type:
- For USB connections, select USB. The system will automatically detect the device.
d. Print Content:
- Select the type(s) of content this printer should handle.
📌 If Kitchen Order is selected and Printing Groups have been configured in the back office, you can further assign this printer to only print specific items.
e. Print Test Page: Tap to print a test page and ensure the content is clear and not garbled.
f. Once the test is successful, click Confirm to save the settings.
g. If you have additional printers, repeat the steps above to add them.
Note: The free version only supports up to two printers.