How to temporarily stop taking new orders on holidays?
How to temporarily stop taking new orders on holidays?
The store temporarily stop taking new orders from Taptouch online store and delivery platforms during holidays.
Stop taking new In-Store orders
In-store order taking typically occurs in two scenarios: customers placing orders on the POS or scanning the QR code on the table.
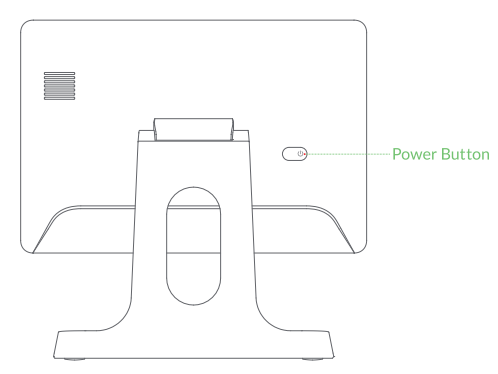
During holidays, it is recommended to power off the POS to stop taking new in-store orders. Long-press the power button at the back of the POS (as shown in the image) for 2-3 seconds, then click Power off to shut it down.
Stop taking new orders from Taptouch online store
Adding holiday dates in the backend ensures that Taptouch online store will no longer accept customer orders during holidays.
Log in to the Taptouch backend using the Chrome browser on your computer.
Navigate to Setting > Store Setting > Time Setting from the left sidebar.
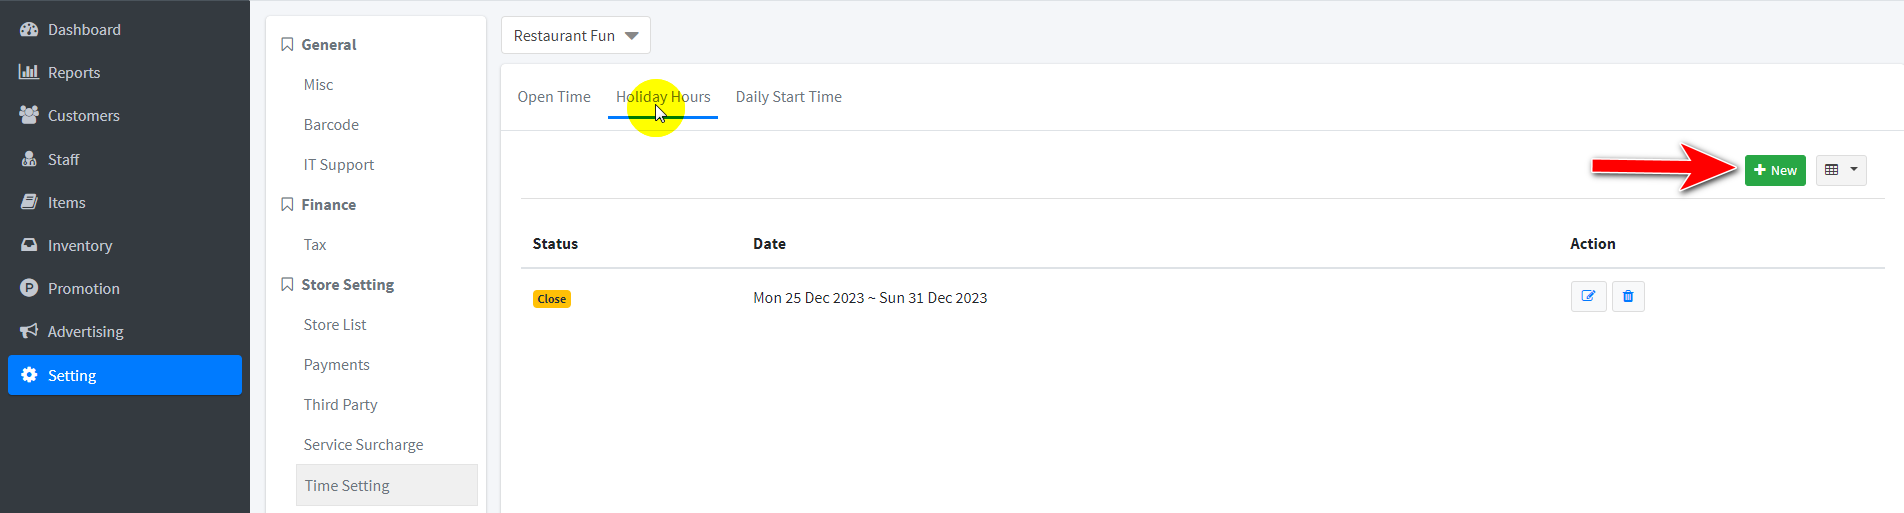
Click on Holiday Hours.
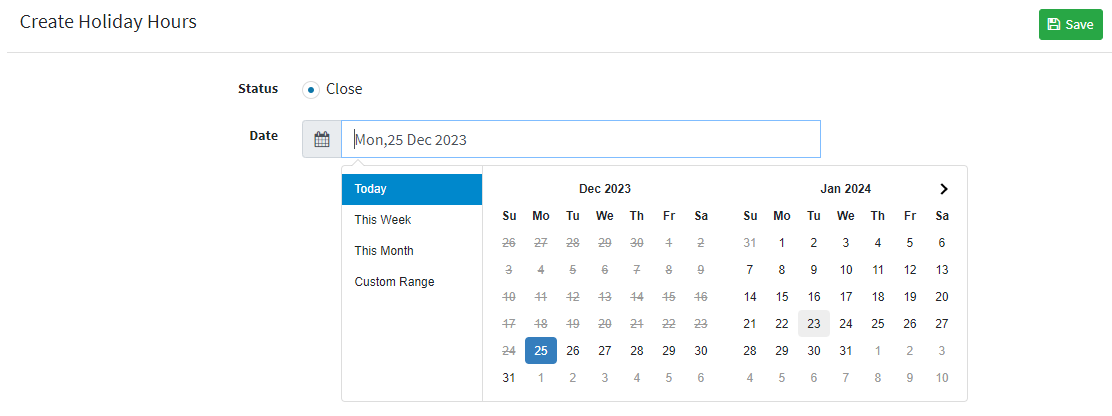
Click New to add a holiday, choosing today, this week, this month, or a custom date range. After configuration, click Save.
Stop taking new orders from Third-Party Delivery Platform
Pausing Orders from Third-Party Delivery Platforms (e.g., UberEats, HungryPanda, Doordash, etc.), It is advisable to log in to the backend website of the third-party delivery platform to set holidays and temporarily pause order taking for your store.
As an example, let's consider pausing order acceptance from the UberEats delivery platform:
Open the UberEats backend on Chrome on your computer and log in with the correct credentials.
In the left navigation bar, find the Switch location section and choose the store for which you want to pause order taking.
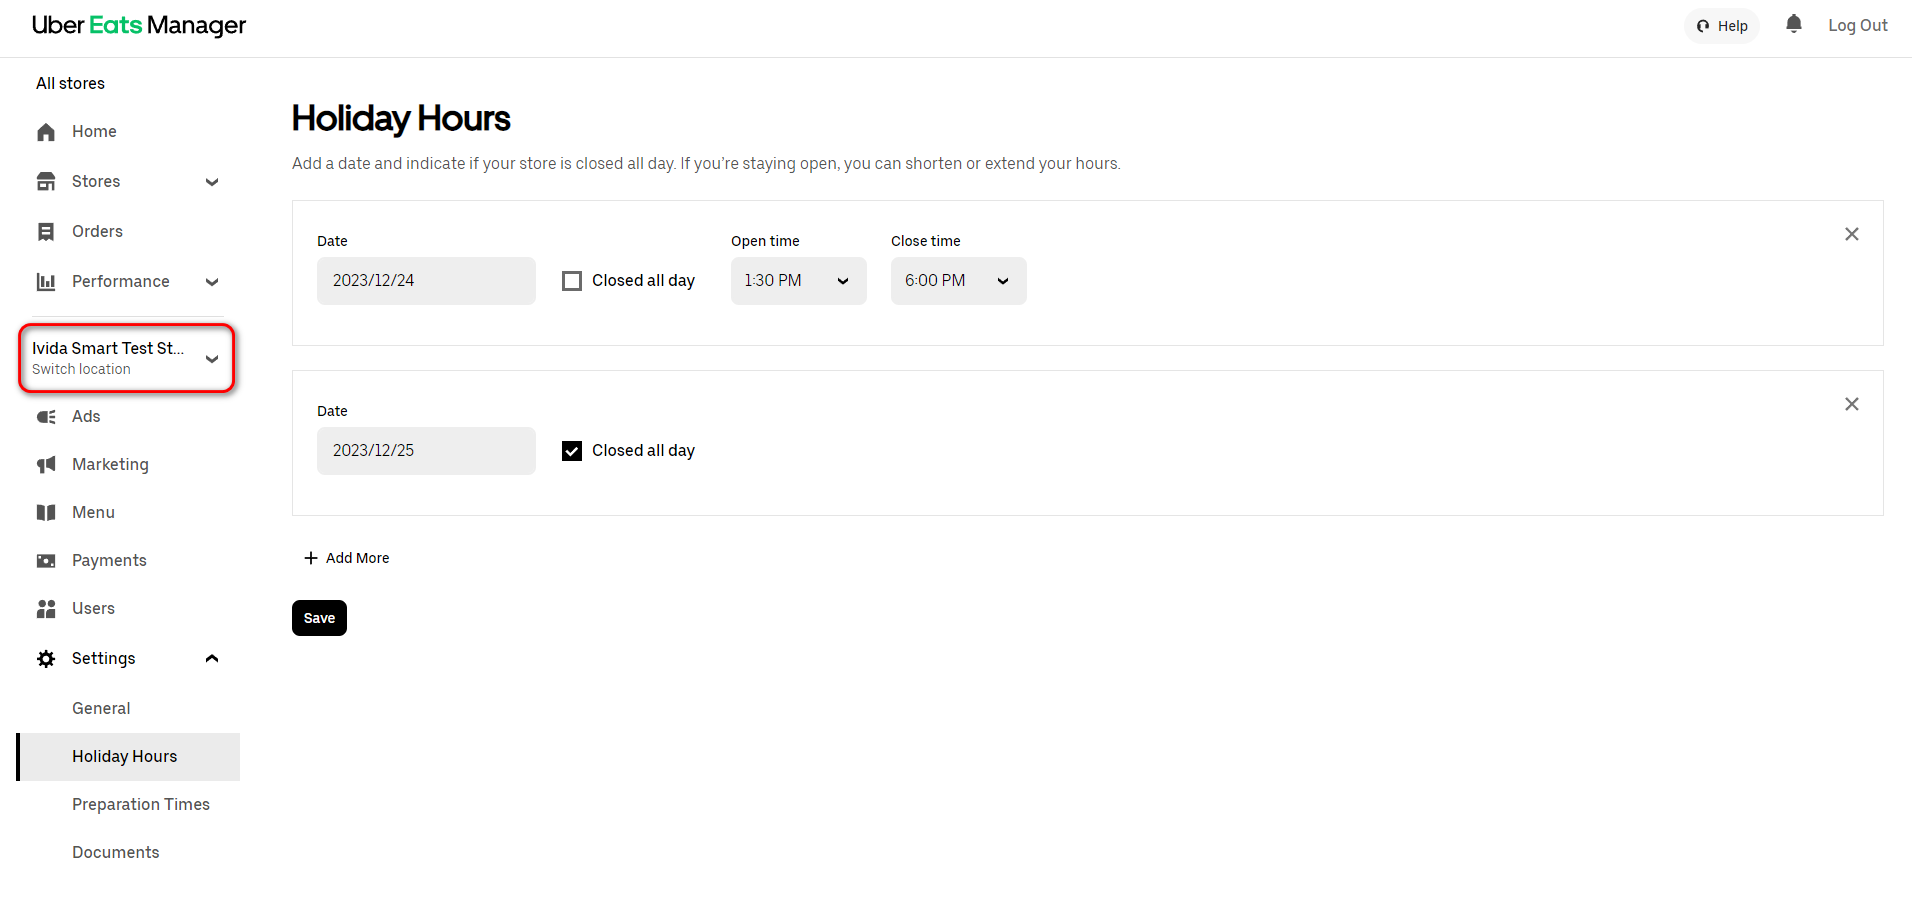
Go to Settings > Holiday Hours, click + Add More to add a holiday, during which the store won't receive orders from UberEats. You can also set the store's opening and closing hours, during which orders won't be accepted.
After configuring, click Save.