How to assign a fixed IP address to the printer?
How to assign a fixed IP address to the printer?
Assigning a fixed IP address to the printer can help avoid IP address conflicts, ensure the stability and accessibility of the printer in the network, and avoid the complexity of frequently changing network configurations.
This article will guide you on how to assign a fixed IP address to the printer, with the following main steps:
Download iPrinter Finder.
Find and assign a fixed IP address to the printer device on the local network.
Configure the POS machine to connect to the printer.
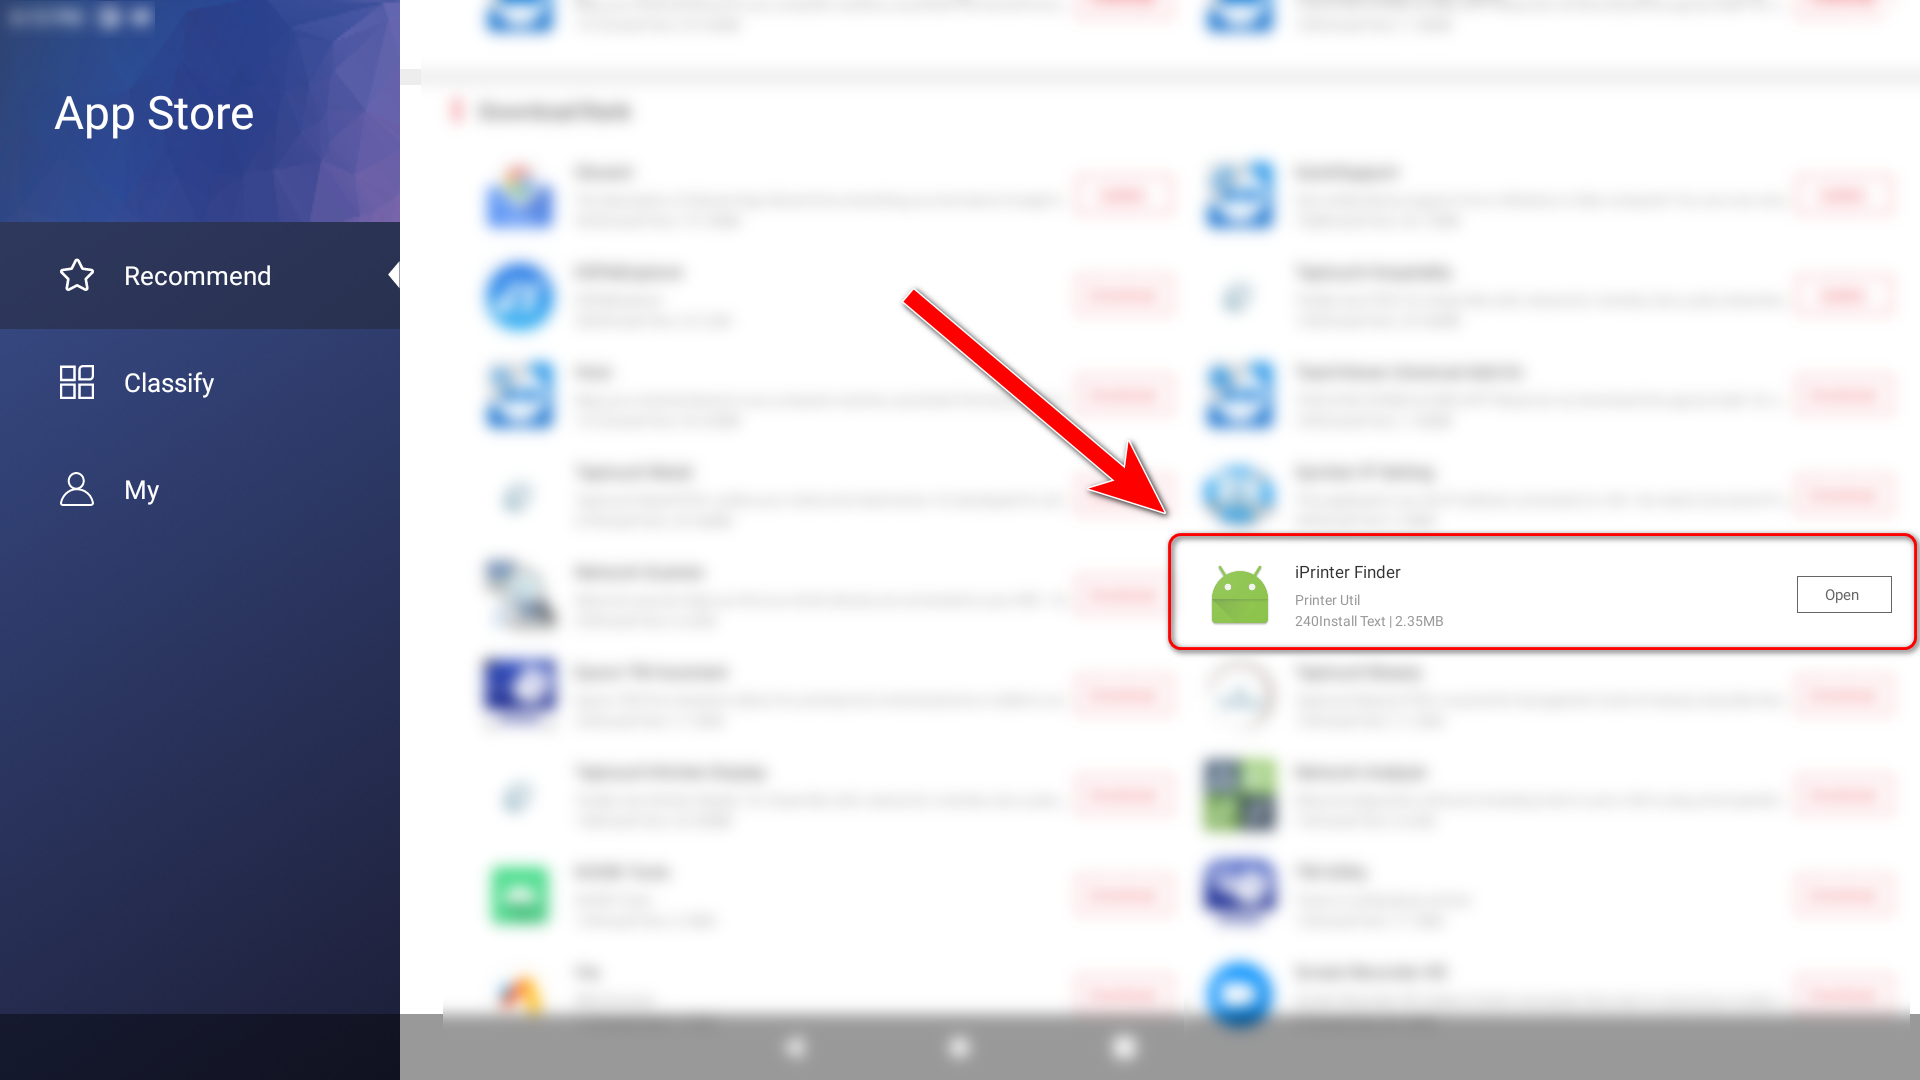
Download iPrinter Finder
Click to download: iPrinter Finder
You can also go to the App Store on the POS machine desktop, find iPrinter Finder, and click Download to install the software.
Assign a Fixed IP Address
Find and assign a fixed IP address to the printer. Follow these steps:
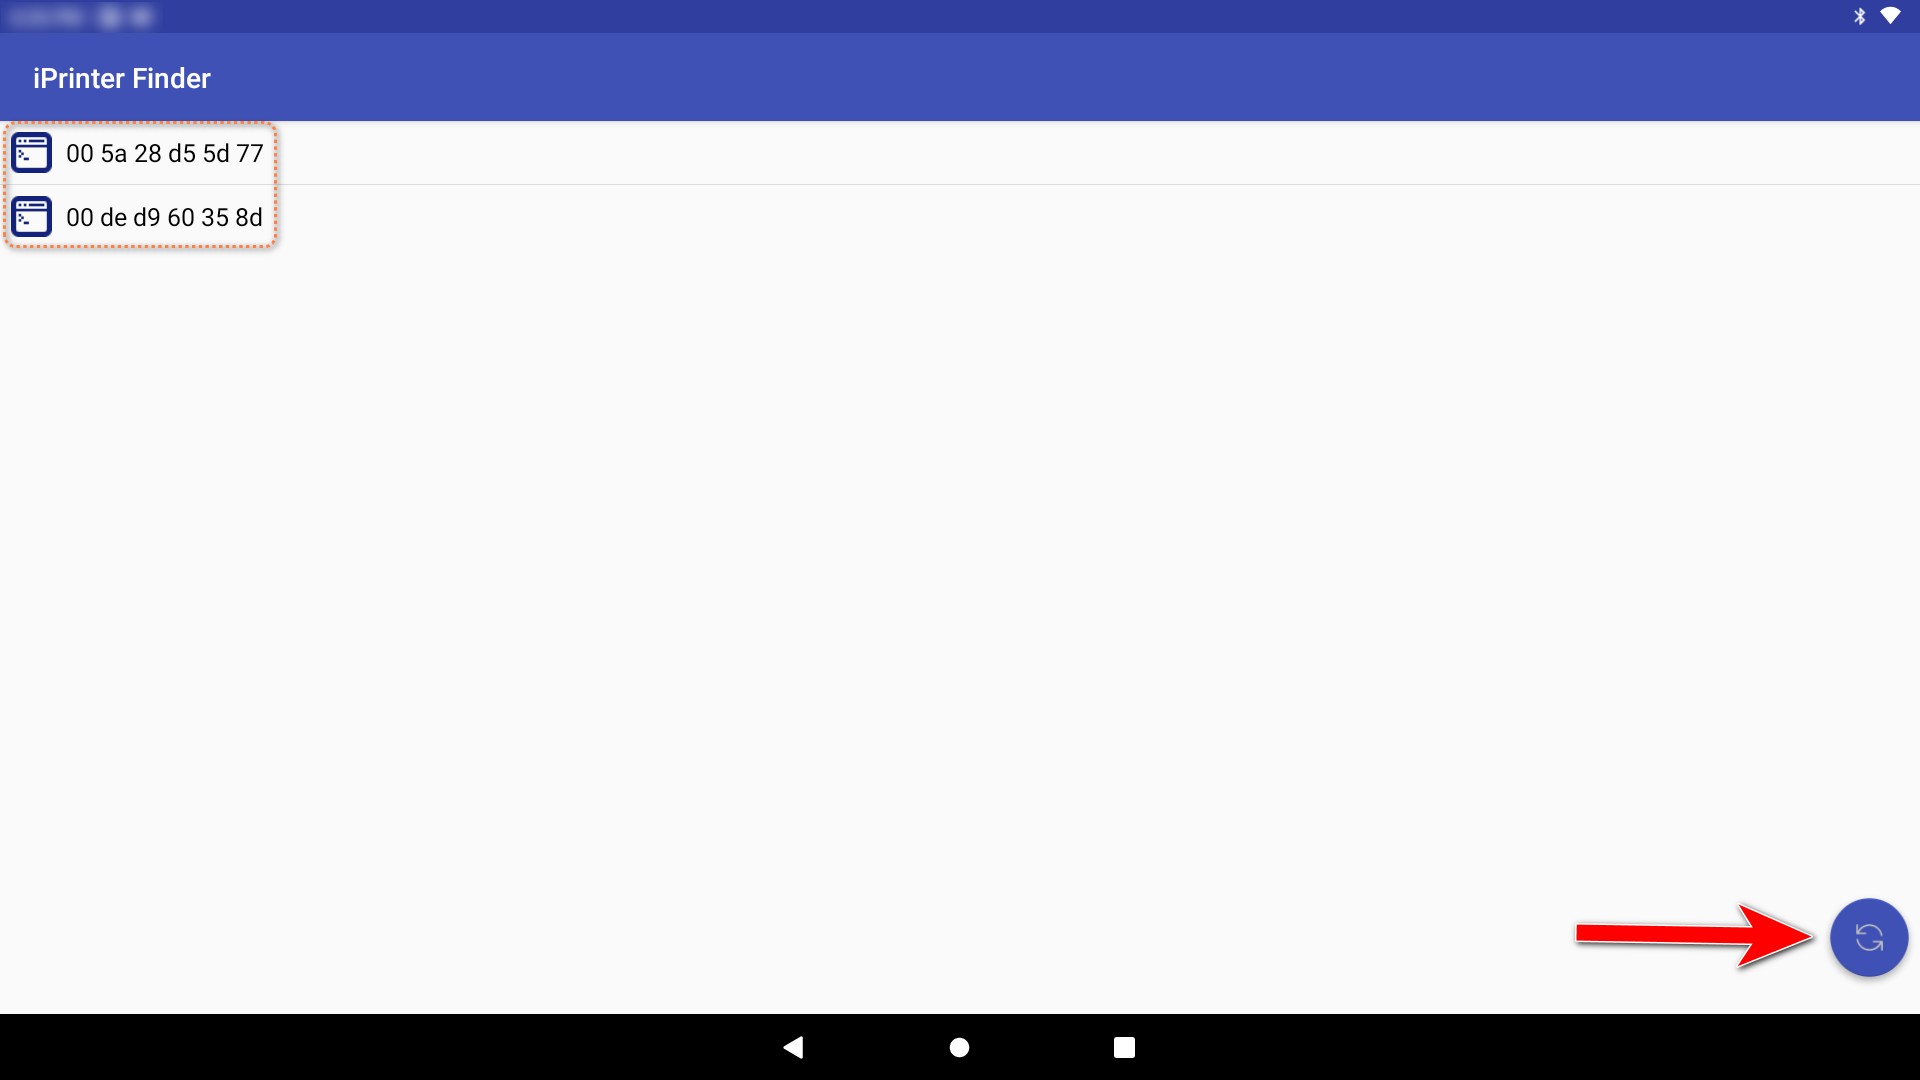
Open iPrinter Finder and click SEARCH PRINTER IN LAN.

Click the refresh button at the bottom right to list all available printer devices.
Click on the printer in the list, uncheck DHCP switch, and then click SET to assign a fixed IP address to the printer.
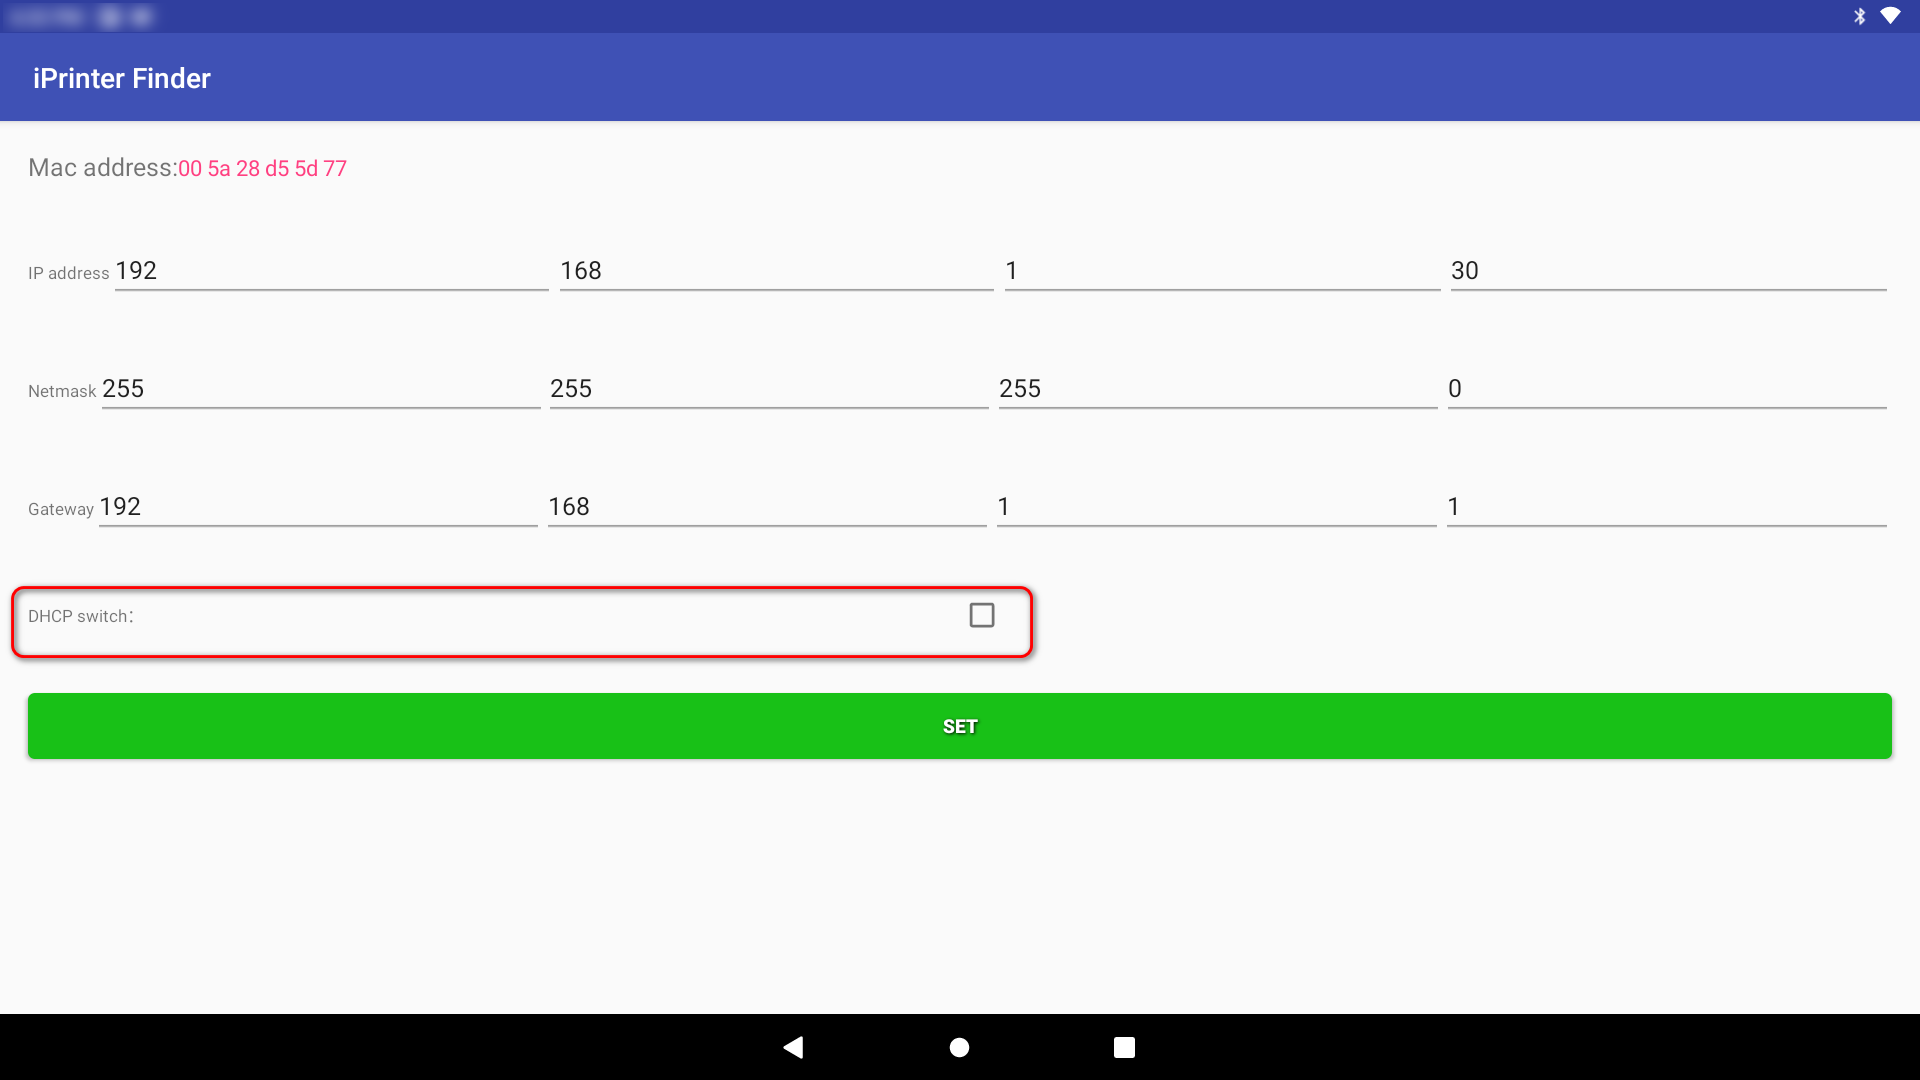
The printer will ring to indicate that the assignment of a fixed IP address was successful.
If the printer is not displayed in the list, return to the main page and manually set the IP address:
Select Ethernet from the options above and enter the IP address.
Click CONNECT to connect to the printer, then click SET IP ADDRESS MANUALLY to manually set the IP address.
Connect POS to Printer
After assigning a fixed IP address to the printer, connect the printer on the POS machine. Follow these steps:
Click the gear icon at the bottom of the left navigation bar to enter the settings page, then click Printer Setting.
Click + Add Printer, and fill in the required information, including:
Name the printer.
Select the specific printer model.
Choose Network as the connection method and enter the assigned fixed IP address.
Check the content the printer will print.
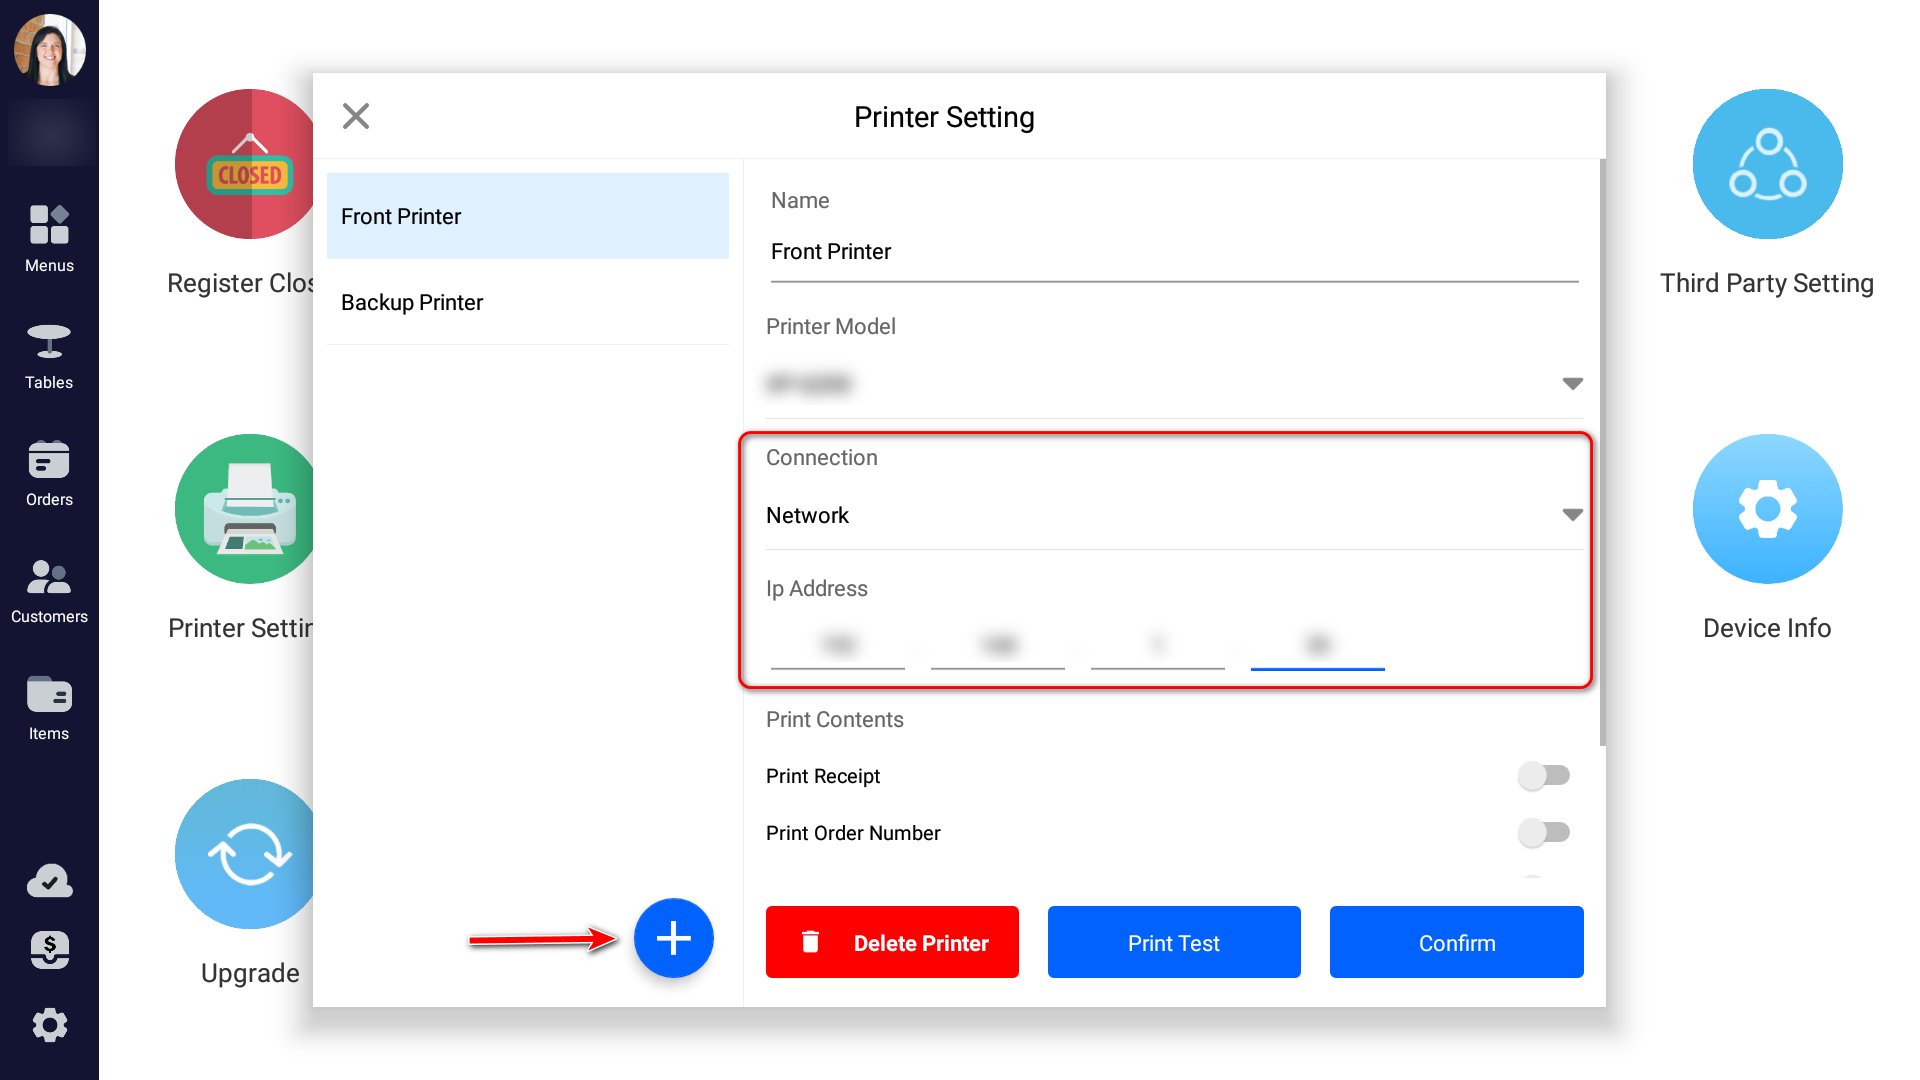
Click Print Test to ensure that printing works correctly, then click Confirm to complete the configuration and connection.